

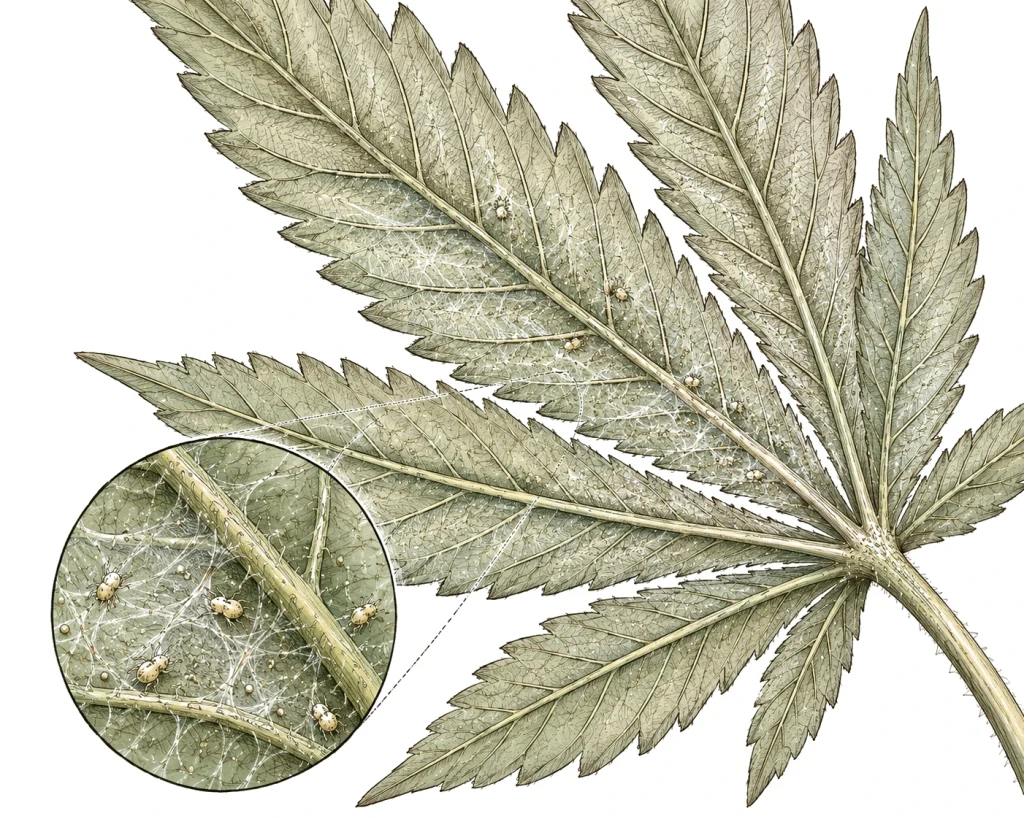
Getting rid of spider mites is one of the most common — and most urgent — jobs in any cannabis grow. These tiny pests are barely visible to the naked eye, yet they can do massive damage before you even notice something is wrong. Typical signs are fine, pale speckles on the leaves, delicate webbing on the undersides of leaves and an overall loss of vigor in your plants. If you spot the symptoms early and act consistently, you can usually still save your harvest — so fighting spider mites is almost always worth it. In this article, we at PlantClue show you everything you need to know about spider mites on cannabis — from a reliable diagnosis to effective treatment.
Spider mites don’t just attack cannabis — they go after hemp plants in general. Spider mites on weed are no different: whatever you call your plant, diagnosis and treatment work exactly the same way.
Spider mites on cannabis: the first symptoms you’ll notice
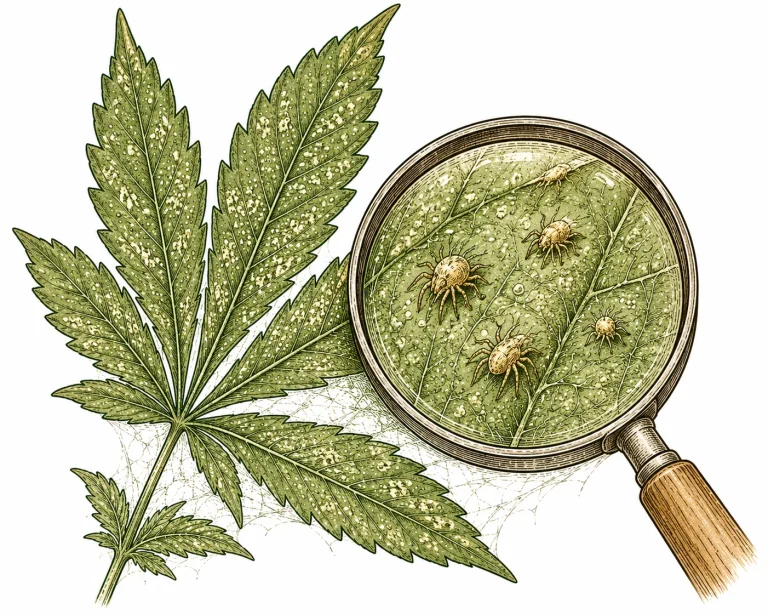
Spider mites (Tetranychidae) aren’t insects but arachnids, which makes them closer relatives of spiders and ticks than of classic plant pests like aphids. The best-known species in cannabis grows is the two-spotted spider mite (Tetranychus urticae), also known as the red spider mite, even though it can look yellowish, greenish or orange depending on the season. Adults are only about 0.01–0.02 in (0.3–0.5 mm) long — to identify them reliably, you need a magnifier with at least 30x magnification.
The first and most reliable warning sign is tiny, pale yellow or silvery-white dots on the upper side of the leaves. This stippling happens because spider mites suck out the contents of the leaf cells, leaving small punctures that cause the leaf tissue to die. Hold the leaf up to the light and it looks finely dotted or silvery speckled. Once the colony spreads across several leaves, they fade more and more, turn yellow and eventually drop off.
Not every white or pale dot on a leaf comes from spider mites — our overview of white spots on cannabis leaves helps you reliably tell stippling apart from powdery mildew, thrips and nutrient problems.
The second telltale sign is fine webbing on the undersides of leaves, in the leaf axils and later on the buds. This webbing protects the mite colony from predators and sprays. The denser the webbing, the more advanced the infestation. Check the undersides of your leaves regularly — that’s where the mites prefer to hide. The Bavarian horticultural research institute LWG Bayern also recommends regular checks of leaf undersides as the most important way to prevent spider mites. If you find yellow leaves on your cannabis plant , always consider spider mites as a possible cause.
- Fine silvery-white or yellowish speckles on the upper side of the leaves
- Tiny webs on the undersides of leaves and in the leaf axils
- Leaves fade, turn yellow and die off
- In heavy infestations: webbing visible on the buds
- With a magnifier: small, oval mites in various colors
- The plant’s overall growth slows down noticeably
Why spider mites are so urgent — causes and risks

Spider mites love hot, dry conditions. Temperatures above 81 °F (27 °C) combined with relative humidity below 40 percent create ideal breeding conditions. Under optimal conditions, spider mites can produce a new generation in just one week — a single female lays up to 200 eggs in her short life. That means a small starting population can turn into a massive colony within two to three weeks.
In indoor grows, spider mites often get into your grow room through contaminated soil, new plants, clothing or tools. Outdoors they spread naturally and reach your cannabis plants via wind, birds or infested neighboring plants. Stress factors like improper watering, nutrient deficiencies or a pH that’s out of balance weaken your plants and make them more vulnerable to pests. That’s why it pays to read up on the right pH for cannabis to create the best possible baseline conditions.
Growers with dry grow rooms or outdoor plants in the summer heat are especially at risk. Poor air exchange in the grow room leads to heat buildup and dry hot spots that practically invite spider mites in. Plants spaced too closely also make early detection harder and give the mites more chances to spread unnoticed. Regular, careful inspections — at least twice a week — are the most effective protection against an uncontrolled outbreak.
- Temperatures above 81 °F (27 °C) trigger explosive population growth
- Humidity below 40% creates the perfect mite climate
- Brought in via soil, new plants, clothing or tools
- Stressed, weakened plants are especially vulnerable
- Poor air exchange and heat buildup in the grow room
- Outdoors: spread by wind, birds and neighboring plants
How to get rid of spider mites: proven methods at a glance

The good news: if you want to get rid of spider mites, you have effective tools at hand — as long as you act consistently and fast enough. The bad news: a single treatment is almost never enough, because mite eggs are more resistant to most products than adult mites. That’s why you always need several treatments three to five days apart to catch freshly hatched young mites too. Combine different methods for maximum effect.
Neem oil is one of the best-known and most effective organic weapons against spider mites. Its active ingredient, azadirachtin, disrupts the mites’ hormone system, inhibits egg laying and kills young mites. Mix 5 ml of neem oil with 1 ml of emulsifier (e.g. insecticidal soap) per quart (1 L) of water and spray the mixture thoroughly on the tops and undersides of all leaves. Always treat during the dark period or with dimmed lights, because neem oil can burn leaves under heat and direct light.
Insecticidal soap (potassium soap) works on contact by attacking the mites’ waxy protective coating and drying them out. It’s cheap, works fast and is gentle on plants. Canola oil mixed with water and an emulsifier has also proven effective. In organic growing, predatory mites such as Phytoseiulus persimilis or Neoseiulus californicus (German) are also used — natural enemies that actively hunt spider mites and adjust their numbers to the level of infestation. This method is especially well suited to indoor grows, where the predatory mites can establish themselves permanently.
- Neem oil spray: 5 ml neem oil + 1 ml insecticidal soap per quart (1 L) of water
- Insecticidal soap as a direct contact spray against mites and their young
- Predatory mites (Phytoseiulus persimilis) as biological control
- Canola oil and water emulsion as an alternative organic approach
- At least 3 treatments, 3–5 days apart
- Always treat the undersides of leaves too — that’s where most mites sit
- During flowering: no foliar spraying on buds, only on leaves
Heavy spider mite infestation: what to do right now

If you have to fight spider mites and the infestation is already advanced — meaning webbing is visible and several leaves look badly damaged — you need a clear plan of action. First, remove all heavily infested leaves and throw them out with the household trash right away, not in the compost. This reduces the mite population and keeps them from spreading further from damaged leaves. If possible, isolate infested plants from healthy ones.
Immediately lower the temperature in your grow room to below 77 °F (25 °C) and raise humidity to 50 to 60 percent — these steps alone slow down reproduction dramatically. Make sure you have good air exchange without fans blowing directly on the plants. Check your watering habits too: Watering cannabis the right way strengthens your plants and makes them more resilient to the extra stress of the infestation.
To get the mites under control, start an intensive treatment program right away: spray all plants thoroughly with the neem oil and insecticidal soap mix, repeat after three days with insecticidal soap alone and after another three days with neem oil again. This alternating approach keeps the mites from building up resistance to a single product. Check your plants daily with a magnifier and keep a log of how the treatment is going. If you see no improvement after three rounds, consider releasing predatory mites as biological backup.
- Remove infested leaves immediately and throw them in the household trash
- Isolate infested plants from healthy ones
- Lower the temperature below 77 °F (25 °C), raise humidity to 50–60%
- Alternating spray program: neem oil and insecticidal soap in turns
- Check leaf undersides daily with a magnifier
- During flowering: treat especially carefully and precisely
Preventing spider mites — the best protection
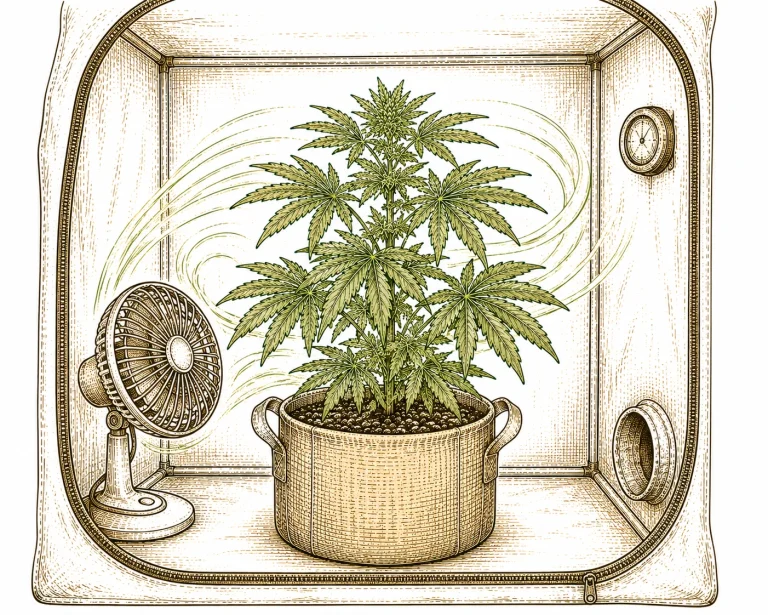
The best way to deal with spider mites is to never let it get that far — if you keep them out of your grow in the first place, you save yourself a lot of work and frustration. The most important preventive steps start with hygiene: only enter your grow room in clean clothes whenever possible, disinfect your tools regularly and don’t use garden soil, which may contain eggs or live mites. New plants or clones should always be quarantined and inspected thoroughly before they go into your main grow.
Climate control is the key to preventing spider mites. Keep the temperature in your grow room below 79 °F (26 °C) and humidity between 50 and 65 percent. A good fan keeps the air moving and prevents heat buildup. Bring in fresh air regularly and make sure your exhaust fan is sized properly. Don’t crowd your plants, so air can circulate freely.
To keep spider mites away for good, preventive sprays with heavily diluted neem oil (2 ml per quart, or 1 L, of water) every two to three weeks during the vegetative stage can prevent an infestation or at least delay it considerably. Healthy, well-fed plants are more resilient — make sure your plants get the right nutrients and the right pH. For a complete overview of every possible problem with your plants, check out the Plant Diagnosis overview on PlantClue.
For outdoor growers, there’s more: check neighboring plants in your garden for spider mites and treat them too if needed. Choose strains suited to your location that stay robust under stress. By the way, a calcium deficiency in cannabis can weaken cell walls and make plants even more vulnerable to spider mite damage — so always keep an eye on your plants’ overall nutrition.
- Grow room hygiene: clean clothes, disinfected tools
- Always quarantine new plants
- Climate: below 79 °F (26 °C), 50–65% humidity
- Good air circulation with fans and enough space between plants
- Preventive neem oil sprays every 2–3 weeks during veg
- Keep an eye on optimal nutrition and pH
- Outdoors: watch neighboring plants and remove sources of infestation
Spider mites during flowering — special challenges
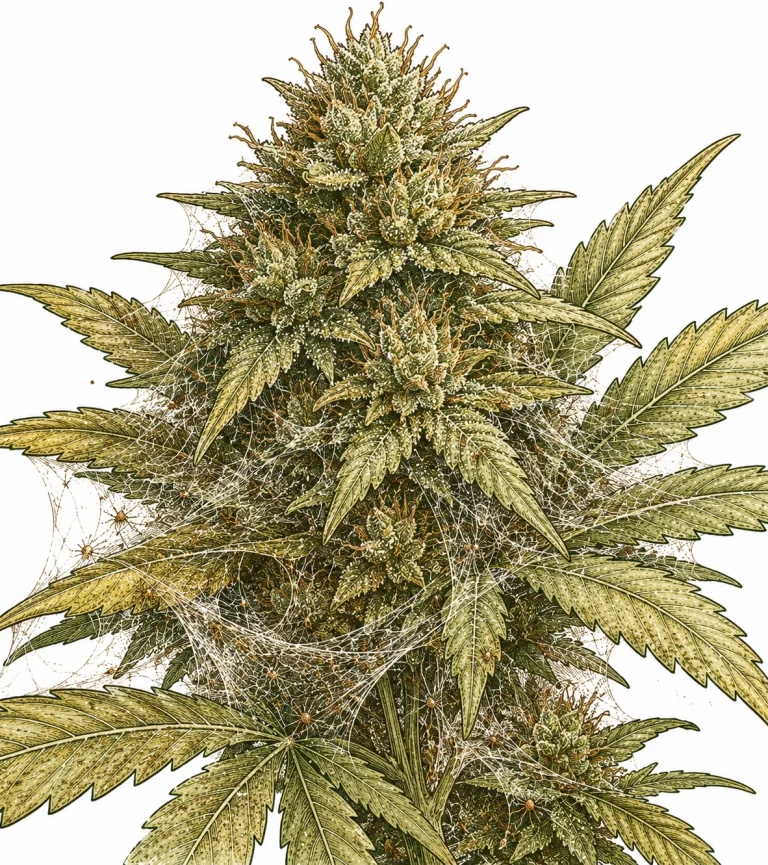
Fighting spider mites during flowering is especially tricky, because sprays on the buds leave residues and can hurt the aroma and quality of the final product. During this stage, limit sprays to the leaves as much as possible and leave the buds themselves alone. Neem oil in particular should not be used at all in late flowering, because the oil’s strong smell can get into the buds.
Predatory mites are the safest control method during flowering, because they leave no chemical or plant-based residues. Release Phytoseiulus persimilis or Neoseiulus californicus early enough — ideally at the first signs of an infestation. The predatory mites need a few days to multiply and bring down the pest pressure. Make sure the room temperature suits the predators: Phytoseiulus persimilis works best between 68 and 86 °F (20 and 30 °C).
If the infestation during flowering is so heavy that webbing is visible on the buds, you have to expect a significantly smaller harvest. Generously remove heavily infested buds, and with a severe infestation, harvest a little earlier than planned to save at least part of your crop. Keep in mind: heavily infested buds with webbing are a health concern and should not be consumed. When exactly the best time to harvest is depends on several factors — read our article on finding the right harvest time by checking trichomes for detailed information.
- No foliar spraying directly on buds in late flowering
- Stop using neem oil in the last 4 weeks before harvest
- Predatory mites are the safest method during flowering
- Generously remove heavily infested buds with webbing
- With a heavy infestation: consider harvesting early to save your crop
- Buds with mite webbing are a health concern
How to deal with sap-sucking pests in general is explained in our article on pest control. Fine speckles on a leaf can also come from whiteflies, thrips or aphids . If the symptoms fit but you can barely see any mites with the naked eye, consider broad mites as well — they’re even smaller than regular spider mites.
Frequently asked questions
How can I reliably identify spider mites on my cannabis plant?
The most reliable signs are fine, pale speckles on the upper side of the leaves and delicate webbing on the undersides. With a 30x magnifier you can see the tiny, oval mites directly. Pay special attention to the undersides of the leaves, since that’s where spider mites prefer to hide.
Are spider mites on cannabis dangerous to humans?
Spider mites themselves aren’t directly dangerous to humans and can’t transmit parasitic diseases. However, heavily infested buds with webbing should not be consumed, because dead mites, shed skins and strands of webbing can end up in the final product. Generously remove infested buds and harvest earlier if necessary.
How long does it take to get rid of spider mites on cannabis?
With consistent treatment, getting rid of them completely usually takes two to four weeks. You need at least three to four rounds of treatment, three to five days apart, to catch freshly hatched young mites too. Afterwards, keep checking regularly for another two weeks to make sure they don’t come back.
Can I get rid of spider mites with household vinegar?
Diluted vinegar can kill spider mites on contact, but it’s also very harsh on plants and can drastically affect the pH of your growing medium and leaves. That’s why vinegar is not recommended as a treatment. Stick to proven remedies like neem oil and insecticidal soap instead, which are much safer for your plants.
Do predatory mites work against spider mites on cannabis?
Yes, predatory mites like Phytoseiulus persimilis and Neoseiulus californicus are one of the most effective and safest ways to control spider mites — especially during flowering, when chemical products are a problem. They leave no residues, adjust their population to the level of infestation and work around the clock. Release them as early as possible so they have time to multiply.
Why do spider mites keep coming back?
Spider mite eggs are very tough and survive many treatments. If you don’t consistently treat in several rounds and fully reach leaf undersides, corners and crevices, new generations will keep hatching. Also check whether conditions like high temperatures and low humidity are giving the mites an ideal environment, and correct those factors for good.
Conclusion
Spider mites are a serious but solvable problem in cannabis — as long as you spot the infestation early enough and act consistently. Regular checks of leaf undersides, the right climate and clean work habits in your grow room are the best prevention. If you have an active infestation, combine organic remedies like neem oil and insecticidal soap with predatory mites and stick with several rounds of treatment. Healthy, well-fed plants are the best insurance against pests of any kind — if you make spider mite checks part of your routine, you protect your harvest for the long run.
