


Spotting and fighting russet mites on cannabis is one of the toughest jobs in the grow room. These tiny pests are almost invisible to the naked eye, so many growers only notice them once the damage is already serious. The broad mite (Polyphagotarsonemus latus) is often confused with the hemp russet mite (Aculops cannabicola): both prefer to attack cannabis in warm, dry conditions, are invisible to the naked eye and can do serious damage. Because spotting and fighting them works much the same way, this article covers both. Unlike spider mites, broad mites leave no webbing, which makes the diagnosis even harder. If you catch the warning signs early and act right away, you can still save your harvest.
What Are Russet Mites on Cannabis and Why Are They So Dangerous?
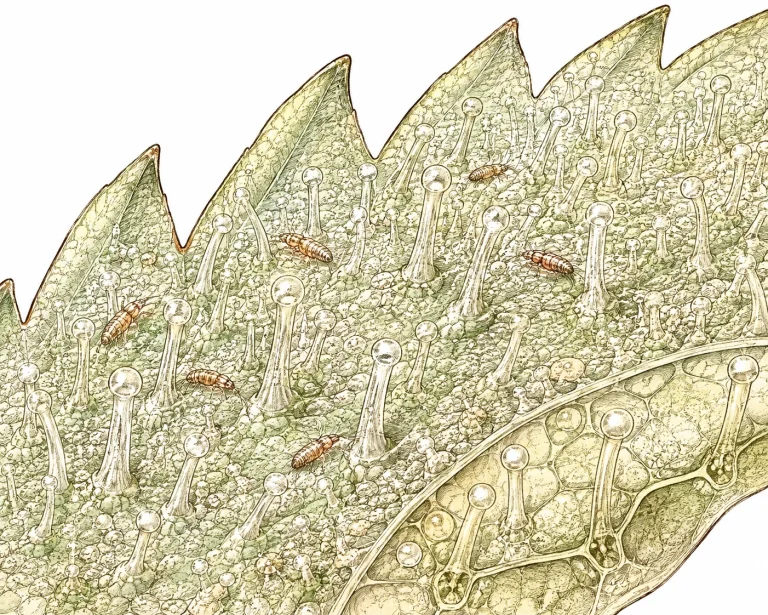
Broad mites belong to the tarsonemid mites (Tarsonemidae), while the hemp russet mite belongs to the gall and rust mites (Eriophyidae). Both are extremely small, only 0.004 to 0.008 in (0.1 to 0.2 mm) long. You practically can’t see them with the naked eye, and even a simple magnifying glass barely helps. For a reliable ID, you need a microscope or a digital USB microscope with at least 60x magnification. Broad mites are oval and glassy white to pale yellow, while hemp russet mites are creamy white, elongated and worm-shaped. Both move slowly across the leaf surface.
What makes russet mites on cannabis so dangerous is how fast they multiply and how long they can spread unnoticed, often for weeks. A single female lays several eggs a day, and in ideal conditions (warm and dry) they can hatch within just a few days. Left untreated, an infestation can weaken an entire plant within a few weeks and wipe out your harvest. The tricky part: early damage often looks like other problems, such as nutrient deficiencies or heat stress.
Unlike spider mites, russet mites prefer the upper, younger parts of the plant. They focus on new growth tips, leaf nodes and buds. Since exactly these areas drive growth and yield, even a moderate infestation can seriously hold your plant back. When growing cannabis indoors, check this zone regularly.
- Size: 0.004 to 0.008 in (0.1 to 0.2 mm), only reliably visible under a microscope
- Color: creamy white to slightly yellowish, worm-shaped body
- Favorite zone: upper growth tips, young leaves and buds
- Reproduction: very fast, just a few days from egg to adult
- No webbing like spider mites
How to Spot Russet Mites on Cannabis: Key Symptoms at a Glance

The first and most common symptom of russet mites is a bronze to rusty brown discoloration of the leaves, usually starting on the young upper shoots. It comes from the mites feeding and destroying plant cells spot by spot. Early on, the leaves look a bit washed out or dull before they turn more and more brownish bronze.
Another telltale sign is leaves curling or bending inward, especially at the edges and tips. The leaf blades feel brittle, rough and leathery. Broad mites typically cause twisted, glossy-looking, stunted young leaves, because their saliva disrupts the growth of the shoot tips. Affected growth tips often look scorched or heat-damaged, which makes it easy to mistake them for heat stress. If you’re not sure whether your plant is wilting or dealing with pests, check out our article on saving wilting cannabis plants.
In advanced stages, the damage spreads from the top down. Whole shoots turn bronze, buds can die off, and the plant may nearly stop growing. A heavy infestation during flowering can stunt bud sites and noticeably cut resin production. At this point, you can still save the plant, but it takes real effort and you need to move fast.
- Bronze to rusty brown discoloration of the upper leaves
- Leaf edges curling inward or upward
- Rough, leathery or brittle leaf surface
- Deformed, stunted growth tips
- Slowed or stalled growth
- Looks a lot like heat stress or a nutrient deficiency
- No webbing visible
- Under a microscope: tiny creamy white mites on leaf undersides and growth tips
Russet Mites on Cannabis: Causes and Risk Factors

The most common trigger for broad mites is a grow space that runs too warm and too dry. Broad mites thrive at 77–95 °F (25–35 °C) and humidity below 40%. Once your grow room hits those numbers, you’re rolling out the welcome mat for these pests. That’s why a well-dialed climate is your single most important prevention step.
Broad mites often hitch a ride in on infested starting material. Clones taken from an infested mother plant can carry mites long before you see any damage. Contaminated soil, tools or even your clothes can also spread them. If you get clones from outside sources, always quarantine them for at least one week and check them for pests under magnification.
Poor grow room hygiene is another risk factor. Dropped leaves, dirt and damp corners give mites shelter and places to hide. Plants already weakened by an off pH or a nutrient deficiency get hit first, because their natural defenses are down. Stress from nutrient burn or poor watering makes plants even more vulnerable.
- High grow room temperatures above 77 °F (25 °C)
- Low humidity below 40%
- Mites brought in on infested clones or mother plants
- Contaminated tools, soil or clothing
- Plants weakened by nutrient deficiencies or pH problems
- Poor hygiene in the grow room
- No quarantine for new plants
How to Get Rid of Broad Mites on Cannabis: Immediate Steps and Effective Treatment
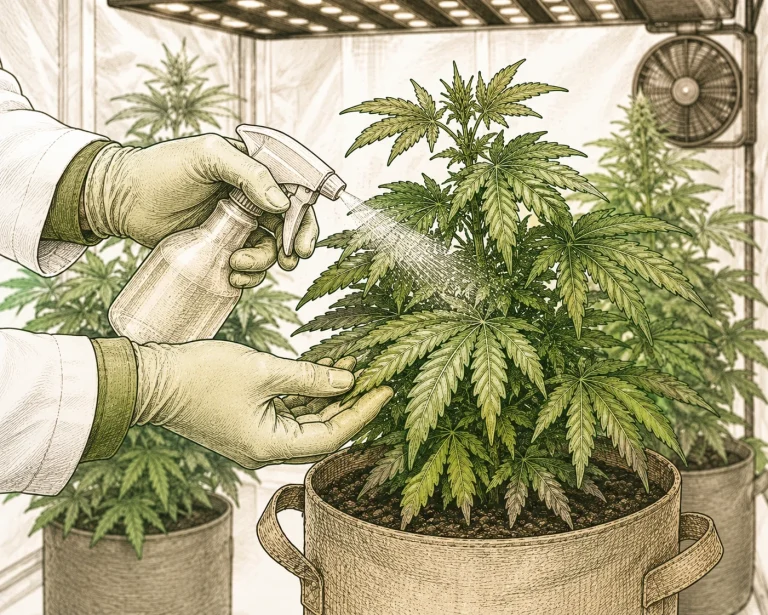
Once you’ve confirmed broad mites, every hour counts. Isolate the affected plant from the rest of your grow right away to stop the spread. Carefully remove all badly damaged leaves and shoot tips, seal them in a bag and toss them in the trash, never in the compost. Drop your grow room temperature below 75 °F (24 °C) and raise humidity to 50–60% to slow down mite reproduction.
For direct treatment, several products have a proven track record. Sulfur products like wettable sulfur work very well below 86 °F (30 °C) and are applied every 5 to 7 days. Spinosad-based products attack the mites’ nervous system and are safe for the plant when used correctly. Azadirachtin (neem oil extract) disrupts the mites’ hormones and stops them from multiplying. Important: always soak the tops and undersides of the leaves as well as the shoot tips completely.
Beneficial insects are another option, especially for prevention or early infestations. Predatory mites such as Neoseiulus californicus or Amblyseius cucumeris feed on broad mites and, with ongoing releases, can keep the population in check. Because beneficials need time to establish, they’re less suited to severe, acute infestations. Ideally, combine several methods and rotate active ingredients to avoid resistance.
A thorough cleaning of your entire grow room is a must, too. Wipe down all surfaces with a mild disinfectant, wash your tools and change clothes before moving between different grows. After treatment, check daily under magnification for new mites. With a stubborn infestation, a full restart with disinfected pots and fresh growing medium can sometimes be the more efficient fix.
- Isolate infested plants immediately
- Remove infested leaves and shoots and dispose of them sealed
- Lower temperature below 75 °F (24 °C), raise humidity to 50–60%
- Apply wettable sulfur every 5 to 7 days (below 86 °F / 30 °C)
- Spinosad-based products as an alternative active ingredient
- Azadirachtin (neem oil extract) to stop reproduction
- Predatory mites (Neoseiulus californicus) for biological control
- Disinfect the entire grow room and clean your tools
- Daily checks under a microscope once treatment starts
Spotting and Fighting Broad Mites on Cannabis: Prevention Is the Best Strategy
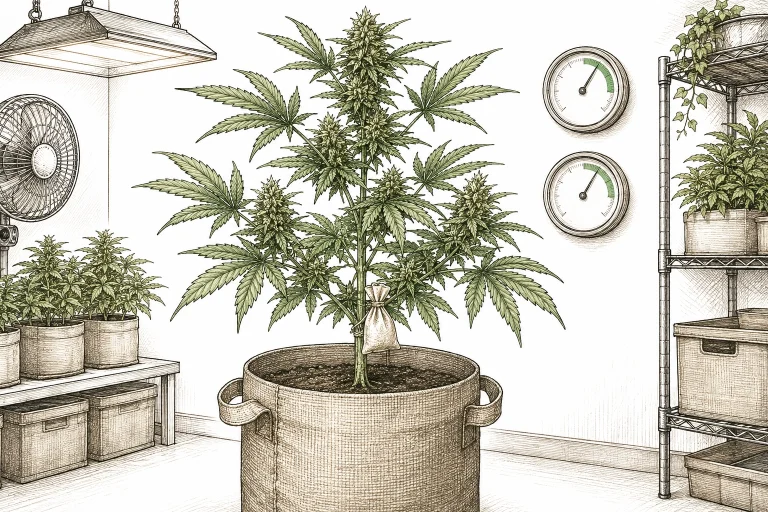
Your best defense against broad mites on cannabis is consistent prevention. Keep your grow space below 77 °F (25 °C) at all times and humidity between 50 and 60% during the vegetative stage. The flowering stage calls for slightly different values, but here too the temperature shouldn’t stay above 81 °F (27 °C) for long. Solid climate control is the most effective way to keep broad mites from ever getting a foothold.
Always quarantine new clones or young plants and inspect them daily under magnification for at least a week before you move them into your main grow. Only buy clones from sources you trust, and go with plants grown from seed whenever you can. Clean your grow space thoroughly after every run with a suitable disinfectant, and don’t leave any plant debris lying around that pests could use as a breeding ground.
Releasing predatory mites preventively from the vegetative stage on is especially smart if broad mites are a known problem in your area. Use Neoseiulus californicus or a similar species before you ever see the first mite. Checking your plants with a pocket microscope or a USB camera every 5 to 7 days lets you catch an infestation while it’s still easy to beat. Healthy, well-fed plants with balanced calcium levels generally hold up much better against pests.
Write down what you see and keep a grow journal. When did you last check for pests? Which products did you use, and how often? A structured approach helps you spot patterns and diagnose future infestations faster. For a full overview of everything that can go wrong with your cannabis plant, check out our Cannabis Plant Diagnosis Hub.
The Bavarian State Institute for Viticulture and Horticulture (LWG) also recommends predatory mites as an effective biological pest control strategy for greenhouse and indoor growing.
- Keep temperatures below 77 °F (25 °C) and humidity at 50 to 60%
- Quarantine all new clones and young plants
- Release predatory mites preventively from the vegetative stage on
- Check with a microscope every 5 to 7 days
- Clean and disinfect thoroughly after every run
- Only get clones from trusted sources
- Keep a grow journal for better records
- Strong, well-fed plants are more resilient
Telling Broad Mites Apart from Other Pests: How to Get the Diagnosis Right

The biggest diagnostic challenge with broad mites is how easily you can mistake them for other problems. Heat stress causes similar symptoms, like curled leaves and bronze discoloration, but it usually shows up evenly on the plants closest to the light. Broad mite damage, on the other hand, typically starts at the growing tips and spreads downward from there.
Spider mites leave tiny, pale stipple marks on the upper leaf surface and, in heavy infestations, spin fine webbing between leaves and stems. Broad mites never leave webbing. Thrips can also cause similar silvery patches and deformities, but their droppings (tiny black dots) and the feeding marks on the leaf undersides are easy to spot. If you also notice yellow leaves that you can’t clearly pin on a pest, our article on yellow cannabis leaves helps you narrow it down.
Nutrient deficiencies, especially iron deficiency or magnesium deficiency, can also cause leaf discoloration and deformities. The key difference: deficiencies clear up once you adjust your pH and feeding, and new growth comes in normal again. If adjusting your nutrients doesn’t help and new growing tips still look stunted and twisted, you should always consider mites.
- Broad mites: damage starts at the top growing tips, no webbing
- Spider mites: webbing visible, stipple marks spread evenly
- Heat stress: damage close to the light, no critters under the microscope
- Thrips: black droppings on leaves, silvery feeding marks
- Nutrient deficiency: responds to pH correction and feeding, no critters
- Most reliable diagnosis: microscope or USB camera at 60x magnification
Frequently Asked Questions
How can I spot cannabis broad mites without a microscope?
Without a microscope, a reliable diagnosis is close to impossible, because broad mites are only 0.004 to 0.008 in (0.1 to 0.2 mm) long. You can still watch for the telltale symptoms: bronze discoloration starting at the top growing tips, curled leaf edges and a rough leaf surface with no visible webbing. If these symptoms show up and don’t respond to fixing heat stress or nutrient deficiencies, mites are a likely culprit. For a solid diagnosis, get a digital USB microscope with at least 60x magnification — you can find one for less than $20.
Can cannabis broad mites destroy my whole harvest?
Yes. Left untreated, broad mites can seriously damage or even wipe out an entire harvest. They go after growing tips and buds first, which can slash both yield and quality. If you catch the infestation early and treat it consistently, though, you can usually still save your plants. Treatment is even possible during the flowering stage, but it gets trickier, since many products shouldn’t be used in late flowering.
How long does it take to treat broad mites?
A full treatment usually takes three to four weeks. Plan on at least three to four treatment rounds, spaced 5 to 7 days apart, so you hit every life stage of the mites. Eggs often hold up better than adult mites, so patience and consistency are key. Check your plants daily under magnification for new mites, and adjust your strategy as needed.
Are broad mites dangerous to humans?
No. The hemp russet mite (Aculops cannabicola) specializes in cannabis, while the broad mite attacks many plant species, such as peppers, tomatoes or ornamental plants. Neither poses a health risk to people or pets. They don’t bite and they don’t pass any diseases on to humans. When you use control products, though, follow the safety instructions on the label and wear protective gear like gloves and safety glasses.
What is the best treatment for broad mites on cannabis?
There’s no single “best” product, because resistance is a real problem. A proven approach is to rotate wettable sulfur (only below 86 °F (30 °C)), spinosad and azadirachtin (neem oil extract). For a biological option, predatory mites like Neoseiulus californicus work very well, especially for prevention. Switch active ingredients with every treatment round to keep the mites from building resistance.
Can poor watering make broad mites more likely?
Indirectly, yes. Plants stressed by poor watering have weaker defenses and get hit by pests more easily. The bigger direct triggers for a broad mite infestation, though, are high temperatures and low humidity. Keep your grow conditions dialed in to help your plants stay tough and resilient.
Why shouldn’t I use wettable sulfur against broad mites in late flower?
Wettable sulfur works reliably against broad mites. But if you spray it in late flower, it can leave a nasty sulfur smell on your buds that’s hard to get rid of before harvest and can noticeably hurt the aroma and taste of the final product. So stop sulfur treatments no later than three to four weeks before your planned harvest. In late flower, spinosad and azadirachtin (neem oil extract) are the better choice, since they don’t affect the smell or taste of your buds. Predatory mites are also an option until shortly before harvest, because they leave no residue behind.
The Bottom Line
Broad mites are among the sneakiest pests you can face in a grow room. They’re too small to see with the naked eye, and for a long time their symptoms can look like other problems. But if you check your plants regularly with a microscope, watch for warning signs like bronzed growing tips and curled leaves, and keep your climate dialed in, you can catch an infestation early and knock it out. Your best protection for your harvest is a combo of three things: isolate affected plants right away, treat them with targeted products and rotate the active ingredients, and release beneficial insects as prevention. And remember: healthy, well-cared-for plants in good conditions are your strongest defense against any pest.
