

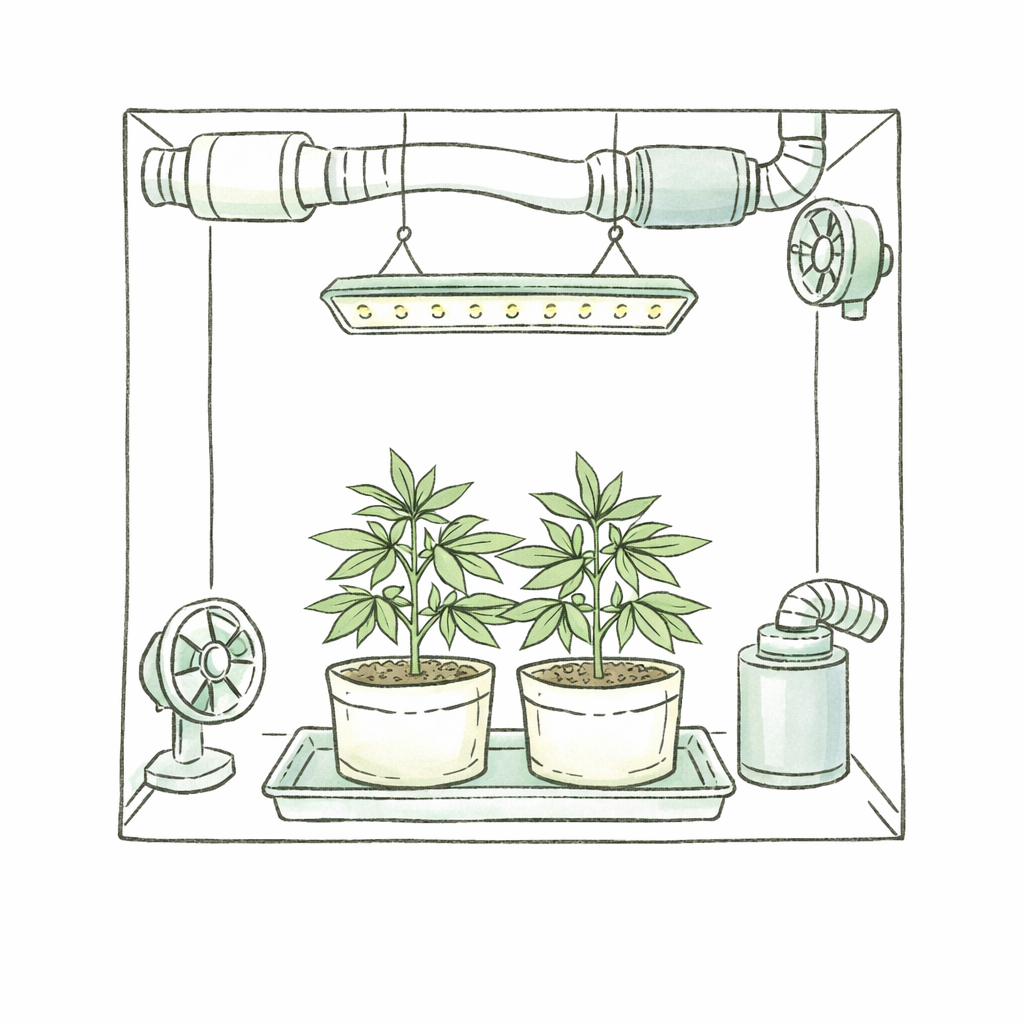
Growing cannabis indoors has one big advantage for beginners: you control light, temperature and humidity completely yourself. That lets you harvest several times a year, no matter the season. Before you start, check the cannabis laws where you live. With the right basics, it’s easier than many people think. In this guide, we’ll show you step by step how to grow cannabis indoors successfully. You’ll learn which equipment you really need and how to avoid typical beginner mistakes right from the start.
Cannabis is especially well suited to indoor growing, because you can fine-tune light, temperature and humidity to exactly what the plant needs.
Key Facts About Growing Cannabis Indoors
This guide walks you through the most important steps for a successful indoor grow. It helps you avoid typical beginner mistakes.
• Quality equipment is key: Invest in a sturdy grow tent (63–71 in / 160–180 cm tall), full-spectrum LED grow lights and a reliable ventilation system with a carbon filter for the best results.
• Control your environment precisely: Keep the temperature at 68–79 °F (20–26 °C), humidity between 40–70% (depending on the stage) and set your pH to 6.0–7.0.
• Follow the right light cycle: 18/6 hours for the vegetative stage, 12/12 hours for the flowering stage — total darkness during the dark period is critical.
• Avoid overwatering: Only water when the growing medium is dry and the pot feels light — overwatering is the most common beginner mistake.
• Match nutrients to each growth stage: Nitrogen-rich (10:5:7) in the vegetative stage, rich in phosphorus and potassium (6:10:15) during flowering.
With the right equipment, controlled conditions and a little patience, you can succeed with your very first indoor grow. And with every grow, your technique keeps getting better.
Legal Basics: Check Your Local Laws First
Cannabis laws differ widely from country to country and from state to state. Before you set up an indoor grow, find out which rules apply where you live — many of them go beyond a simple plant count:
- Plant limits — check how many plants (and in which stage) you’re allowed to grow per adult or per household, and whether home growing is only allowed for personal use.
- Childproof setup: Secure your grow tent or grow room so that children and teenagers can’t get to plants, seeds or your harvest — for example with a lockable room or a tent area you can lock.
- No selling or sharing with others, especially not with minors — in many places, home growing has to stay strictly private.
- Store your harvest childproof as well, out of reach of minors, no matter how much you grow.
Keep these points in mind when you plan your grow setup, for example when choosing a lockable tent or room. This is not legal advice — if you’re unsure, check the current laws where you live or ask a local advisory service.
The Right Equipment for Growing Cannabis Indoors
Choosing a Grow Tent or Grow Cabinet
Your grow tent is the foundation of a successful indoor grow. It creates a controlled environment with its own climate zone, where you can precisely control light, temperature and humidity. Well-known brands like Secret Jardin, Homebox, Mars Hydro or Garden High Pro use durable materials. Their tents have sturdy frames and highly reflective interior linings.
For a complete overview of all components, see our Equipment & Setup guide. We’ve also put together a detailed step-by-step guide on how to set up your grow tent .
For beginners, compact models 63–71 in (160–180 cm) tall are a good choice. Smaller tents of 24–47 in (60–120 cm) take more experience and often produce lower yields. Grow tents from 63 in (160 cm) tall give your plants enough room to grow. Larger models 79 in (200 cm) tall make sense if you want to grow several plants at once. Choose a size that fits your room. Keep in mind: your plants need enough distance from the light — and if you’d rather start without a tent at all, our guide to growing cannabis on a windowsill without a grow tent offers a simple alternative for getting started.
Look for quality features: premium tents like the Homebox have sturdier poles that can hold up to 165 lb (75 kg). They offer more vent ports and better seams and zippers. The PAR+ lining reflects the light plants need especially well and gives off less heat. A waterproof floor with a removable tray protects against water damage. Cheap propagation boxes are often flimsy and not lightproof. They also reflect less light, which hurts your results.
Ad / affiliate link: A proven 32 x 32 x 63 in (80 x 80 x 160 cm) grow tent — a great fit for getting started — is available here on Amazon. *As an Amazon Associate, we earn from qualifying purchases.
LED Grow Lights and Lighting Systems
For indoor growing, LED technology is the preferred choice today. LEDs use up to 60% less electricity than conventional lighting systems. They last between 50,000 and 100,000 operating hours. High-pressure sodium (HPS) lamps, on the other hand, need replacing after about 24,000 hours.
For beginners, full-spectrum LEDs are the best option. They deliver balanced light for both the vegetative and the flowering stage. Because they give off little heat, you can hang them closer to your plants without risking burns. The ideal distance is about 6–8 in (15–20 cm) from the plant tops. That has more to do with light distribution than with heat.
Ad / affiliate link: A proven 200 W full-spectrum LED with far-red diodes, fan cooling and an adjustable hanging kit — a good fit for 32 x 32 in (80 x 80 cm) tents — is available here on Amazon. *As an Amazon Associate, we earn from qualifying purchases.
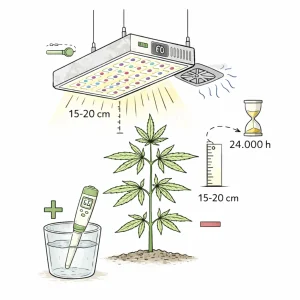
Modern LED systems don’t need an external ballast, which makes them much easier to handle. They switch on and off instantly, while HPS lamps need to warm up first. Many models are dimmable, so you can adjust light and heat to your plants’ needs. High-quality LEDs have cooling systems such as fans or heat sinks that carry away excess heat.
Ventilation and Carbon Filters
In an indoor grow, a well-working exhaust system replaces stale, humid air with fresh, cool air from outside. Cannabis plants transpire naturally: water evaporates into the air and raises the humidity. Without enough ventilation, hot and humid pockets form, and these encourage mold and powdery mildew.
Your fan’s capacity is rated in cubic feet per minute (CFM) or cubic meters per hour (m³/h). Multiply the length, width and height of your grow tent to get its volume. All the air in the tent should be fully exchanged once every 2–3 minutes. Mount the fan at the top of the tent, because warm air rises. To find out which ventilation kit fits which tent size, check out our grow tent exhaust fan comparison.
Carbon filters are essential for discretion. They filter out up to 99% of the odors cannabis plants produce. A single gram of activated carbon has a surface area of about 32,000 sq ft (3,000 m²). Running nonstop, a filter lasts about a year. Replace it as soon as you notice the first odors outside your grow tent. Important: at humidity above 70%, water condenses in the activated carbon, which shortens its lifespan.
Ad / affiliate link: A complete 4 in (100 mm) exhaust kit with a 130 CFM (221 m³/h) inline fan, carbon filter and ducting — a good fit for 32 x 32 in (80 x 80 cm) tents — is available here on Amazon. *As an Amazon Associate, we earn from qualifying purchases.
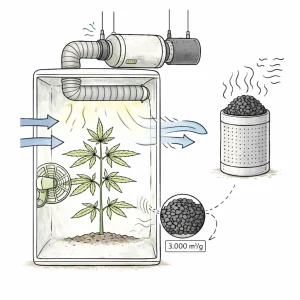
Oscillating fans keep the air moving evenly. The light breeze strengthens your plants’ stems and keeps stale air from building up.
Ad / affiliate link: A 6 in (150 mm) clip fan with 10 speed and oscillation settings, designed specifically for air circulation in grow tents, is available here on Amazon. *As an Amazon Associate, we earn from qualifying purchases.
Pots, Soil and Growing Media
Several types of pots work for growing cannabis indoors. Plastic pots are cheap and durable. Fabric pots (German) are breathable, which encourages the roots to air-prune themselves. Air-Pots let extra oxygen reach the roots and lower the risk of root rot. Autoflowers are best sown directly into a 3 gal (11 L) pot.
If you’re growing several plants at once, a set of same-size pots is worth it. That’s ideal for autoflowers, which stay in their final pot from start to finish.
Ad / affiliate link: A handy 5-pack of 3.2 gal (12 L) fabric pots — enough for your whole grow crew — is available here on Amazon. *As an Amazon Associate, we earn from qualifying purchases.
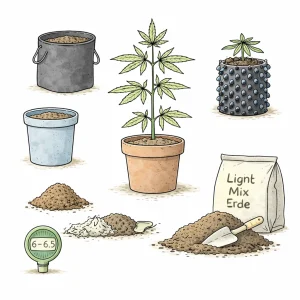
Your soil should be loose, well-draining and slightly acidic. The ideal pH is between 6.0 and 6.5. Light-mix soil is ideal for beginners because it’s only lightly pre-fertilized, which lowers the risk of nutrient burn. Perlite or coco fiber improves the structure and adds aeration. The soil should hold water well without getting soggy.
Ad / affiliate link: A proven light-mix soil in a 1.8 cu ft (50 L) bag — enough for 3 pots of 3.2 gal (12 L) with some to spare — is available here on Amazon. *As an Amazon Associate, we earn from qualifying purchases.
Timers and Measuring Tools
In an indoor grow, a timer controls the light cycle automatically. For LED lighting, digital models that are explicitly rated for LED loads are the way to go — our grow timer comparison (German) shows which devices actually meet that standard. They can be programmed with up to 20 on/off times per day. A built-in backup battery keeps your programs saved even during a power outage. For more powerful setups, what counts is the LED load rating printed on the device or in the data sheet, because LED drivers draw high inrush currents when they switch on. The general wattage rating isn’t enough here — look for the explicit LED rating.
Ad / affiliate link: A 3-pack of digital timers — handy if you want to program several devices — is available here on Amazon. *As an Amazon Associate, we earn from qualifying purchases.
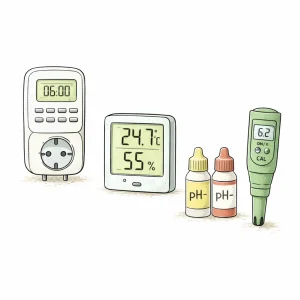
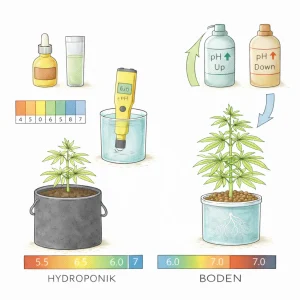
A digital thermo-hygrometer gives you a constant overview of temperature and humidity. You’ll also need a pH meter (German) to check the pH regularly and adjust it with pH Up or pH Down.
Ad / affiliate link: A digital thermo-hygrometer with app connectivity — so you can check temperature and humidity even when you’re away — is available here on Amazon. *As an Amazon Associate, we earn from qualifying purchases.
Estimating Your Running Electricity Costs Realistically
Besides the initial equipment, you should budget for the ongoing electricity costs of your grow. The biggest power users are the LED light, the exhaust fan and the circulation fan, which run 12–18 hours a day depending on the stage. On an 18-hour light cycle in the vegetative stage, a 200 W LED uses about 3.6 kWh per day, and correspondingly less on 12/12 in the flowering stage. Together with ventilation and the timer, a full grow cycle of 3–4 months adds a noticeable amount to your power bill — the LED light alone uses roughly 250–300 kWh over that time, and the final cost depends on your local electricity rate.
You can estimate the costs for your specific setup with our Grow Light Electricity Cost Calculator — just enter the wattage of your devices and how long they run.
Step-by-Step Guide: How to Grow Cannabis Indoors
The actual growing process starts with germination and moves through several clearly defined stages. Each stage has specific requirements for light, temperature and nutrients.
Germinating the Seeds (1–7 Days)
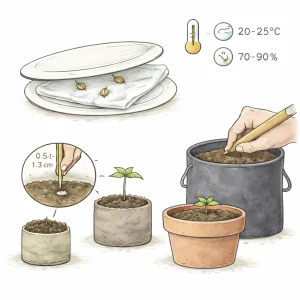
For indoor growers, the paper towel method is the most reliable way to germinate seeds. Place your seeds between two damp paper towels on a plate and cover them with a second plate. Put everything in a dark, warm spot at 68–77 °F (20–25 °C). Humidity should be between 70–90%. After 24–48 hours, the taproot appears. As soon as it’s 0.2–0.6 in (0.5–1.5 cm) long, carefully plant the germinated seed 0.4–0.6 in (1–1.5 cm) deep in moist soil. Alternatively, you can sow seeds directly into soil or peat pellets, so you won’t have to transplant them later. If the seedling then turns limp or falls over, our article on cannabis seedlings falling over covers the most common causes and quick fixes.
Seedling Stage (1–2 Weeks)
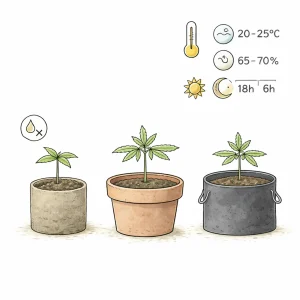
In the seedling stage, the young plant develops its first true leaves. During this delicate stage, the ideal temperature is 68–77 °F (20–25 °C) at 65–70% humidity. Set the light cycle to 18 hours of light and 6 hours of darkness. For the first two weeks, seedlings don’t need any nutrients, since pre-fertilized soil supplies enough. Overwatering is the most common mistake at this stage. The seedling stage ends once the plant has developed 3–4 nodes. If the young seedling falls over or looks unstable, our article Cannabis Seedling Falling Over explains the most common causes. If, on the other hand, the seedling gets unusually tall and thin, it’s often a case of stretchy, leggy seedlings (etiolation) caused by too little light.
Vegetative Stage (3–8 Weeks)
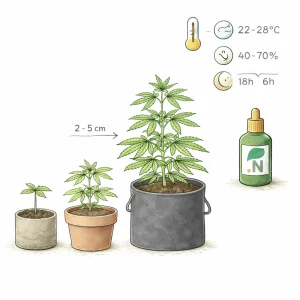
In the vegetative stage, the plant focuses on growing roots, stems and leaves. Under ideal conditions, it grows 0.8–2 in (2–5 cm) per day. Stick with the 18/6 light cycle and keep the temperature between 72–82 °F (22–28 °C). Humidity should be 40–70%. Nitrogen-rich nutrients promote strong leaf growth. Most growers keep their plants in this stage for 4–6 weeks before flipping to flower. Keep in mind that some strains can double in size during flowering.
Starting the Flowering Stage
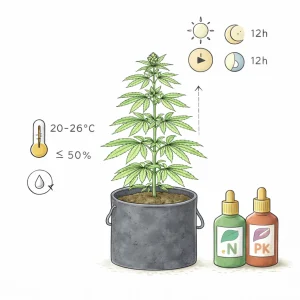
Switch the light cycle to 12 hours of light and 12 hours of darkness. Indoors, photoperiod cannabis plants respond to this change by starting to form flowers. Three criteria should be met: the plant is already showing its first pre-flowers as a sign of sexual maturity, it has already been transplanted and it has at least three nodes. At the same time, lower the humidity to 50% max and the temperature to 68–79 °F (20–26 °C). Switch from grow nutrients to bloom nutrients, because the plant now needs more phosphorus and potassium. During the first weeks, plants go through the flower stretch and grow taller faster.
Harvesting at the Right Time
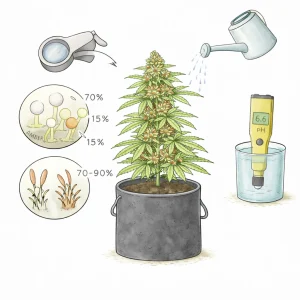
When you grow cannabis indoors, trichome color tells you the ideal harvest time. Check the resin glands with a jeweler’s loupe: about 70% should look cloudy (milky), 15% clear and 15% amber. Cloudy trichomes signal peak THC. In addition, 70–90% of the pistils should have turned from white to orange-brown. For the last 1–2 weeks before harvest, flush your plants with pH-adjusted water only, without nutrients. This gives a cleaner taste.
Ideal Conditions for Healthy Cannabis Plants
Indoors, cannabis plants only thrive under precisely controlled conditions. Your equipment is the technical foundation. Temperature, humidity, light and pH decide between success and failure.
Setting Temperature and Humidity Correctly
For an indoor grow, the ideal temperature is between 68–79 °F (20–26 °C). Temperature and humidity are directly linked: warm air holds more water vapor than cold air. That’s why you pull hot, stale air out at the top while fresh air flows in from below.
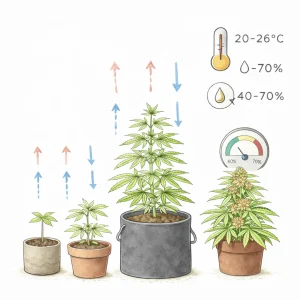
Humidity should be between 40–70%, but these values vary considerably depending on the growth stage. Seedlings need 65–70% humidity, because their root system isn’t developed yet and they take up water through their leaves. In the vegetative stage, lower the humidity by 5% per week until you’re in the 40–70% range. During the flowering stage, you need to reduce humidity to 40–50%. Values above 60% encourage mold on the dense buds.
Light Cycle in the Different Stages
When you grow photoperiod strains indoors, you need 18 hours of light and 6 hours of darkness during the vegetative stage. This cycle simulates long summer days and maximizes photosynthesis. To trigger the flowering stage, switch to 12 hours of light and 12 hours of darkness. To learn which light spectrum makes the most sense in which stage, read our article How to Use Light Spectrum and Light Duration for Cannabis.
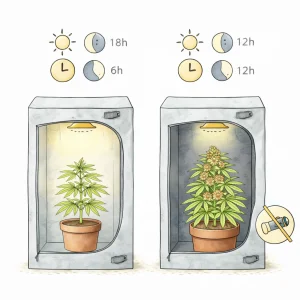
Uninterrupted darkness is critical. Any light interruption during the dark period can delay or prevent flowering. Make sure absolutely no light gets into your grow tent.
Measuring and Adjusting pH
The pH of your water determines whether your indoor plants get a good supply of nutrients. In soil, it should be between 6.0 and 7.0. An ideal value of 6.4 ensures the best nutrient availability. For hydroponic systems, the ideal pH is a bit lower, at 5.5–6.0.
pH test drops are the cheapest way to measure. Digital pH meters give more accurate results, but need to be calibrated regularly.
Ad / affiliate link: Instead of buying several separate devices, an 8-in-1 soil tester can help: it measures pH, EC, nutrient levels and moisture at the same time and analyzes the readings in an app. You can find it here on Amazon. *As an Amazon Associate, we earn from qualifying purchases.
How to Water Cannabis: When and How Much
The golden rule: only water when the pot feels light and the top layer of the growing medium is dry. Lift the pot before watering and remember its weight. Dry soil weighs almost nothing.
The best time to water is in the morning, during the first hours of the light period. Ideally, your water should be about 68 °F (20 °C). Water less often, but thoroughly. This encourages strong roots. Overwatering is a bigger problem than underwatering.
Nutrients for Indoor Plants
The right nutrient supply decides whether your indoor grow reaches its full potential or your plants struggle. Without enough nutrients, deficiencies develop that lead to weak growth and poor harvests. Basic information on plant nutrition is also available from the Julius Kühn Institute (German). For an overview of all deficiencies, see our nutrient deficiency chart.
Understanding NPK Ratios
In cannabis growing, NPK stands for the three primary nutrients: nitrogen (N), phosphorus (P) and potassium (K). Nitrogen promotes leaf growth and chlorophyll production. Chlorophyll is essential for photosynthesis. Phosphorus supports root development and flower formation. Potassium regulates the plant’s water balance and strengthens its immune system.
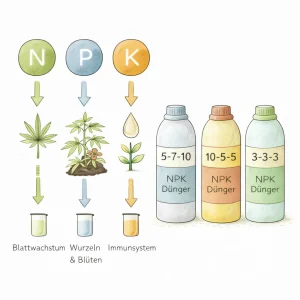
On nutrient bottles, you’ll find the NPK ratio as three numbers, for example 3-3-3 or 5-7-10. A product labeled 10-5-5 contains 10% nitrogen, 5% phosphorus and 5% potassium. The numbers tell you the ratio, not the absolute concentration. Two nutrients with the same NPK ratio can be concentrated differently, so the dosage still matters.
Feeding in the Vegetative Stage
Seedlings don’t need any nutrients in the first weeks, since pre-fertilized soil supplies enough. Once your plant has developed 3–4 pairs of true leaves, you can start with light feeding at an NPK ratio of 2:1:2. This gets the plant used to nutrients and avoids nutrient burn.
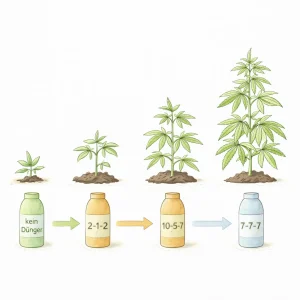
About 6 weeks after germination, increase the nutrient supply significantly to 10:5:7 to promote strong leaf growth. In the late vegetative stage, reduce the nitrogen to 7:7:7 to prepare for the transition to flowering. Always start with 50% of the manufacturer’s recommended dose and increase it gradually.
Ad / affiliate link: A grow nutrient with a matching 10:5:7 ratio is available here on Amazon. *As an Amazon Associate, we earn from qualifying purchases.
Feeding in the Flowering Stage
During the flowering stage, nutrient needs shift: less nitrogen, more phosphorus and potassium. In the first two weeks, an NPK ratio of 5:7:10 works well. The higher phosphorus content supports bud structure and branching.
Ad / affiliate link: A bloom nutrient high in phosphorus and potassium is available here on Amazon. *As an Amazon Associate, we earn from qualifying purchases.
By mid-flower, most growers increase to 6:10:15, with potassium always kept the highest. In the final weeks, reduce to 4:7:10 for a smooth transition to the flush. Stop feeding completely 1–2 weeks before harvest so no residues remain in the buds.
Avoiding Nutrient Burn
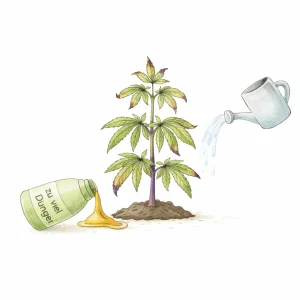
Indoors, nutrient burn shows up as brown, burnt leaf tips that curl upward. In addition, leaves turn dark green and stems develop purple or red coloring. Always start with lower doses, because nutrient burn is more common than underfeeding. If you’ve overfed, flush the growing medium with pH-adjusted water and permanently reduce your nutrient dose to 50–75% of the manufacturer’s recommendation.
Common Beginner Mistakes and How to Avoid Them
Even with good preparation, mistakes happen. Cannabis is actually an undemanding plant as long as you follow a few basic rules. But the following beginner mistakes can cost you yield or even your entire harvest. If your plant is already showing symptoms, our Plant Diagnosis hub will help you find the cause.
Watering Too Often
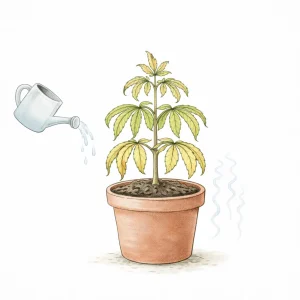
Overwatering is one of the most common mistakes in indoor growing. Too much water pushes oxygen out of the growing medium, so the roots suffocate and rot. The symptoms are easy to spot: leaves look firm and swollen, curl downward like eagle claws and lose their posture. Leaves also turn yellow, growth stalls and the pot smells musty. Only water again once the top 1 in (2–3 cm) of soil is completely dry. Check the pot weight before every watering.
Wrong Light Distance
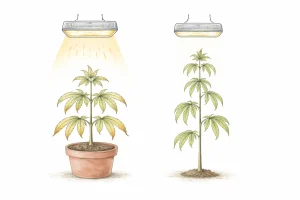
If your light hangs too close to your plants, heat stress and light burn follow. Leaves dry out at the edges, curl upward and turn almost white. Burnt leaf tips are a warning sign. If the light hangs too far away, the plants stretch too much and form thin, unstable stems — typical signs of stretchy, leggy (etiolated) seedlings. Depending on the type of light, keep a distance of 12–20 in (30–50 cm) and check the manufacturer’s recommendations.
Poor Ventilation
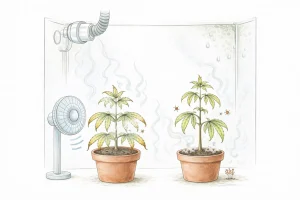
Without enough air circulation, humid, warm air builds up inside your grow tent. This creates ideal conditions for mold and mildew as well as pests such as spider mites. Install oscillating fans for constant air movement and make sure your exhaust system completely exchanges all the air once every 2–3 minutes.
Light Leaks During the Dark Period
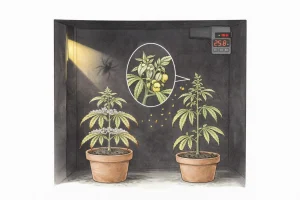
Indoors, photoperiod cannabis plants are extremely sensitive to light interruptions during the dark period. Even tiny amounts of light can delay or prevent flowering. Worse still: stressed plants can develop both male and female traits and pollinate themselves instead of producing potent buds. Seal all openings in your grow tent and tape over the LED indicator lights on your devices.
Harvesting Too Early or Too Late
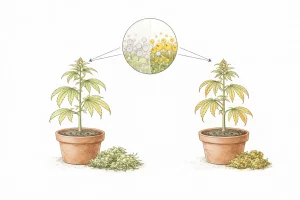
Harvest timing determines the potency and effect of your buds. If you harvest too early, with clear or mostly cloudy trichomes, THC levels stay low. If you wait too long, THC breaks down into CBN, which produces sedating rather than energizing effects. Start harvesting when 10–20% of the trichomes look amber. To learn what to do next, check out our Harvesting & Drying guide.
For a specific product selection for grow tents, lighting, ventilation and measuring tools, see our Recommended Gear page.
Conclusion
Growing cannabis indoors is easier than most beginners expect. You need the right equipment. You need to control temperature and humidity and adapt your feeding to each growth stage. Avoid typical mistakes like overwatering, wrong light distances or light leaks during the dark period.
Start with a manageable setup and focus on the basics. Investing in quality equipment pays off with healthier plants and better harvests. After your first successful grow, you’ll have a lot more experience and keep improving your technique.
Before you start, it’s also worth thinking about strain choice: the difference between indica, sativa and hybrid has a big impact on plant structure and flowering time.
FAQs
How many cannabis plants can I grow indoors?
That depends on where you live — plant limits vary widely, so check the cannabis laws in your area before you start. Growing indoors has one big advantage: you control light, temperature and humidity completely yourself. That lets you harvest several times a year, no matter the season.
What is the best lighting for growing cannabis indoors?
Full-spectrum LED grow lights are the best choice for beginners. They use up to 60% less electricity than conventional lighting systems, last 50,000 to 100,000 operating hours and give off little heat. The ideal distance from the plant tops is about 6–8 in (15–20 cm).
How often should I water my cannabis plants?
Only water when the top 1 in (2–3 cm) of soil is completely dry and the pot feels light. Overwatering is the most common beginner mistake and leads to root rot. The best time to water is in the morning, during the first hours of the light period, ideally with water at about 68 °F (20 °C).
When is the right time to harvest?
The ideal harvest window is reached when about 70% of the trichomes look cloudy (milky), 15% clear and 15% amber. In addition, 70–90% of the pistils should have turned from white to orange-brown. For the last 1–2 weeks before harvest, give your plants only pH-adjusted water without nutrients.
How much yield do 3 cannabis plants produce indoors?
With good care and enough light, three indoor plants together usually produce between 150 and 500 grams of dried buds per harvest. The range is wide because strain, pot size, light output and experience vary a lot. With a 32 x 32 in (80 x 80 cm) tent and a 200–300 W LED, 250–350 grams per harvest across all three plants is realistic for beginners. As you gain experience, techniques like topping or SCROG (screen of green) and an optimized feeding schedule can boost your yield significantly.
Indoor or outdoor — which is better for you as a beginner?
When you grow indoors, you control light, temperature and humidity yourself and can harvest year-round — in return, you invest in a grow tent, LED light, exhaust and ongoing electricity costs. Growing outdoors, you use free sunlight and save on a lot of equipment, but you depend on the weather and seasons and only harvest once a year. For a first grow, indoor is usually the better choice, because you can spot and correct mistakes faster. If you’re on a tight budget and have a sunny balcony or garden, our Outdoor Growing guide has the right instructions for you.
What temperature and humidity are ideal for indoor cannabis plants?
The ideal temperature is between 68–79 °F (20–26 °C). Humidity depends on the growth stage: seedlings need 65–70%, the vegetative stage 40–70%, and during the flowering stage you should lower it to 40–50% to prevent mold on the buds.
Back to the key sections:
