

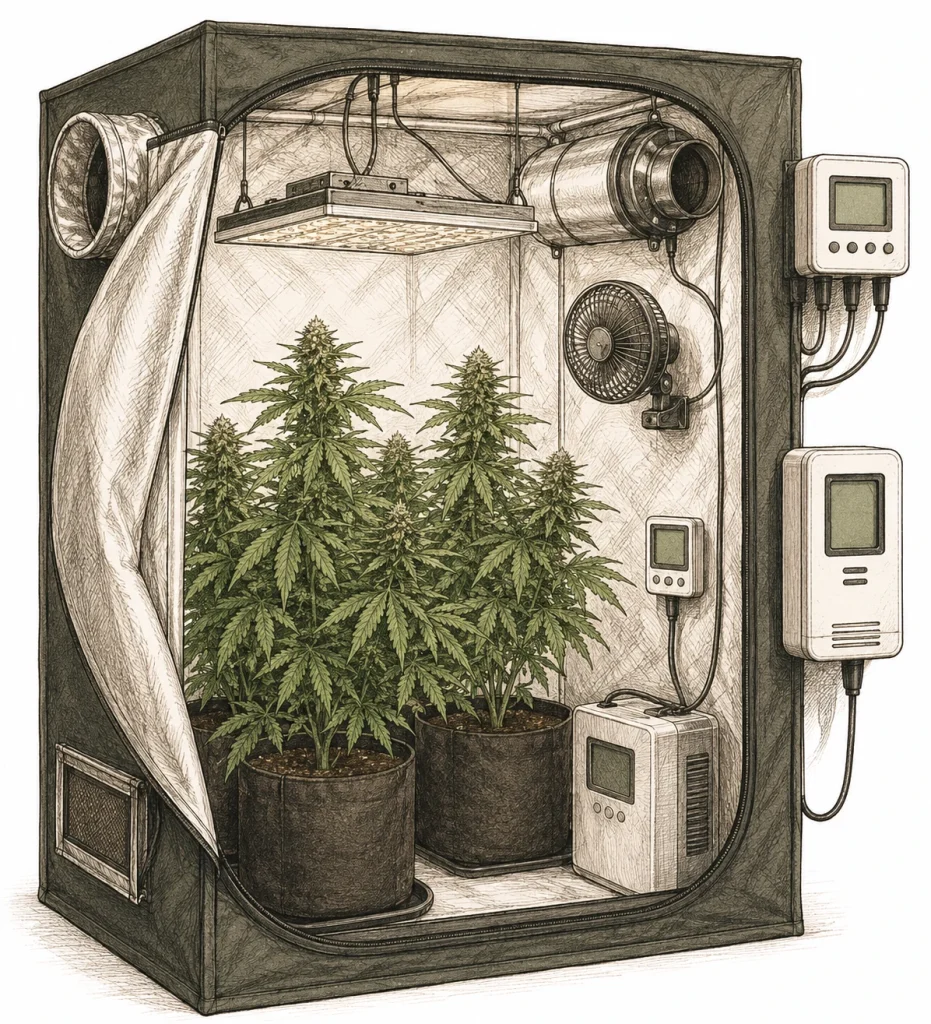
CO2 and cannabis yield: sooner or later, this topic comes up on every serious grow forum. Carbon dioxide is one of the most powerful ways to boost indoor yields, but the effort and cost add up fast. Before you invest in a CO2 setup, you should know when it actually pays off and when it just burns your money without any measurable results. This article gives you the facts, numbers and practical tips you need to make a smart call for your grow.
What Is CO2 and Why Does Cannabis Need It to Grow?
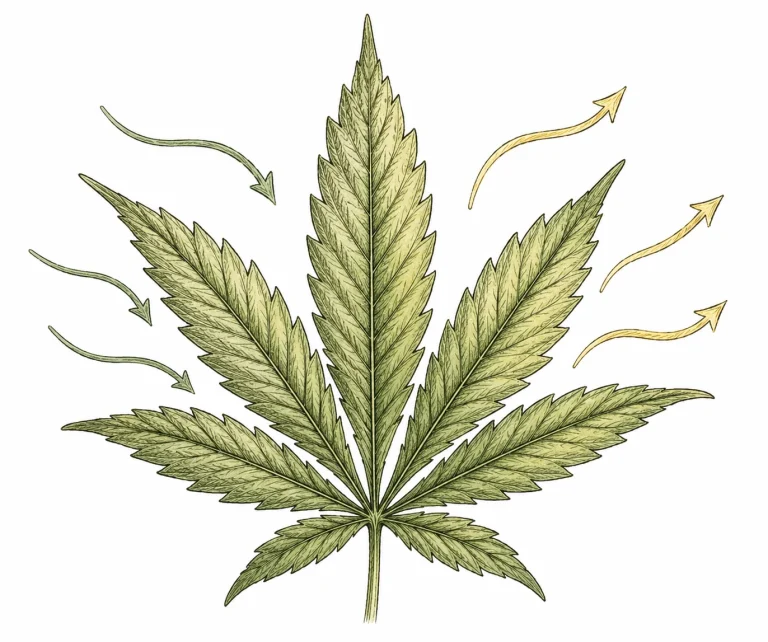
Along with light and water, carbon dioxide (CO2) is the third big fuel for photosynthesis. Cannabis plants take in CO2 through the stomata on their leaves. With the help of light and water, they turn it into glucose, which is pure growth energy. Without enough CO2, this process runs at half speed, no matter how expensive your lights are or how dialed-in your feeding schedule is. Germany’s Julius Kühn Institute (German) explains the basics of photosynthesis in more detail.
Normal outdoor air contains about 400–420 ppm (parts per million) of CO2. Cannabis can easily use higher levels of 800 to 1,500 ppm, as long as everything else is on point. In a densely packed grow room with poor ventilation, CO2 can drop below 200 ppm during the light period because the plants actively pull it out of the air. At those levels, the photosynthesis rate can crash, growth stalls and your yield can take a serious hit.
So the connection is clear: without a minimum amount of CO2, your plants can’t reach their genetic potential. But more CO2 doesn’t automatically mean a bigger harvest. There’s an upper limit, and beyond it, extra CO2 is just wasted money or can even become a hazard.
- Normal outdoor air: about 400–420 ppm CO2
- Cannabis sweet spot with added CO2: 1,000–1,500 ppm
- Critical low in poorly ventilated rooms: below 200 ppm
- Photosynthesis only runs with light, so no CO2 is needed during the dark period
- CO2 only works when combined with enough light and warmth
CO2 and Cannabis Yield: How Big Is the Real Difference?
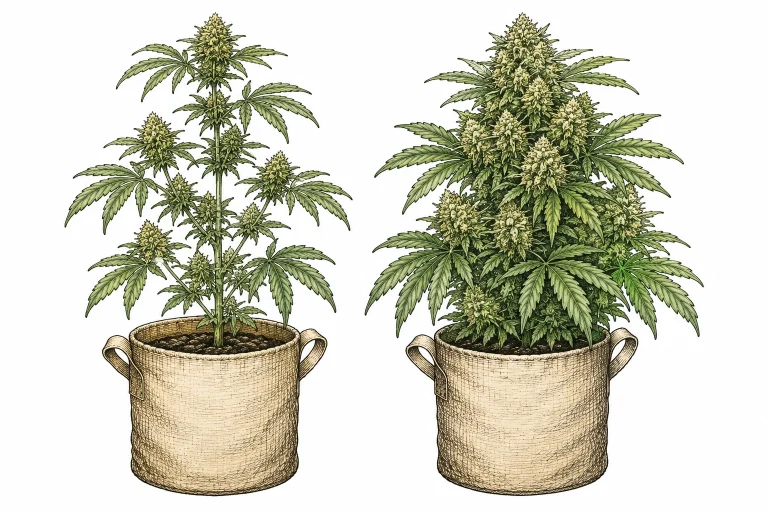
Studies and real-world grower experience agree: under ideal conditions, enriching the air to 1,200–1,500 ppm CO2 can increase yield by 20 to 40 percent. That sounds tempting, and it’s real. But it only applies when every other factor is already optimized. CO2 is no miracle cure that can rescue a poorly run grow.
The logic is simple: CO2 removes a bottleneck in photosynthesis. But if your plants are also dealing with a nutrient deficiency, the wrong pH or too little light, even the best CO2 setup won’t help you. Growth is always limited by the weakest factor. Ecologists call this principle Liebig’s law of the minimum. Only once light, temperature, humidity, watering and nutrients are dialed in can CO2 show its full effect.
Light intensity is another critical point. CO2 raises the photosynthesis rate, so your plants also need more light to actually use the extra CO2. If you add CO2, you should deliver at least 600–800 µmol/m²/s of PPFD (photosynthetic photon flux density), ideally more. With a weak 200-watt light over two plants, adding CO2 is pointless.
- Yield increase under ideal conditions: 20–40 %
- CO2 only works when all other factors are already on point
- Minimum light intensity to make use of CO2: 600+ µmol/m²/s PPFD
- Small grows under 400 W: little to no CO2 benefit
- Large indoor grows over 600 W benefit the most
CO2 Sources Compared: Tank, Generator or Mushroom Bag?
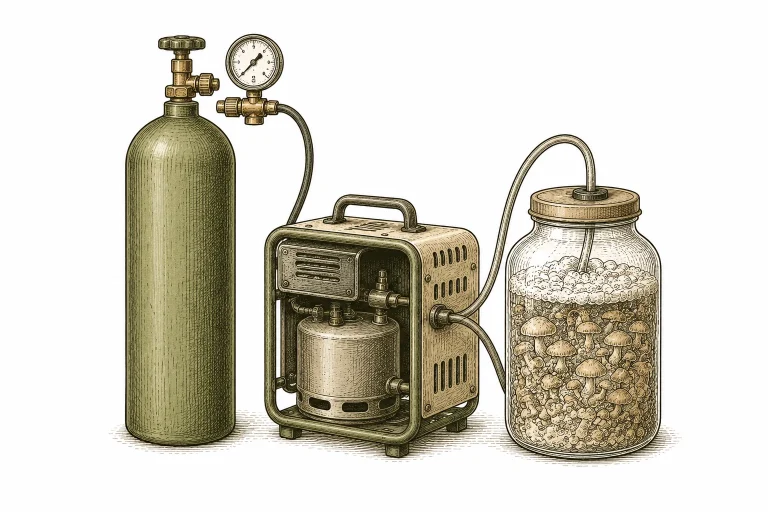
There are several ways to give your grow room extra CO2. The three most common methods are pressurized tanks, gas-burning CO2 generators and biological fermentation setups. Each one has its pros and cons, and the right choice depends a lot on the size of your grow and your budget.
Pressurized CO2 tanks are the most precise and cleanest option. You need a tank (rented or bought), a regulator, a solenoid valve and a CO2 controller with a sensor. The controller measures the ppm level in the room and opens the valve only when the concentration drops below your target. The system is accurate, low-maintenance and adds no extra heat. The downside: the upfront cost is noticeable, and tanks need regular refills.
CO2 generators burn propane or natural gas and produce CO2 and water as by-products. They are cheaper to run, but they put out a lot of heat and raise humidity. In a grow room that already runs warm, both can turn into a real problem. They can also release small amounts of toxic by-products if combustion is incomplete. For grow rooms under 108 sq ft (10 m²), they are usually not a good fit.
Biological methods like yeast-and-sugar fermentation or growing mushrooms do produce CO2, but in such small amounts that the effect in a sealed grow room is barely measurable. In a small home grow with 1–2 plants in a tent, they may nudge CO2 levels up a little. Don’t expect a meaningful yield boost, though. Think of these methods as an experiment.
- Pressurized tank: precise, clean, ideal for mid-size grows – higher upfront cost
- CO2 generator: cheap to run, but watch out for rising heat and humidity
- Fermentation (yeast/mushrooms): minimal effect, only a hobby experiment for very small setups
- CO2 controller + sensor: a must for precise ppm control
- Home grow tip: from around 600 W of lighting, a tank setup starts to pay off
The Right CO2 ppm Levels for Every Growth Stage
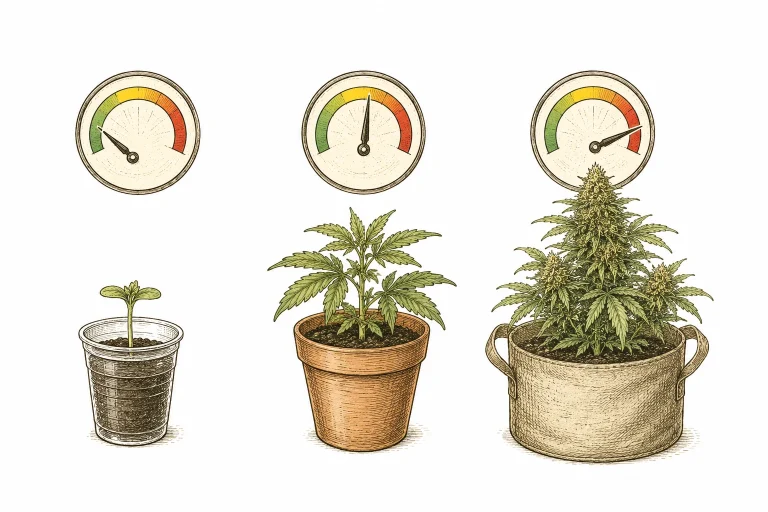
CO2 needs aren’t the same in every growth stage. During germination and with very young seedlings, you don’t need to add CO2. Small plants can’t use higher concentrations efficiently yet, and the stress of unfamiliar conditions can even hurt them. Keep CO2 at normal outdoor levels here.
In the vegetative stage (veg), once your plants are actively growing and have built up enough leaf area, adding CO2 starts to make sense. Levels between 800 and 1,000 ppm are ideal to speed up vegetative growth without overloading the plants. You can expect thicker stems, bigger leaves and noticeably faster growth.
In the flowering stage, CO2 has its biggest impact on yield. Levels between 1,200 and 1,500 ppm, combined with strong lighting and a slightly higher temperature (82–86 °F (28–30 °C) instead of the usual 75–79 °F (24–26 °C)), help you get the most out of bud development. Heads up: above 1,500 ppm you’ll see little extra benefit, and from 2,000 ppm CO2 can become dangerous for people. Always install a CO2 alarm when you supplement CO2.
Keep in mind: your plants only need CO2 while the lights are on. Once the lights go out, they stop photosynthesis and start releasing CO2 themselves. Set up your controller so it only adds CO2 during the light period. Anything else wastes resources and raises the risk of a dangerously high concentration in the room.
- Seedling: normal outdoor level (400 ppm) is enough
- Vegetative stage: 800–1,000 ppm is optimal
- Flowering stage: 1,200–1,500 ppm for maximum effect
- Above 1,500 ppm: little added value, higher risk
- Above 2,000 ppm: a health hazard for people – a CO2 alarm is a must
- Only supplement while the lights are on – always shut it off at night
When Does CO2 Pay Off in Your Grow Room – and When Doesn’t It?
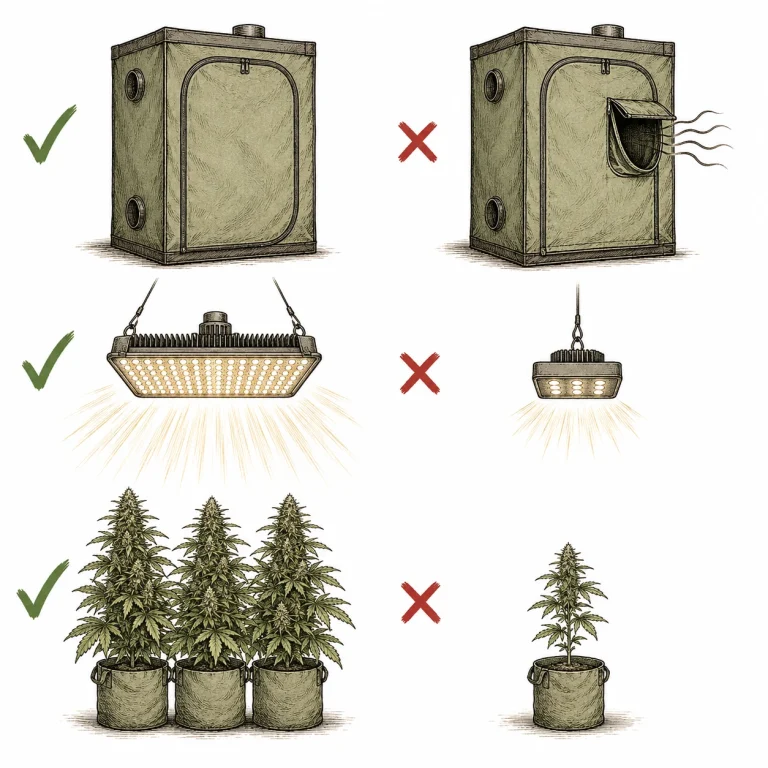
Honest answer: for most home growers, CO2 supplementation just isn’t worth it right now. A typical home grow with two or three plants under a mid-power LED doesn’t need extra CO2 to get great results. Your money goes much further on a better light, a higher-quality growing medium or a reliable pH meter. If you’re fighting a pH that’s off or keep running into nutrient problems, fix those basics first. CO2 can boost growth, but it won’t fix the underlying problems in your grow.
CO2 supplementation starts to pay off once you check these boxes: you run at least 600 W of real light output (HPS or high-power LED), your grow room is mostly closed and well sealed, your basics like pH, EC, temperature and watering are dialed in, and you’re already pulling consistent yields. At that point, CO2 is the logical next step to optimize your grow. You’ll notice the effect most in bigger tents, from 4 x 4 ft (1.2 x 1.2 m) and up.
One thing many growers overlook is sealing the room. CO2 only works in a closed system. If you run an active exhaust that constantly pulls air out of your grow room and replaces it with fresh outside air, you’re literally blowing your pricey CO2 out the window. You can either cut your exhaust down to a minimum (which makes temperature and humidity control harder) or switch to a sealed room with an AC unit and a dehumidifier. That second option adds a lot of complexity and cost.
- CO2 is worth it: 600 W+ of light, a sealed room, stable basics
- CO2 is NOT worth it: small home grow, weak lighting, active fresh-air intake
- Open exhaust system = CO2 gets pumped straight out = wasted money
- Fix the basics (pH, nutrients) first – add CO2 after that
- The cost-benefit usually only works out at a target yield of about 600 g+ per run
Using CO2 Safely: Health Risks and Safety Tips

CO2 is odorless, colorless and heavier than air. It settles near the floor, which makes it especially sneaky. Even at 1,000 ppm, sensitive people may feel slightly dizzy or have trouble concentrating. At 2,000–3,000 ppm, headaches and nausea can set in, above 5,000 ppm it gets dangerous, and above 10,000 ppm you risk passing out. These numbers sound far off, but in a small, tightly sealed grow room, a leak or a controller glitch can quickly push levels where you don’t want them.
Always install a CO2 alarm with an audible signal before you start supplementing. These devices usually run about $30 to $90 and can save lives. Mount the sensor at breathing height, not right on the floor. Air out the room thoroughly before you walk in after a long CO2 run: open the door, wait a few minutes and let the air circulate. Keep kids and pets out of the grow room.
Check the cannabis laws and any local rules for compressed gas where you live before you set up CO2. Always buy certified food-grade or technical-grade CO2 from a reputable supplier, and never leave tanks in direct sunlight or extreme heat.
- CO2 alarm with an audible signal: an absolute must before you start
- Mount the sensor at breathing height, not on the floor
- Air out the grow room before every entry after a long CO2 run
- Kids and pets: no access to the CO2-enriched room
- Store tanks in a cool, dry place, away from heat sources
- Above 2,000 ppm: acute health risk zone – set your controller limits correctly
Boost Your Cannabis Yield with CO2: Step-by-Step Setup
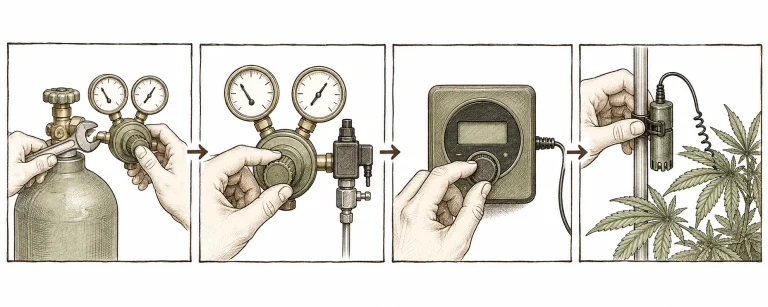
Once you’ve decided to go with CO2, start with the right gear. You’ll need: a CO2 tank (11 lb (5 kg) or 22 lb (10 kg) for mid-size grows), an adjustable regulator, an electric solenoid valve, a CO2 controller with a built-in or external ppm sensor, and the right tubing. The controller is the heart of the system. It constantly measures the CO2 level and only opens the solenoid when the reading drops below your target.
Place the CO2 outlet as high as you can in your grow room, close to the lights. CO2 is heavier than air, so it sinks on its own, and the airflow from your fans spreads it evenly across the leaf surfaces. Don’t blow CO2 directly onto the leaves. That can cause local stress symptoms. A small circulation fan in the room is ideal.
Start with a conservative target of 1,000 ppm and watch your plants for a week. If everything looks good and you have enough light output, raise it step by step to 1,200 ppm, then 1,500 ppm. Keep a grow log: growth rate, leaf health, temperature and humidity. Good notes help you find the sweet spot for your grow and get better with every run. Keep your pH stable too, because CO2-enriched plants can react more strongly to pH swings. Our article on pH for cannabis covers everything you need to know.
- Equipment: tank + regulator + solenoid valve + controller + sensor
- Place the CO2 outlet high in the room, because the gas sinks
- Use a fan to keep the air moving for even distribution
- Starting point: 1,000 ppm, then increase gradually
- Grow log: write down growth, temperature and humidity every day
- Light cycle sync: link your CO2 controller to the lights-on period
A well-planned ventilation system is the foundation for effective CO2 enrichment. Learn more in our article on grow tent ventilation.
Frequently Asked Questions
When is CO2 in the grow room really worth it?
CO2 supplementation only pays off once you have at least 600 W of real light output, run a mostly sealed room and already have the basics dialed in: pH, watering and nutrients. For small home grows with 1–2 plants under weak lighting, CO2 adds hardly any measurable yield.
What CO2 level is best for cannabis in flower?
In the flowering stage, 1,200 to 1,500 ppm of CO2 is ideal, as long as your lighting is strong enough. Above 1,500 ppm you will see little extra benefit, and from 2,000 ppm it starts to get dangerous for people. Start conservatively at 1,000 ppm and increase gradually.
Can I make my own CO2 for the grow room with yeast?
Yes, but the effect is minimal. Yeast and sugar fermentation produces so little CO2 that it barely raises the ppm in a grow tent in any measurable way. If you want a serious yield boost, a pressurized tank with a controller is the only solution that really makes sense.
Do I need to add CO2 during the dark period too?
No, definitely not. Plants only photosynthesize when the lights are on, so they don’t need CO2 at night. Set your CO2 controller so it only runs during the light period. At night you just waste CO2 and raise the health risk for no reason.
Is CO2 supplementation dangerous?
CO2 can become dangerous at high concentrations. From about 2,000 ppm you can get headaches and nausea, and above 5,000 ppm it gets seriously dangerous. Always install a CO2 alarm with an audible signal, and air out the room thoroughly before you walk in after a long enrichment period.
Does CO2 really boost yield by 40 percent?
Under ideal lab conditions with a professional setup, yield gains of 20–40 % are possible. In a real home grow, 15–25 % is more realistic, and only if every other factor is already dialed in. CO2 is the final polish, not a fix for basic problems.
Bottom Line
Boosting your cannabis yield with CO2 really works, but only for growers who have already done their homework everywhere else. For the typical home grower with one or two plants, CO2 supplementation usually is not a smart next step. But if you run strong lighting, a sealed room and stable basics, a well-tuned CO2 setup can give you noticeable yield gains of 20–30 %. Safety always comes first: a CO2 alarm is not optional, it is a must. And if you are not sure your setup is ready for CO2, start with our Plant Diagnosis overview to track down any open issues in your grow.
