

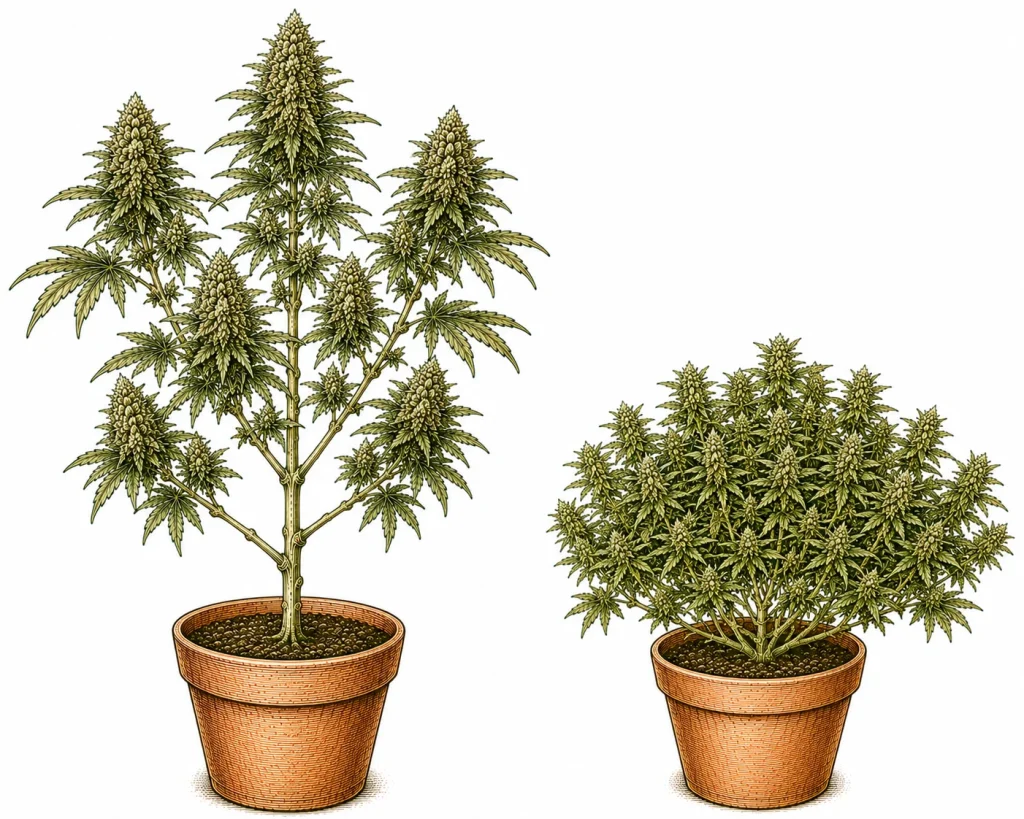
Monster cropping is one of the most fascinating and effective techniques in advanced indoor growing. It turns flowering clones into unusually bushy, heavily branched plants with huge yield potential. Unlike classic cloning from vegetative plants, monster cropping means you take clones straight from the flowering stage, push them back into veg and let them develop a unique, wild growth pattern packed with side shoots. Once you master this method, you can produce genetically identical clones with maximum branching at any time, without keeping extra mother plants. In this article, you’ll learn the exact process, the right timing, common mistakes and how to get the most out of this advanced technique.
What Is Cannabis Monster Cropping? The Basic Idea
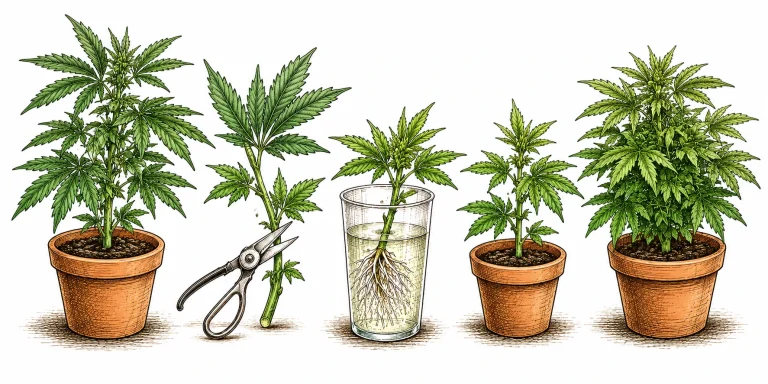
Cannabis monster cropping, also known as re-veg cloning or flowering cloning, is a technique where you take clones from a plant that’s already in the flowering stage. You then put these clones back under an 18/6 light cycle to push them into the vegetative stage again. This process is called re-vegging.
What makes this method special is how the plant reacts biologically. When a branch that’s already flowering is forced back into veg, it responds by exploding with new growth tips. Instead of the usual two side shoots per node, you often get four, six or even more shoots at once. The result is an extremely dense, bushy plant. That’s where the name “monster” cropping comes from.
Keep in mind: cannabis monster cropping only works with photoperiod strains. Autoflowering strains don’t respond to changes in the light cycle and can’t go through the re-veg process. So if you grow autoflowers, this technique isn’t for you.
- Clones are taken during flowering (weeks 2–5 of flower)
- Back to veg with an 18/6 light cycle
- Result: extremely branched, bushy clones
- No separate mother plant needed
- Only suitable for photoperiod strains
Cannabis Monster Cropping Technique: Step-by-Step Guide

The first step in monster cropping is picking the right moment. The ideal window for taking cuts is between the second and fifth week of flower. By then, the branches have switched to flowering, but they aren’t so far along that rooting gets difficult. Clones taken later in flower (week 6 and beyond) root much less reliably.
Choose healthy, sturdy branches from the middle of the plant. Cut the branch at a 45-degree angle with a clean, sharp scalpel or pair of scissors. It should be 3–6 in (8–15 cm) long, with at least two to three nodes. Remove the bud sites and lower leaves so only the top two or three sets of leaves remain. Dip the cut end into rooting gel or powder right away.
Place the clones in a proven rooting medium. Rockwool cubes, Jiffy pellets or a light, airy growing medium all work well. Keep humidity high (70–80 % RH), the temperature at 72–79 °F (22–26 °C) and turn down the light intensity. Under an 18/6 light cycle, the re-veg process kicks in. Now you need patience: monster cropping clones take a lot longer to root than vegetative clones. Plan on 2–4 weeks.
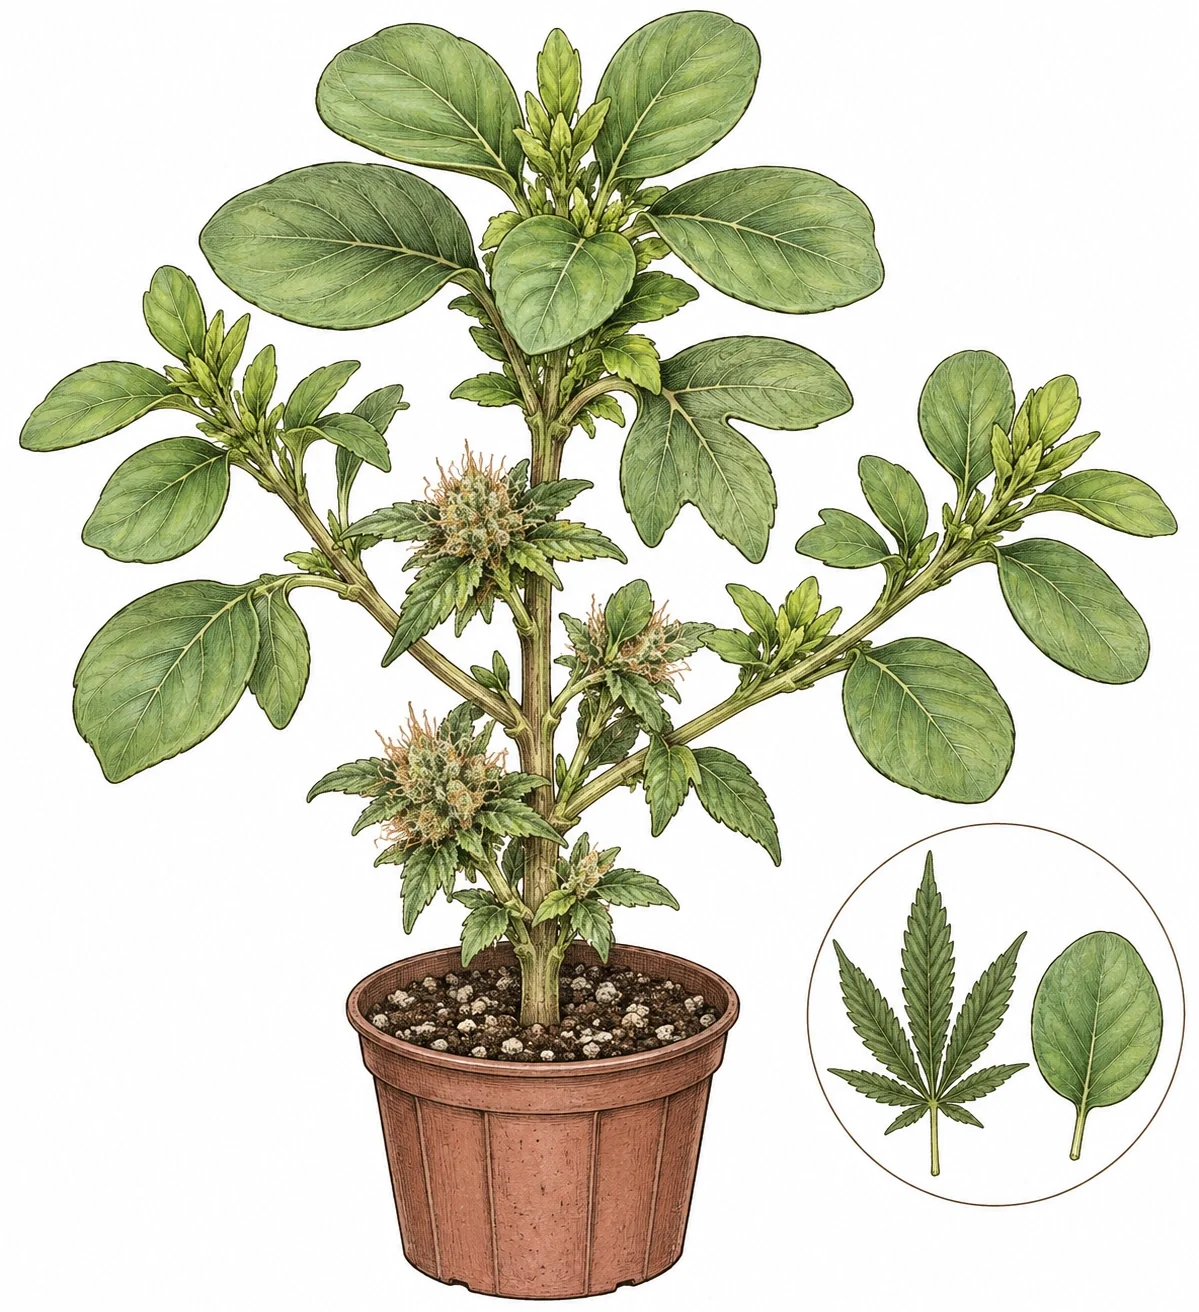
Once the first roots show up, the real “monster” phase begins. At first, the plant grows odd, rounded leaves without the typical finger shape. That’s completely normal and a sign that re-vegging is working. Little by little, the classic cannabis leaves come back, while the number of growth tips explodes. At this stage, you can start LST (low stress training) to position the shoots just right.
- Step 1: Take the clone in weeks 2–5 of flower (45-degree cut)
- Step 2: Remove bud sites, keep only the top leaves
- Step 3: Use rooting gel and place in a moist medium
- Step 4: 18/6 light cycle, 70–80 % humidity, 72–79 °F (22–26 °C)
- Step 5: Allow 2–4 weeks for rooting
- Step 6: Start training once the clone has taken root
Cannabis Monster Cropping Technique: Advantages Over Classic Methods
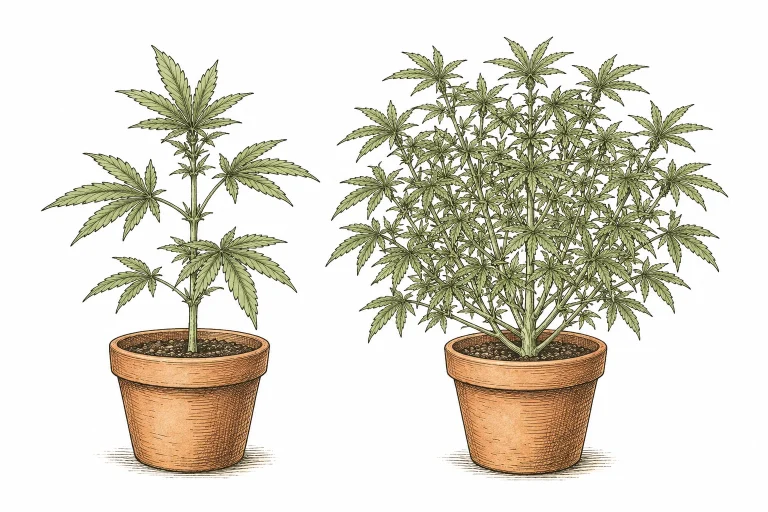
The most obvious advantage of cannabis monster cropping over regular cloning is the superior structure of the plants you get. A vegetative clone mostly copies the growth pattern of its mother plant. A monster-cropped clone, on the other hand, goes through the re-vegging process and develops a uniquely dense structure with lots of growth tips. That means more colas, bigger yields and a plant that’s naturally suited for techniques like SCROG (screen of green) or LST (low stress training).
Another huge plus: you don’t need a dedicated mother plant. In a classic grow setup, a mother plant permanently eats up space, light and resources – without ever adding to your harvest. With cannabis monster cropping, you can start your next generation while your current plants are still flowering. That makes your grow cycle more efficient and your planning a lot simpler.
Cannabis monster cropping is also a great alternative to cannabis topping if you want a plant with many even main colas without cutting into a growing plant. The natural branching from re-vegging gives you a similar result with less hands-on work. Pair it with targeted training methods, and you can pull impressive yields from a small space.
- Extreme natural branching – no extra topping needed
- No dedicated mother plant required – saves space and resources
- Perfect starting plant for SCROG and LST setups
- Genetically identical clones with improved growth traits
- A continuous grow cycle with no downtime
Understanding Re-Vegging: What Happens Biologically During Cannabis Monster Cropping?
To really understand cannabis monster cropping, it helps to look at the biology behind it. Cannabis uses light as the main trigger for switching between the vegetative stage and flowering. When photoperiod plants get more than 12 hours of darkness per day, flower induction kicks in — the plant releases plant hormones that start the flowering process. Reverse that process with an 18/6 light cycle, and the plant starts switching back.
During re-vegging, the plant gradually breaks down its flower-specific structures and fires up its vegetative growth programs again. The meristematic tissues (growth tips) wake up from their flowering rest and start growing vegetatively. Because the flowering stage sets up lots of dormant buds that would never have been activated during normal veg growth, re-vegging produces an unusually high number of side shoots all at once.
You can spot the first signs of successful re-vegging in the new leaves: at first they come in round and single-bladed, without the typical fingered shape of cannabis. That’s not a sign of a deficiency or disease – it’s a normal part of the transition. Only after a few weeks do the new leaves take on the familiar serrated shape again. At the same time, the growth tips multiply – and that’s what creates the signature “monster” look.
Nutrition and root health also play a big role in how well re-vegging works. Clones taken from underfed plants or with damaged cut sites tend to root much more poorly. Make sure your source plant is well fed during flowering – calcium deficiency in particular, or other nutrient deficiencies, can weaken your clones and seriously lower your success rate.
- Switching the light cycle to 18/6 triggers re-vegging
- Dormant flower buds turn into vegetative shoots
- The first new leaves are round and single-bladed – totally normal
- The source plant’s nutrition affects your success rate
- The process takes 3–6 weeks until the plant is fully back in veg
Avoiding Common Mistakes With Cannabis Monster Cropping
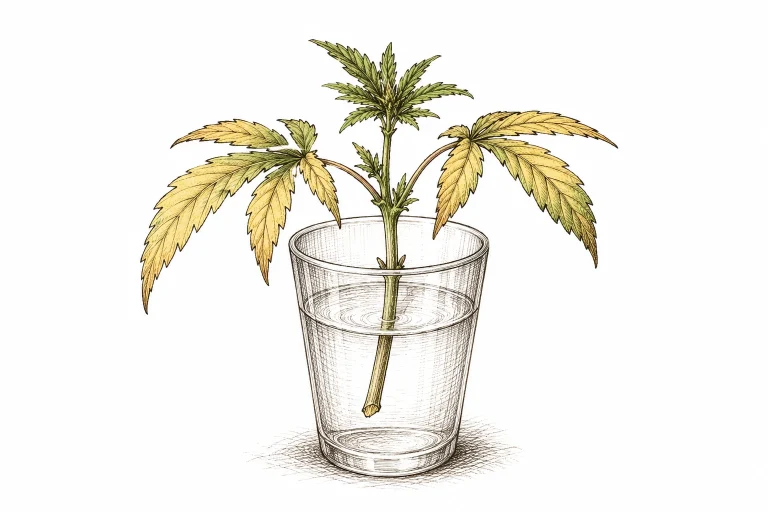
The most common monster cropping mistake is bad timing. If you take clones too early, in the first week of flower, the hormonal switch to flowering hasn’t gone far enough to create the signature “monster” effect. If you take them too late, from week 6 or 7 on, the plant has already put too much energy into bud development, and those clones root very poorly or not at all. The sweet spot is clearly between weeks 2 and 5.
Another common mistake is poor hygiene when cutting. Flowering plants are more sensitive than vegetative ones because their defenses are focused on producing buds. Always use sterile tools and disinfect your scissors or scalpel between cuts. Contamination can cause stem rot and kill the clone before it ever puts out roots.
Many growers also underestimate how long monster cropping clones take to root. Vegetative clones often root in 7–14 days, but flowering clones frequently need twice as long. If you give up after two weeks without visible roots, you may be tossing perfectly good plant material. Keep conditions steady and give your clones enough time. Humidity is often overlooked too: if the air is too dry, clones can wilt before they get a chance to root.
Finally, feeding too heavily during rooting is a common mistake. Clones need few or no extra nutrients in the first weeks. Too much can burn the root tips and slow rooting down a lot. Only start with a light feed once the first true vegetative leaves show up and the plant is actively growing. You’ll find more on this topic in our article on cannabis nutrient burn.
- Bad timing: cutting too early (wk 1) or too late (wk 6+)
- Poor hygiene when cutting – sterile tools are a must
- Not enough patience: rooting takes 2–4 weeks or longer
- Humidity too low during the rooting stage
- Avoid overfeeding in the early rooting stage
- Don’t mistake the re-vegging phase for disease or a deficiency
Combining Monster Cropping with Other Cannabis Techniques
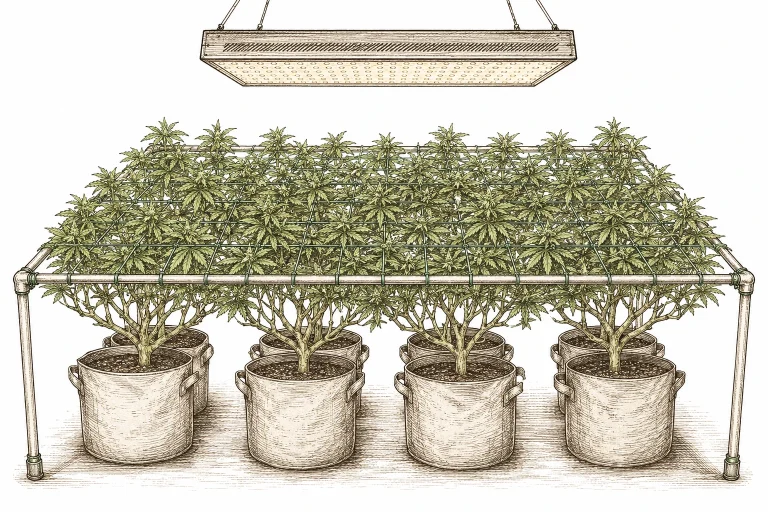
Monster cropping really shines when you combine it with other training techniques. The plant structure you get from re-vegging is practically made for a SCROG (screen of green) setup: all those equal-sized shoots are easy to weave through the net and give you an even canopy. Together, monster cropping and SCROG make one of the highest-yielding indoor setups out there. For a detailed walkthrough of this combo, check out our guide to cannabis SCROG.
LST (low stress training) also pairs really well with monster cropped plants. Since the plant naturally develops lots of growth tips on a flat plane, gentle tie-downs are often all it takes to create a perfectly even canopy. It’s less work than with conventionally grown plants, and the results are often better.
You can FIM or top monster cropped plants, but in most cases you don’t need to. Re-vegging already creates so many growth tips through natural branching that extra cuts can add stress without a matching payoff. If you still want to top, wait until the plant has fully re-vegged and grown at least 8–10 strong vegetative nodes.
Monster cropping is a great fit for perpetual grows – continuous cycles where you always have plants at different stages. By taking clones for the next round during every flowering cycle, you get a seamless rotation with no downtime and no separate mother plant room. That saves space, power and resources while keeping your genetics consistently high quality.
- SCROG + monster cropping = maximum indoor yield in a small space
- LST is perfect for the bushy monster growth pattern
- Topping usually isn’t needed – natural branching does the job
- Ideal for perpetual grows without a separate mother plant room
- Combine with defoliation during flower for better light penetration
Cannabis Monster Cropping Technique: Ideal Growing Conditions
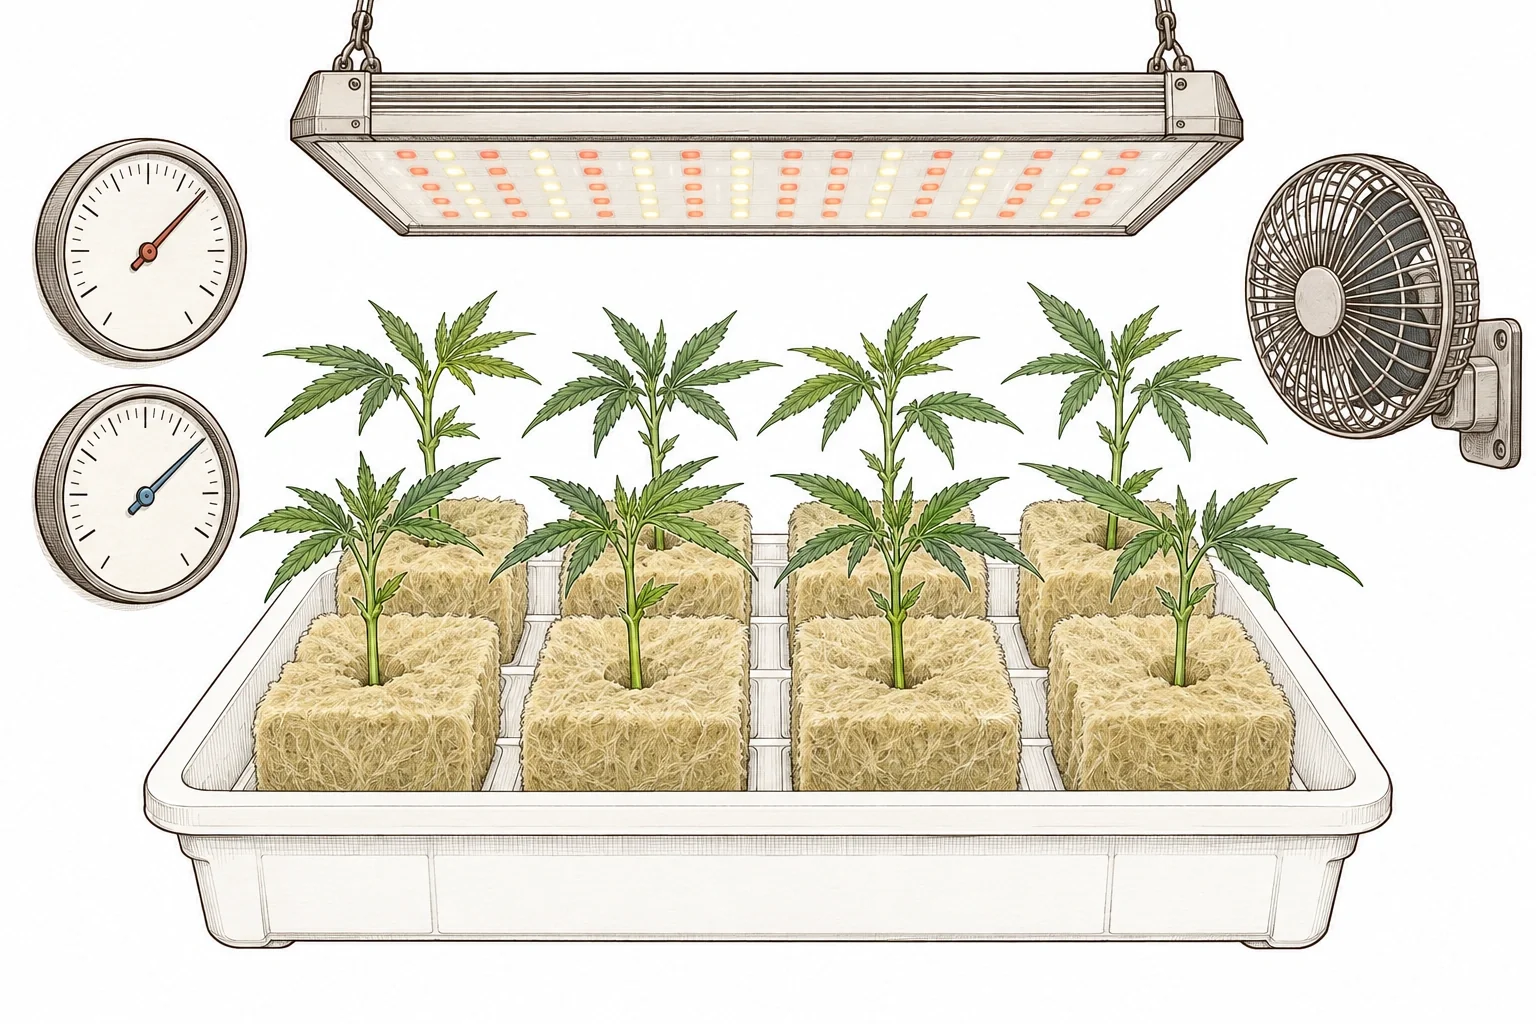
For monster cropping clones to root and reveg successfully, stable conditions are key. The ideal temperature during rooting is 72–79 °F (22–26 °C). Below 64 °F (18 °C), root growth can slow down a lot. Above 82 °F (28 °C), the risk of mold and root rot goes up. In cooler rooms, a heat mat under the rooting medium can help a lot.
Keep humidity (relative humidity, RH) at 70–80% while your clones root. Higher levels (above 85%) raise the risk of mold. Lower levels make the clones lose too much water through their leaves. A humidity dome or an upside-down plastic container over the clones creates a moist microclimate and cuts down on watering. Air it out briefly every day to keep mold away.
Turn the light intensity down on purpose during rooting. Strong light stresses a clone without roots, because it can’t pull in enough water to keep up. Low-output fluorescent tubes, T5 fixtures or LEDs dimmed and raised to max height work great. Once the first roots show up and new vegetative leaves start growing, you can raise the light intensity step by step. Make sure your grow room has good basic airflow, but no fan blowing straight at the clones. You’ll find more on this in our article on grow tent ventilation.
Don’t ignore the pH of your water when monster cropping. Keep the pH between 6.0 and 6.5 in soil, or 5.5–6.0 in rockwool and other inert media. The wrong pH can block nutrient uptake. Even with a healthy root system, your plant can then develop yellow leaves or stop growing. That’s why regular testing is a must.
- Temperature: 72–79 °F (22–26 °C) for best rooting
- Humidity: 70–80% during rooting
- Low light intensity for the first 2 weeks
- pH: 6.0–6.5 (soil) or 5.5–6.0 (inert media)
- No fan blowing directly on clones – create a humid microclimate
- Air out briefly every day to prevent mold
A related technique based on a similar idea is FIM, where you remove only part of the growing tip instead of the whole thing.
Frequently Asked Questions
Does monster cropping work with autoflowering strains?
No, monster cropping only works with photoperiod cannabis strains. Autoflowers bloom regardless of the light cycle, so switching to 18/6 won’t push them back into the vegetative stage. Reveg just isn’t possible with autos – it’s in their genetics.
Which week of flowering is best for monster cropping?
The sweet spot for monster cropping is between week 2 and week 5 of flowering. In weeks 2–3, the clones are still vigorous enough to root, but far enough into flower to give you the classic monster effect. From week 6 on, the success rate can drop noticeably.
How long does it take for monster cropping clones to root?
Monster cropping clones take a lot longer than clones from veg. Expect 2–4 weeks until you see roots. In some cases, it can take up to 5–6 weeks. Give your clones enough time, and don’t give up too early as long as they still look green and alive.
Why does my monster cropping clone have weird round leaves?
That’s totally normal! During reveg, the plant first grows round, often single-blade leaves without the typical cannabis finger shape. This is a sign that reveg is working, not a sign of disease or a deficiency. After a few weeks, the new leaves go back to their usual shape.
Can I combine monster cropping with SCROG or LST?
Yes, and it’s highly recommended! Thanks to their natural heavy branching, monster-cropped plants are perfect for SCROG and LST. You can easily weave all those even-sized branches through a SCROG net or tie them down with plant wire. That gives you an even canopy and helps you max out your yield.
Do I need a separate mother plant for monster cropping?
No – and that’s one of the biggest perks of monster cropping. You take clones straight from your flowering plants before you harvest them. That way you don’t need a separate mother tent, you save space and energy, and you can still produce genetically identical clones whenever you want.
What’s the difference between monster cropping and regular cloning?
With classic cloning, you take clones from plants in the vegetative stage. With monster cropping, you take them from flowering branches and then re-veg them. Re-vegging creates much bushier branching than regular clones, but rooting takes longer and needs more care.
The Bottom Line
For experienced growers, monster cropping is one of the most exciting ways to produce genetically identical clones with an unusual growth structure – no mother plant tent needed. Re-vegging flowering clones gives you plants with extreme branching that are ideal for SCROG, LST and perpetual grows. Once you’ve dialed in the key factors – timing, hygiene, humidity and patience – you’ll be rewarded with monster-cropped plants that can clearly beat conventional clones in branching and yield potential. Keep in mind: this technique only works with photoperiod strains, and it can take some practice before you get reliable results.
