

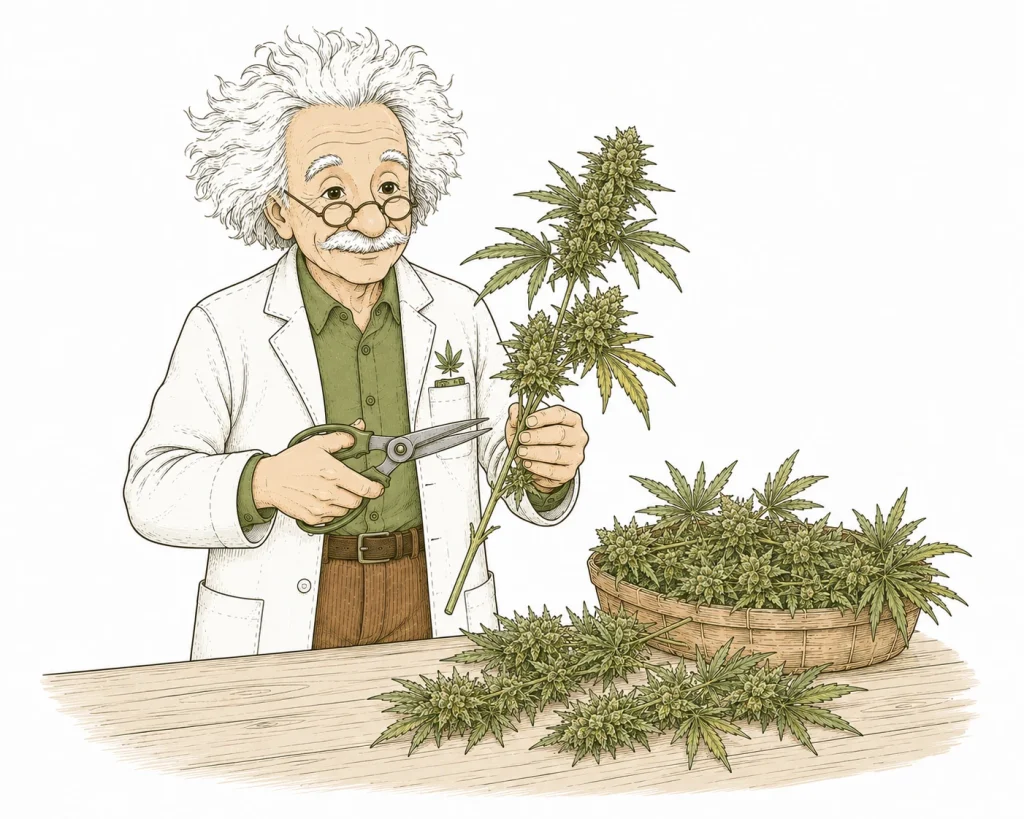
Knowing how to harvest cannabis step by step decides the quality, potency and aroma of your whole crop. Cut too early and you leave THC and terpenes on the table. Wait too long and you risk overripe buds with a heavy, sedating effect. In this guide I’ll show you exactly how to spot the perfect harvest window, get your plants ready like a pro and cut your buds cleanly and gently. Follow these steps and you’ll get the most out of months of hard work, whether you grow indoors or outdoors.
Why Harvest Timing Is Everything When You Harvest Cannabis
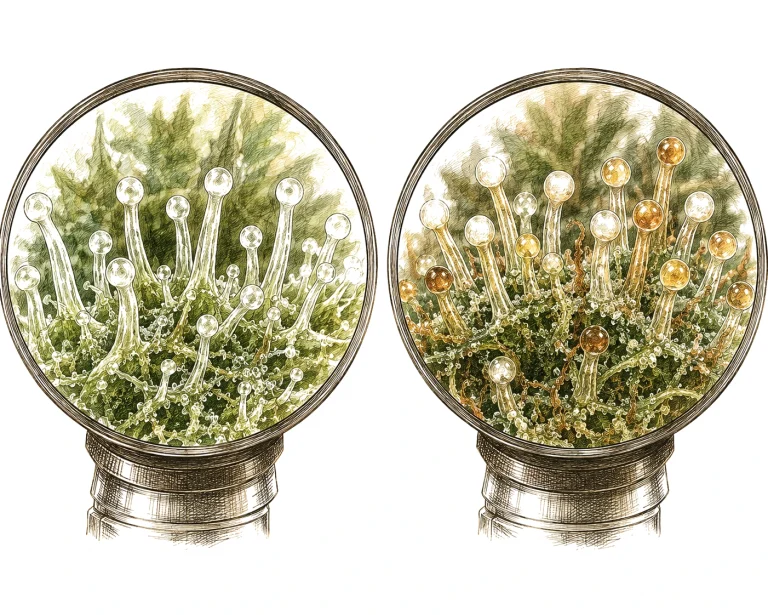
Harvest timing is the most important decision of your whole grow. Cannabis doesn’t build THC, CBD and terpenes evenly throughout the flowering stage. These compounds peak in a fairly short window. Hitting that window is part art, part science.
There are two main ways to pin down harvest time: checking the trichomes with a loupe or microscope, and reading the pistils (the hairs) on your buds. Both methods have their place, but only the trichome method gives you truly precise results.
Buds harvested too early are high in THCA that hasn’t fully developed yet, and they tend to give a light, somewhat incomplete effect. If you wait too long, THC can oxidize into CBN. The result: a heavy, sleepy effect and noticeably less potency. The ideal window usually lasts about five to ten days.
- Harvested too early: clear trichomes, light heady effect, lower potency
- Harvested at peak: cloudy white to slightly amber trichomes, maximum THC
- Harvested too late: mostly amber trichomes, high CBN content, sedating effect
- Breeder flowering times are only guidelines, so always check for yourself
- Genetics, light and room temperature all affect your actual harvest time
Reading Trichomes the Right Way: The Heart of Every Cannabis Harvest
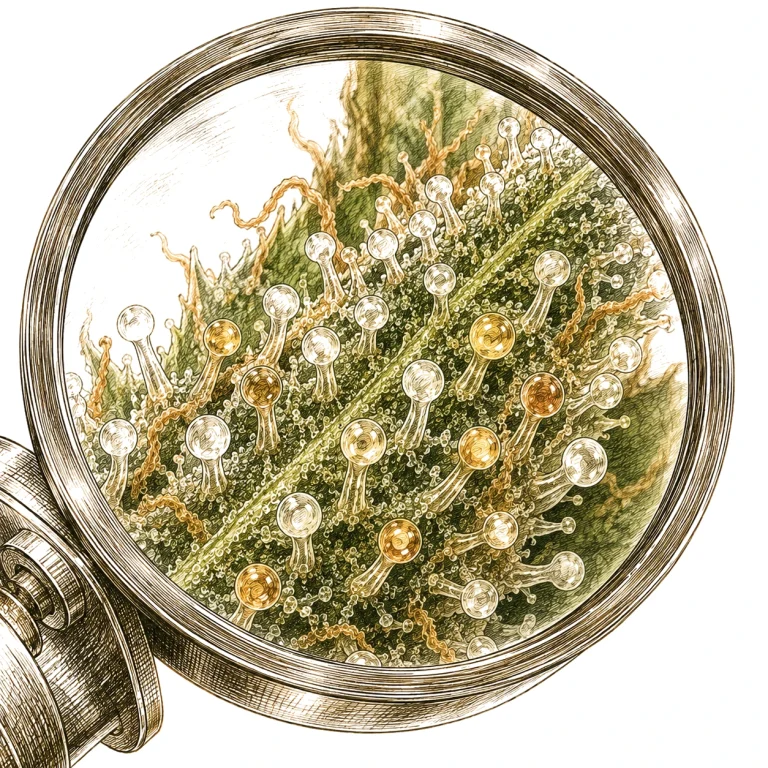
Trichomes are the tiny, mushroom-shaped resin glands on your buds and leaves. With a loupe of at least 30x magnification, or better yet a digital microscope at 60x, you can clearly see how ripe they are. A cheap jeweler’s loupe is all you need to get started.
Clear, glassy trichomes tell you the plant isn’t ready yet. THC is still building up, and harvesting now would be premature. Cloudy white, opaque trichomes mean THC is close to its peak. For many growers, that’s the sweet spot: the effect is energetic and clear-headed. Once the trichome heads turn amber, THC starts breaking down into CBN. Most growers consider about 10–20% amber trichomes mixed in with the cloudy ones ideal. That gives you a balanced, slightly relaxing effect.
Make sure you check the trichomes on the buds themselves, not on the sugar leaves. The leaves ripen faster and can trick you into harvesting too early. Take your time and check several spots on the plant, because ripeness can vary a bit from branch to branch. If you’re unsure, take a look at our plant diagnosis overview to rule out other possible stress factors.
- Clear trichomes: too early, let them keep growing
- Cloudy white trichomes: peak THC, ideal for an energetic effect
- 10–20% amber trichomes: balanced, slightly relaxing effect
- Over 50% amber: THC turns into CBN, giving a sedating, body-heavy effect
- Check trichomes on the buds, not on the leaves
- A digital microscope is recommended for an even more accurate read
Pistils as a Second Indicator: Understanding the Hair Method
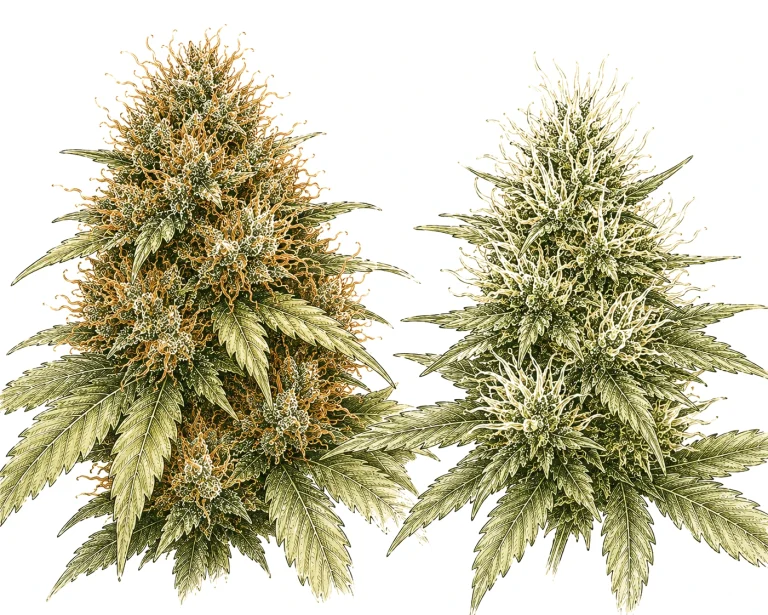
No loupe on hand? You can also estimate how ripe your plants are by looking at the pistils, the fine hairs on your buds. Early in flowering, these hairs are pure white and stick straight out. As the buds mature, they start to change color and curl inward.
As a rough rule of thumb: once 50–70 percent of the pistils have turned orange to dark red and curled inward, your plant is getting close to its ideal harvest time. At 70–90 percent darkened pistils, you’re right in the sweet spot of the harvest window. This method is less precise than checking trichomes, but it works fine as a first reference point.
Heads up: stress like pH problems, high heat or physical damage can make pistils change color early, even when the buds aren’t actually ripe. If you’re not sure whether your plant is stressed or truly ready, check out our article on heat stress and its effects, and always combine both methods.
- Less than 50% darkened: way too early to harvest
- 50–70% orange-red and curled in: harvest is getting close
- 70–90% darkened: ideal harvest window for most strains
- More than 90% darkened: your plant is starting to overripen
- Stress can throw off pistil color, so always confirm by checking the trichomes
Pre-Harvest Prep: What to Do in the Final Days
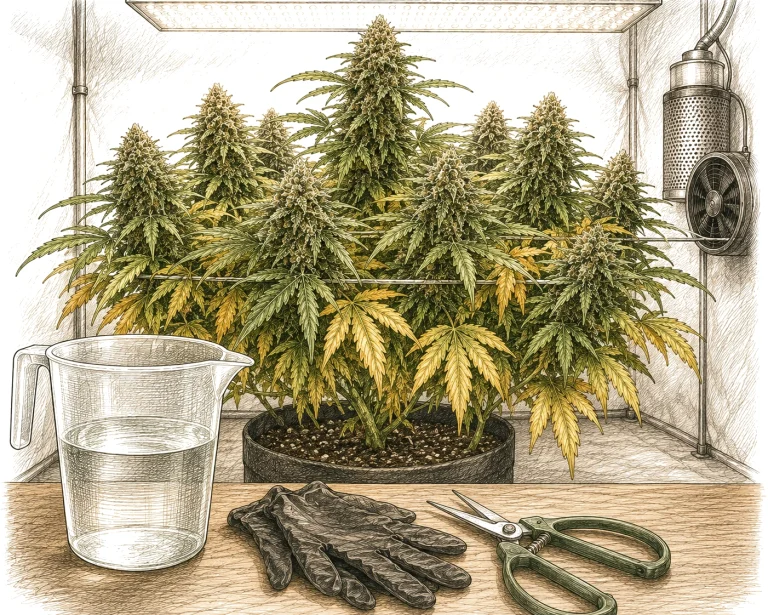
For top quality, harvest prep starts one to two weeks before chop day. The most important step is flushing: for the last seven to fourteen days, you give your plant plain water only, no nutrients. This lets the plant use up excess nutrient salts, which can noticeably improve aroma and smoothness. Want to learn more about nutrient problems and nutrient burn? You’ll find a detailed explanation here.
For the last 24 to 48 hours before harvest, many experienced growers recommend a full dark period. You leave the plant in total darkness. The idea: without light, more terpenes and resin get pushed to the surface of the buds. Science hasn’t fully proven this effect yet, but plenty of hands-on experience from the grower community backs it up.
The day before harvest, get your gear ready: sharp, disinfected pruning shears (bypass shears work best), disposable gloves, drying racks or hanging lines, a tray or clean work surface, and labeled paper bags or drying boxes. When you harvest cannabis, cleanliness is key – dirt and germs can lead to mold later on.
- 1–2 weeks before harvest: plain water only (flushing)
- 48 hours before harvest: optional dark period
- Disinfect your shears – isopropyl alcohol works great
- Wear disposable gloves – fingers can damage trichomes
- Set up a drying rack or hanging line
- Harvest in the morning – that’s when terpenes are most concentrated
Step by Step: How to Harvest Cannabis on Harvest Day
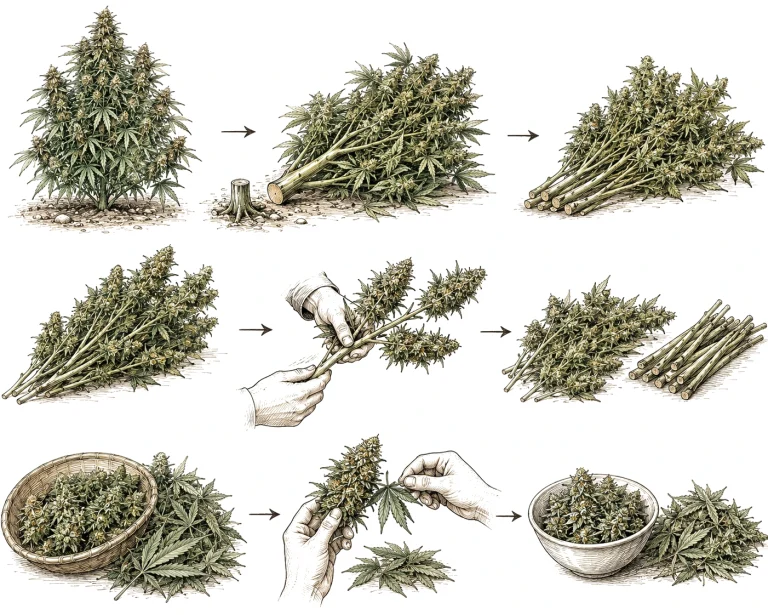
Now it’s go time. The actual harvest works much the same for indoor and outdoor grows, with a few differences in the details. Take the following steps calmly and with focus – rushing is the enemy of a good harvest. First, put on your gloves and disinfect your shears.
Step 1 – Chop the plant: Cut the plant right above the growing medium. You can also hang the whole plant by its stem and let it dry upside down – many growers prefer this method because the buds dry more slowly and evenly. Step 2 – Separate the branches: Cut off the main branches one by one and lay them out neatly on your work surface. That way you keep track of everything and can work on each branch separately. Step 3 – Rough trimming (wet trimming): Remove the big fan leaves with few or no trichomes right on the plant. These leaves have very little potency and can go straight into the compost or be used for extracts.
Step 4 – Fine trim or dry whole: Now you have two options. With wet trimming, you also cut off the smaller sugar leaves while the plant is still fresh. It’s easier and faster, but the buds can dry out a bit quicker. With dry trimming, you hang the branches untrimmed and only cut the sugar leaves after drying. It takes more skill, but it protects the trichomes better and often gives you more aromatic buds. Which method suits you best depends on your time and your gear.
Step 5 – Label and hang: Hang the trimmed branches or individual buds on your drying rack and label everything with the strain name and date. Make sure the buds don’t touch each other so air can circulate. Now the drying process begins – and it matters just as much as the harvest itself.
- Step 1: Cut the plant at the main stem or hang it upside down whole
- Step 2: Cut off the main branches one by one and lay them out neatly
- Step 3: Remove fan leaves without trichomes (rough trim)
- Step 4: Decide between wet trimming and dry trimming
- Step 5: Hang the buds, label them, and leave enough space between them
- Keep your work surface clean and collect any fallen trichomes as kief
- Clean your scissors regularly when they get sticky with resin
How to Harvest Cannabis: Indoor vs. Outdoor – Key Differences
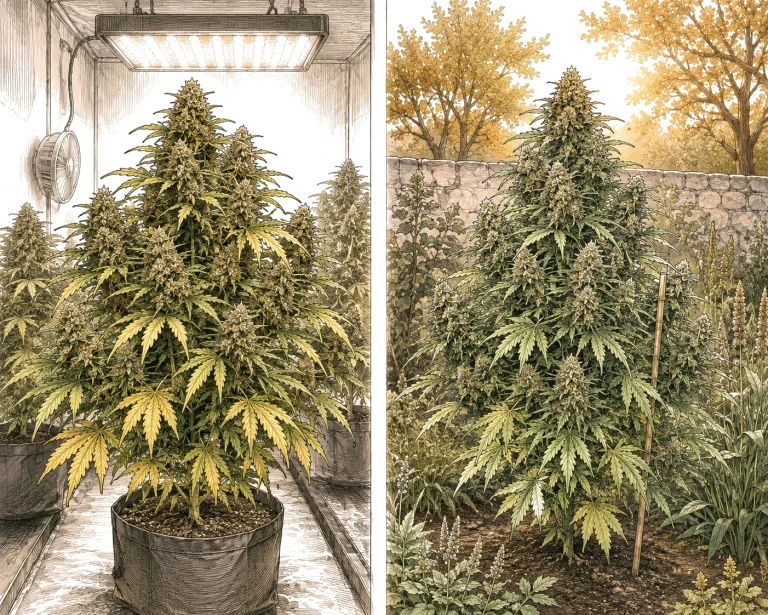
Indoors, you have full control over light, temperature and humidity. You can plan your harvest time almost to the day. Usually you give the go-ahead two to four days after the dark period starts, once you’ve confirmed the trichomes are ripe. Thanks to the controlled environment, indoor plants often dry more evenly. Make sure your drying room (German) is set to 59–68 °F (15–20 °C) and 55–60 % relative humidity (RH).
Outdoors, you depend a lot more on Mother Nature. Harvest day isn’t just about how ripe your plant is. The weather has a say too. Incoming rain or frost can force you to harvest early. Always plan in a buffer for outdoor grows and keep a close eye on the forecast. If several days of rain are coming, it can make sense to take your buds even if they’re not quite at peak ripeness. Mold is the biggest threat to an outdoor harvest. Learn more in our article on mold problems in outdoor plants.
One more key point for outdoor grows: not all branches on a plant ripen at the same time. The top buds that got more light are often done earlier than the lower ones. A staggered harvest, where you cut the ripe top branches first and let the lower branches grow a few more days, can noticeably boost your overall yield and quality.
- Indoor: harvest time can be planned precisely, even drying
- Outdoor: factor in the weather and the risk of mold
- Outdoor: a staggered harvest is recommended when ripening is uneven
- Ideal drying room conditions: 59–68 °F (15–20 °C), 55–60 % relative humidity
- If frost or days of rain are coming, harvest early rather than risk mold damage
- Autoflowering strains: judge harvest time by the trichomes, not the calendar
After the Harvest: Drying and Curing to Finish the Job
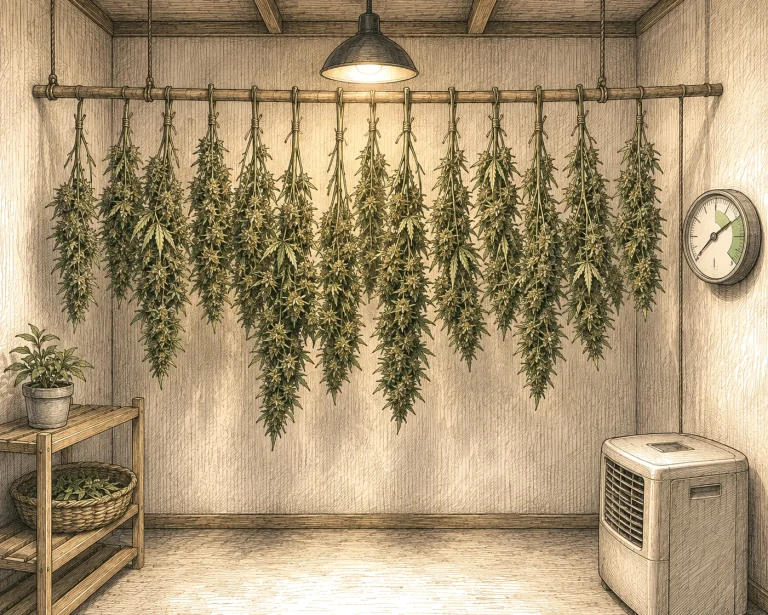
Harvesting is just the first step. Drying and curing matter just as much for the final quality of your buds. Once the buds are hanging, a slow drying process begins that should ideally take seven to fourteen days. If you dry too fast or too warm, you lose precious terpenes and your buds can end up tasting like hay.
As soon as the outer layer of the buds crackles when you squeeze lightly and the thin stems snap when you bend them (instead of just folding), the buds are dry enough for the next step. Now they go into airtight jars, and curing begins. During curing, a controlled fermentation takes place: the remaining moisture inside the buds spreads out evenly and unwanted compounds break down. The result: smoother smoke, a stronger aroma and a longer shelf life. For a detailed walkthrough of the curing process, I recommend reading the complete curing guide (German).
For the first two weeks, open the jars daily for 15–30 minutes to let moisture escape and prevent mold. After at least two weeks, a basic cure is done. If you can be patient, let your buds cure for four to eight weeks or longer. You’ll notice the jump in quality. Keep a hygrometer in the jar: the ideal reading is 58–62 % relative humidity.
- Drying time: 7–14 days at 59–68 °F (15–20 °C) and 50–60 % RH
- Readiness test: outer layer crackles, thin stem snaps when bent
- Cure in airtight jars for at least 2–4 weeks
- Open the jars daily for 15–30 minutes (burping)
- Ideal hygrometer reading in the jar: 58–62 % relative humidity
- A longer cure (6–8 weeks) improves aroma and smoke quality even more
- 2-way Boveda packs can help keep humidity steady
Common Cannabis Harvesting Mistakes and How to Avoid Them
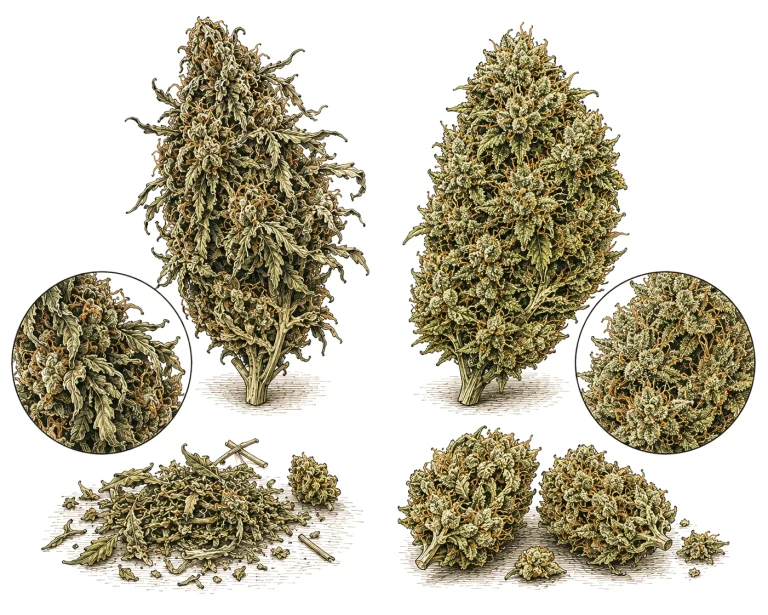
Harvest mistakes can wipe out months of hard work. The most common one is harvesting too early. Many beginners get impatient once the buds look big and smell great. But a quick look at the trichomes often tells a different story: not ready yet. Wait patiently until the trichomes show the right signs of ripeness. Impatience can cost you potency and quality.
Another classic mistake is drying too hot or with too much airflow. Pointing a fan straight at your buds? That’s a hard no. Terpenes are responsible for flavor and effect, and they evaporate quickly above 77 °F (25 °C). Always dry at moderate temperatures, with indirect airflow and enough humidity. The pH of your water during flushing matters too: if you get it wrong, you can leave nutrient salts in the growing medium that may affect the taste. Check out our guide to pH for cannabis.
Many growers also forget to clean their trimming scissors regularly. Resin-gunked scissors don’t cut cleanly and can crush trichomes instead of snipping neatly. Clean your scissors every few minutes with isopropyl alcohol. By the way, save the resin you scrape off: that’s high-quality scissor hash.
- Mistake 1: Harvesting too early: always check the trichomes
- Mistake 2: Drying too fast: no direct airflow on the buds
- Mistake 3: Drying above 77 °F (25 °C): terpene loss
- Mistake 4: Buds touching while drying: risk of mold
- Mistake 5: Working without gloves: fingerprints damage trichomes
- Mistake 6: Skipping curing: quality stays well below its potential
- Mistake 7: Never opening (burping) your jars during curing: moisture can lead to mold
Frequently Asked Questions
How can I tell when my cannabis plant is ready to harvest?
Before you start harvesting, here’s what you should know: the most reliable method is checking the trichomes under a loupe. Milky-white trichomes signal peak THC. Around 10–20 % amber trichomes marks the ideal, balanced harvest window, while 20–30 % gives you a more body-heavy effect. You can also watch the pistils: when 70–90 % of them are orange-red and curled in, that’s a good sign of ripeness.
What’s the difference between wet trimming and dry trimming?
With wet trimming, you cut off the sugar leaves right after harvest while the plant is still fresh. It’s easier and faster. With dry trimming, you hang the branches up untrimmed first and only trim after drying. Dry trimming protects the trichomes better and often gives you more aromatic buds, but it takes more patience and skill.
How long do I need to dry my cannabis buds?
Ideally seven to fourteen days at 59–68 °F (15–20 °C) and 55–60 % relative humidity (RH). Your buds are dry enough when the outer layer crackles when you squeeze it and thin stems snap instead of bending. Drying too fast can cause terpene loss and a hay-like taste.
Do I need to flush cannabis before harvest?
Flushing means watering with plain water only for the last 7–14 days. It’s a hot topic, but many experienced growers recommend it. The idea is to rinse excess nutrient salts out of the growing medium and the plant to improve smoothness and flavor. Make sure your water has the right pH while you do it.
Can I harvest all the buds on a plant at once?
Yes, that’s the most common way to harvest cannabis. But if you want maximum quality from outdoor plants or large indoor plants, you can do a staggered harvest: take the ripe top branches first and let the lower branches keep growing for a few more days. This can noticeably improve overall quality.
What should I do with the leaves I trim off after harvest?
The big fan leaves with few trichomes are great for compost or tea. The smaller sugar leaves with visible trichomes can be used to make hash, bubble hash, rosin or tinctures. Just freeze them and process them whenever you’re ready.
For more on proper harvest quality and preventing mold, check out LWG Bayern (German).
The Bottom Line
Following a careful, step-by-step harvest guide can make the difference between a mediocre harvest and an outstanding one. The keys are watching your trichomes closely, prepping right in the last days before harvest, and a gentle drying and curing process. Stick to these steps and you’ll be rewarded with maximum potency, intense aroma and excellent flavor. If you ran into problems during your grow that you haven’t solved yet, our Plant Diagnosis overview has in-depth help for all the common plant problems.
