

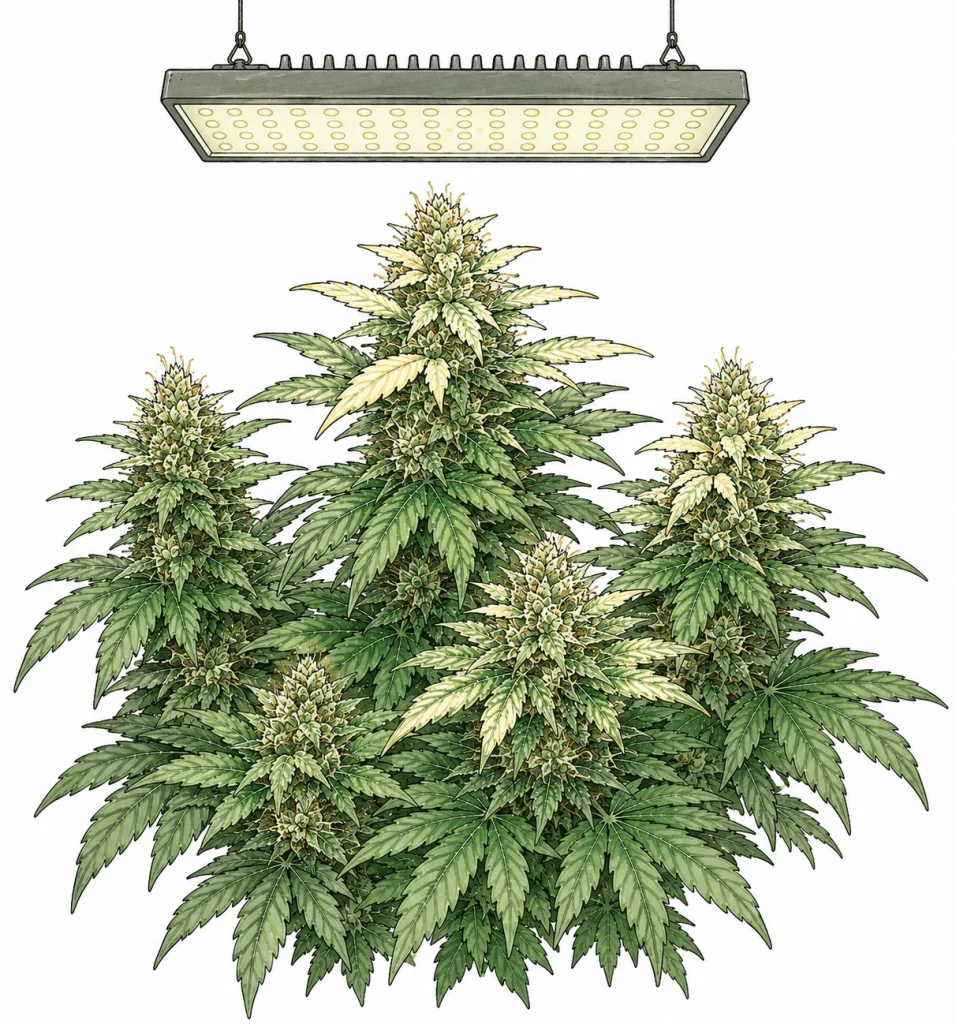
Knowing how to spot cannabis LED light burn is one of the most important skills an indoor grower can have – because modern LED lights are more intense than ever and can stress your plants faster than you think. At first glance, the symptoms look like a nutrient deficiency or nutrient burn, which is why many beginners lose valuable time and start the wrong treatment. Yet the fix is often simple: more distance between the light and the canopy. In this article, we’ll show you how to reliably recognize light burn, how to tell it apart from other problems and what you can do right away to save your harvest. The exact opposite – too little or too weak light – often causes a seedling to stretch and get leggy instead.
What Is Cannabis Light Burn and What Causes It?
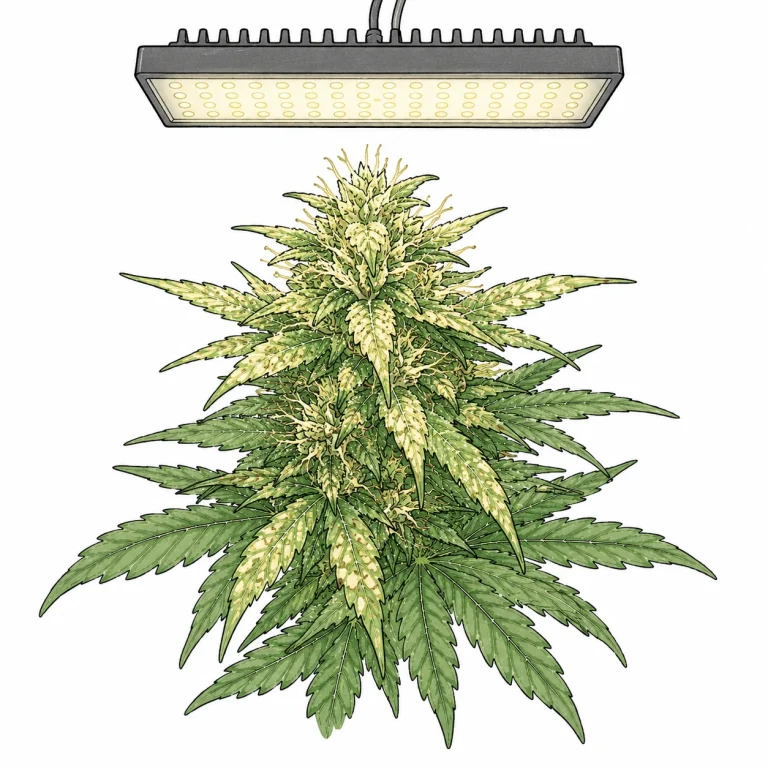
Light burn – also known as light stress – happens when your cannabis plant absorbs too much light energy at once. That sounds paradoxical at first, since plants need light to grow. But just as a ray of sunlight through a magnifying glass can set paper on fire, overly intense light overwhelms the plant’s photosynthetic machinery – the chloroplasts are permanently damaged.
Modern LED grow lights are the most common cause of this problem because they produce extremely high light intensities (PPFD levels) while giving off relatively little heat. Many growers know the rule of thumb from the HPS era, “the cooler the light, the closer it can hang” – so they hang their new 600-watt LED way too close to the tops of their plants. The result: the upper leaves burn, even though the light itself barely feels warm.
Besides the wrong distance, light intensity that’s too high over long light periods and an overly abrupt switch from weak to strong light also play a role. Plants need to adjust slowly to more light – a process growers call “light hardening.” If you run a new, stronger light at full power right away, you risk burns even at the correct distance.
- LED light hanging too close to the tops of the plants
- Light intensity (PPFD) too high for the current growth stage
- Abrupt switch to a stronger light without acclimation (more on light spectrum and light cycles)
- Light periods that are too long combined with high intensity
- Hot spots caused by poor light distribution
How to Spot Cannabis LED Light Burn: The Typical Symptoms
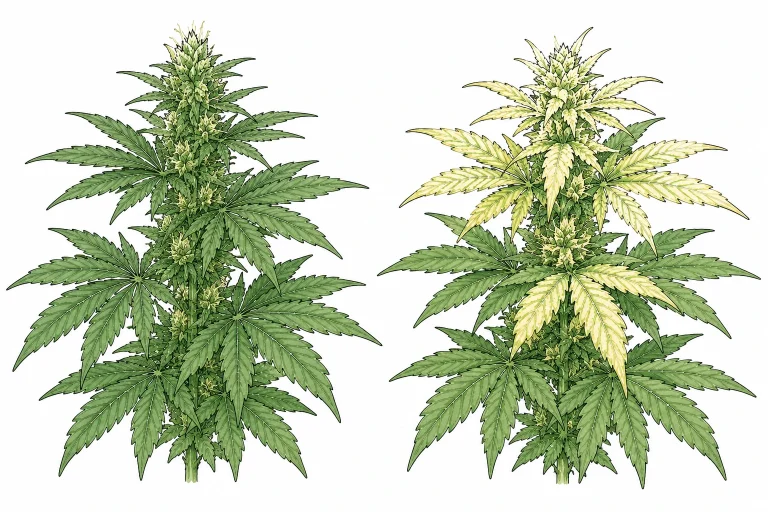
The most reliable sign of light burn is where it shows up: the damage appears almost exclusively on the leaves and buds closest to the light – in other words, the tops and growing tips of the plant. The lower leaves, on the other hand, stay completely healthy and green. This pattern is highly characteristic and sets light burn apart from most nutrient deficiencies, which often spread from the bottom up.
In terms of color, the damage first shows up as a pale yellow-green that develops into a strong yellow and eventually white. Unlike a nitrogen deficiency, where the yellow evenly covers the whole leaf, the discoloration from light burn often starts out patchy and concentrates on the leaf surfaces facing the light directly. In advanced stages, the edges can turn brown and crispy.
Another typical symptom is leaves curling or bending upward – the so-called “canoe effect.” The leaves curl upward as if they were trying to shield their surface from the intense light. This can also happen with heat stress – which often occurs together with light burn. If you also notice that the leaf tips point upward and the leaves look very stiff, that’s a strong sign of too much light.
In the flowering stage, light burn can be especially sneaky: the top sugar leaves bleach out, and the trichomes in the affected areas can be damaged. Some growers mistake heavily bleached buds for a sign of extreme potency – in reality, it’s usually light-damaged tissue that is mainly affected visually and doesn’t necessarily contain fewer active compounds than healthy material.
- Yellowish to white discoloration ONLY on the top leaves and tops
- Lower leaves stay healthy – a typical top-down pattern
- Leaves curl upward (canoe effect)
- Pale, washed-out color on the sides facing the light
- Brown, crispy edges in severe cases
- Bleaching of the sugar leaves and top bud sites in the flowering stage
- Symptoms don’t get better after feeding or a pH correction
How to Tell Cannabis LED Light Burn Apart from Nutrient Problems
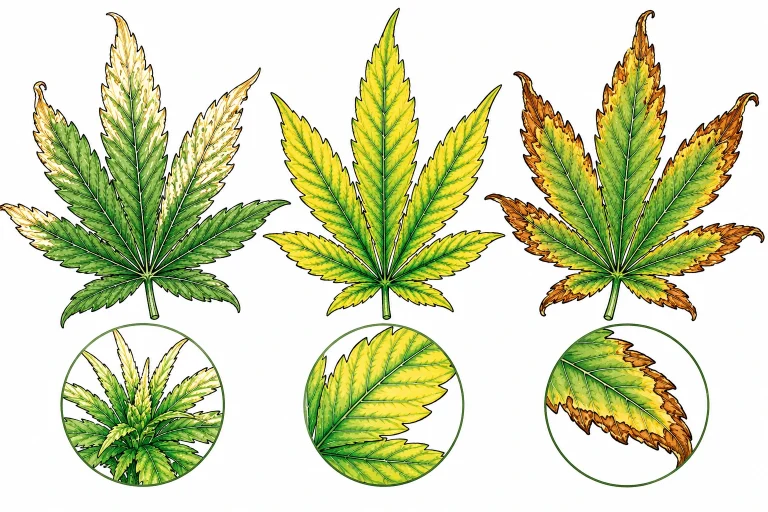
The most common mix-up is between light burn and nitrogen deficiency. Both cause yellow leaves, but the key difference is the direction: nitrogen deficiency starts on the oldest, lowest leaves and works its way up, because the plant breaks down nitrogen from old tissue to supply new growth. With light burn, it’s exactly the opposite – the damage starts at the very top. If your lower leaves are still perfectly healthy and deep green but the tops are fading, that clearly points to light burn.
Nutrient burn can also cause similar symptoms, but it typically shows up as brown leaf tips bending inward spread across the whole plant – not just at the tops. Nutrient burn also often comes with an overall dark green, almost blue-green color on the healthy parts of the leaves, which points to nitrogen toxicity. Learn more in our article on how to spot and fix cannabis nutrient burn.
A pH problem can also cause patchy, yellowish discoloration, but it’s usually scattered irregularly across the whole plant and often comes with spots or mosaic patterns, while light burn tends to affect the surfaces exposed to the light evenly. If you’re not sure whether pH plays a role, we recommend taking a look at our guide on how to adjust the pH for cannabis. A correct pH between 6.0 and 7.0 in the growing medium at least rules out this cause with certainty.
The most practical test to tell them apart: raise your light 4–6 in (10–15 cm) and watch the plant for three to five days. If it’s light burn, the new growth stops fading and the plant visibly recovers. Nutrient problems don’t respond to this at all or even get worse when the lower light levels reduce the rate of photosynthesis.
- Nitrogen deficiency: starts at the bottom; light burn: starts at the top
- Nutrient burn: brown tips everywhere + dark green leaves overall
- pH problem: irregular spots spread across the whole plant
- Potassium deficiency: brown edges + usually weak growth
- Light burn: stops after raising the light; deficiencies don’t
- Healthy lower leaves = strong sign of a light problem, not a nutrient problem
The Right LED Distance: How to Prevent Cannabis Light Burn
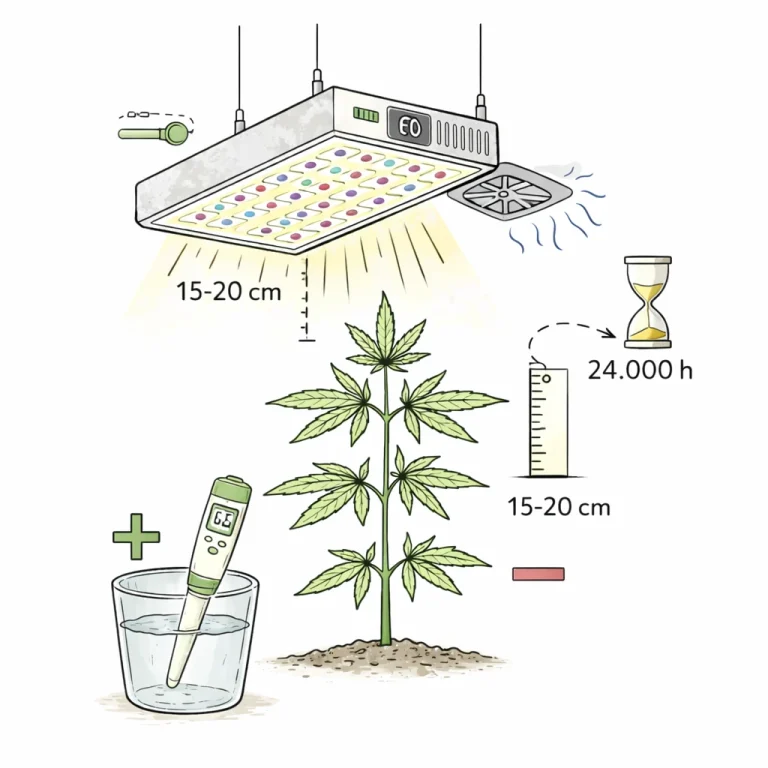
The optimal distance between your LED light and the tops of your plants depends on the wattage and type of your light. As a rough rule of thumb for standard quantum board LEDs: keep at least 16–24 in (40–60 cm) of distance in the vegetative stage and 12–20 in (30–50 cm) in the flowering stage. Cheaper LEDs with weak chips can hang closer, while high-power LEDs over 500 watts often need 24 in (60 cm) or more. Be sure to check the manual for your specific light, since manufacturers usually include PPFD charts. If you’re shopping for a new light anyway, you’ll find models with a dimmer and the right output in our LED grow light comparison.
PPFD (photosynthetic photon flux density) is the key metric: it describes how many photons hit a surface per second. For optimal growth, cannabis needs about 400–600 µmol/m²/s in the vegetative stage and 600–900 µmol/m²/s in the flowering stage. Levels above 1,000–1,200 µmol/m²/s overwhelm most strains and lead to photoinhibition – the plant mechanism in which excess light energy causes damage instead of driving photosynthesis.
Many modern LED lights come with a dimmer, which is one of the smartest features out there. Always start new plants or young clones at 50–60% of maximum output and increase the intensity by 10–15% each week so the plants can adjust. This gradual acclimation greatly reduces the risk of light burn, even when the distance is set perfectly.
Check the distance regularly during the flowering stage, because during the “stretch” – the growth spurt in the first two to three weeks of flowering – your plants can grow an inch or more per day. A plant that’s 16 in (40 cm) below the light today may be only 10 in (25 cm) away tomorrow. Measuring daily and adjusting as needed is a must during this critical phase.
- Vegetative stage: 16–24 in (40–60 cm) of distance depending on light output
- Flowering stage: 12–20 in (30–50 cm) of distance, check daily during the stretch
- Target PPFD in veg: 400–600 µmol/m²/s
- Target PPFD in flowering: 600–900 µmol/m²/s
- Use the dimmer: start at 50–60%, increase by 10–15% per week
- Follow the manufacturer’s specs and the light’s PPFD charts
- Keep an eye on the stretch every day and adjust the light accordingly
Cannabis Light Burn First Aid: What to Do When the Damage Is Already Done
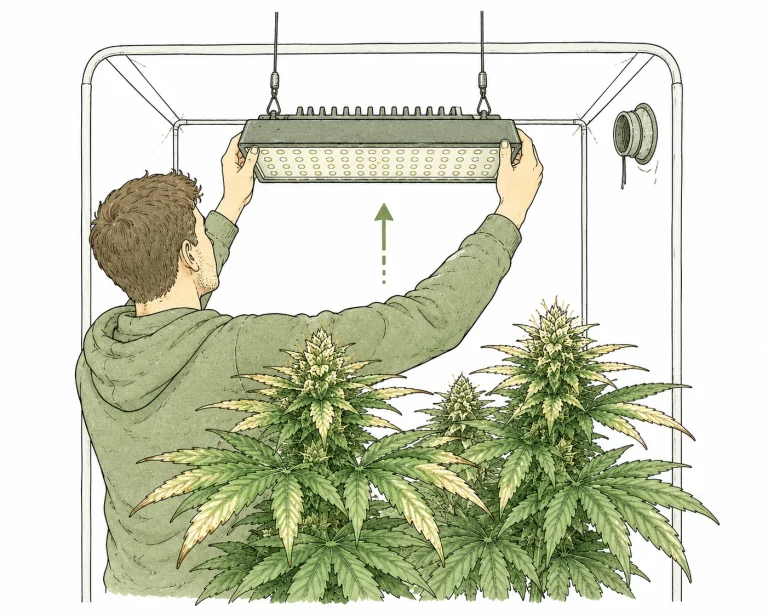
Once you’ve spotted light burn, the most important immediate fix is very simple: raise the light right away or turn down the intensity with the dimmer. Every hour you wait can cause more damage. Leaves that are already burned won’t recover – the damaged tissue stays yellow or white. But you can keep new leaves and, above all, your valuable buds from taking further damage.
Don’t remove badly damaged leaves completely right away unless they’re already dead and drying out. Lightly burned leaves can still contribute somewhat to photosynthesis and shouldn’t be taken off the plant as long as they still have green parts. Wait until the leaves have yellowed completely or dried up before you pluck them – unnecessary defoliation puts extra stress on the plant.
At the same time, check whether heat stress plays a role: measure the air temperature right at canopy height (not in the middle of the room). Temperatures above 82–86 °F (28–30 °C) make light burn symptoms considerably worse, even when the distance is right. That’s why good air circulation and adequate ventilation are just as important as the correct light distance. Also check out our detailed beginner’s guide to growing cannabis indoors – it covers all the environmental factors for a successful setup.
After you adjust the distance, the plant should noticeably recover within three to seven days – new growth comes in healthy green again, and the damage stops spreading. If symptoms keep appearing despite the correct distance and moderate temperatures, you should rule out nutrient deficiencies. A calcium deficiency, for example, can cause similar burn-like spots – learn more in our article how to quickly spot and fix calcium deficiency in cannabis.
- Raise the light right away or turn the dimmer down to 60–70%
- Measure the temperature at canopy height – aim for below 82 °F (28 °C)
- Improve air circulation, avoid drafts blowing directly on the buds
- Only remove lightly burned leaves once they’re completely dead
- Watch new growth after 3–7 days – if it recovers, light was the cause
- Don’t change your feeding as long as light is the likely cause
- Keep a log: write down distance, temperature and PPFD every day
Cannabis LED Light Burn in the Flowering Stage: How to Spot It and What to Do
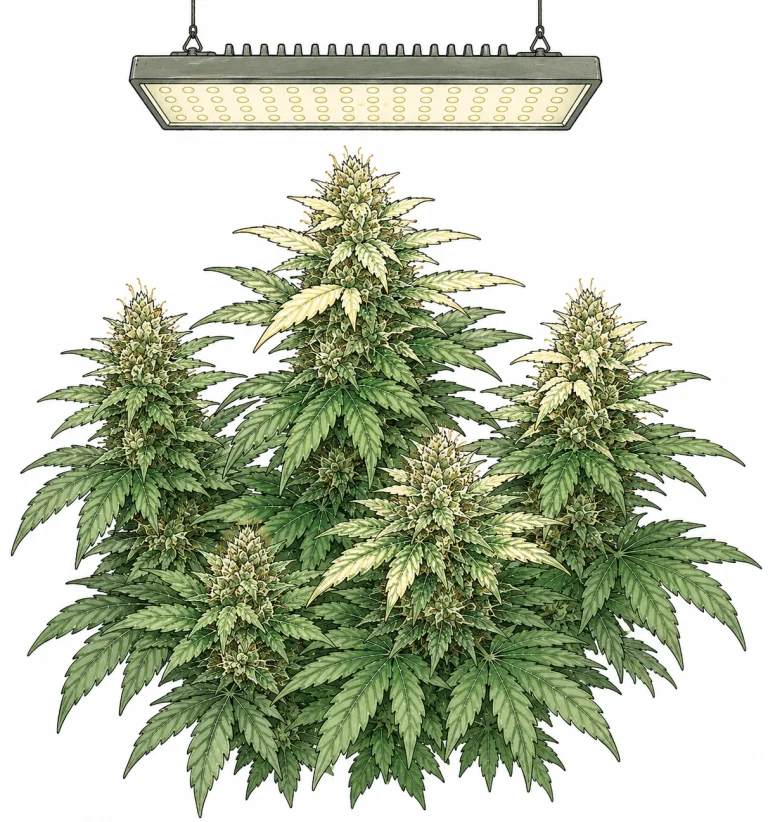
In the flowering stage, cannabis light burn from LEDs is especially tricky, because the plants need maximum light for resin production while also reacting more sensitively to too much light than in the vegetative stage. The balance between “enough light for big, resinous buds” and “not so much light that it burns” is narrower than many growers think. A professional PAR meter or PPFD meter is really worth the investment here.
If you notice light burn in the flowering stage and need to raise the light, make sure the whole canopy still gets enough light. One option is the so-called screen of green (SCROG), where you use a net to spread the plants out evenly and bring all the tops to the same height. That way you can keep the ideal light distance without burning some tops while others sit in the shade.
You’ll find our complete overview of all common indoor growing problems – from light burn to nutrient deficiencies – on the PlantClue Plant Diagnosis hub. There, structured diagnosis paths help you quickly narrow down your plant’s problem, even if you’re not sure whether light, nutrients or something else is the cause.
- Flowering stage: aim for a PPFD between 600–900 µmol/m²/s
- Use a PAR meter for accurate readings at the tops of the plants
- SCROG helps bring all the tops to an even height
- Watch out during the “stretch”: measure daily for 2–3 weeks after flowering starts
- Burned sugar leaves on buds reduce visual quality, not necessarily potency
- When in doubt: turn the dimmer down by 15% as a first step
In outdoor growing, similar damage shows up as sunburn – the cause is the same light intensity, only the light source is different.
Frequently Asked Questions
How can I tell the difference between cannabis light burn and nitrogen deficiency?
The most reliable clue is where the damage is. Light burn only affects the top leaves and growing tips – the parts of the plant closest to the light. Nitrogen deficiency, on the other hand, always starts on the oldest, lowest leaves and works its way up. If your lower leaves are still healthy and dark green, everything points to a light problem.
How far should my LED light be from my cannabis plants?
As a rule of thumb: 16–24 in (40–60 cm) in the vegetative stage and 12–20 in (30–50 cm) in the flowering stage for standard quantum board LEDs. High-power lights over 500 watts often need more distance. Be sure to check your light’s manual, since manufacturers include PPFD charts for different distances. The target PPFD in flowering is 700–900 µmol/m²/s.
Do leaves damaged by light burn recover?
No. Leaf tissue that’s already burned doesn’t regenerate – the yellow or white spots stay. What you can do is stop the damage from spreading. After you raise the light, new growth should come in healthy and green again within 3–7 days. You can remove damaged leaves once they’re completely dead.
Can light burn happen with LEDs that don’t get hot?
Yes, and that’s exactly what makes modern LED lights so tricky! Many growers think a cool light can’t cause burns. But light burn isn’t caused by heat from the light – it’s caused by overly intense light energy that overwhelms the plant’s photosynthetic machinery. A modern quantum board LED can produce extremely high PPFD levels that lead to burns even though its surface feels cool to the touch.
Should I also cut back on nutrients if my plant has light burn?
Not automatically. Once you’ve diagnosed light burn, change only the light distance at first and watch how the plant responds. Changing your feeding at the same time makes it harder to pin down the real cause. Only if there’s no improvement after 5–7 days at the correct distance should you check other factors such as pH or nutrient supply.
Cannabis leaves curling upward – is it always light burn?
Curled leaves are a strong sign of light or heat stress, but they’re not limited to light burn. Nutrient burn, underwatering and extreme heat can also cause the canoe effect. If the curling is concentrated on the top leaves and there’s no other damage visible lower on the plant, light burn is the most likely cause. Also check the temperature at canopy height – above 86 °F (30 °C) makes the problem worse.
On our Recommended Gear page we feature proven LED models with the right beam angle.
Is light stress the same as light burn on cannabis?
Yes, light stress and light scorch are just other names for the same light burn: overly intense light damages the chloroplasts in the top leaves and buds. Growers often use “light burn” and “light stress” interchangeably. The symptoms, causes and immediate fixes are the same as those described earlier in this article.
Conclusion
Spotting cannabis light burn from LEDs is easier than you might think once you know what to look for: fading, yellowish-white discoloration only on the top leaves and growing tips is the key symptom. With one simple comparison – are the lower leaves still healthy? – you can reliably tell light burn apart from nutrient deficiencies. The good news: in most cases, the problem can be solved with a single step – raise or dim the light. With the right PPFD, the correct distance and a slow acclimation to new lights, you’ll be able to avoid this problem completely in the future.
