

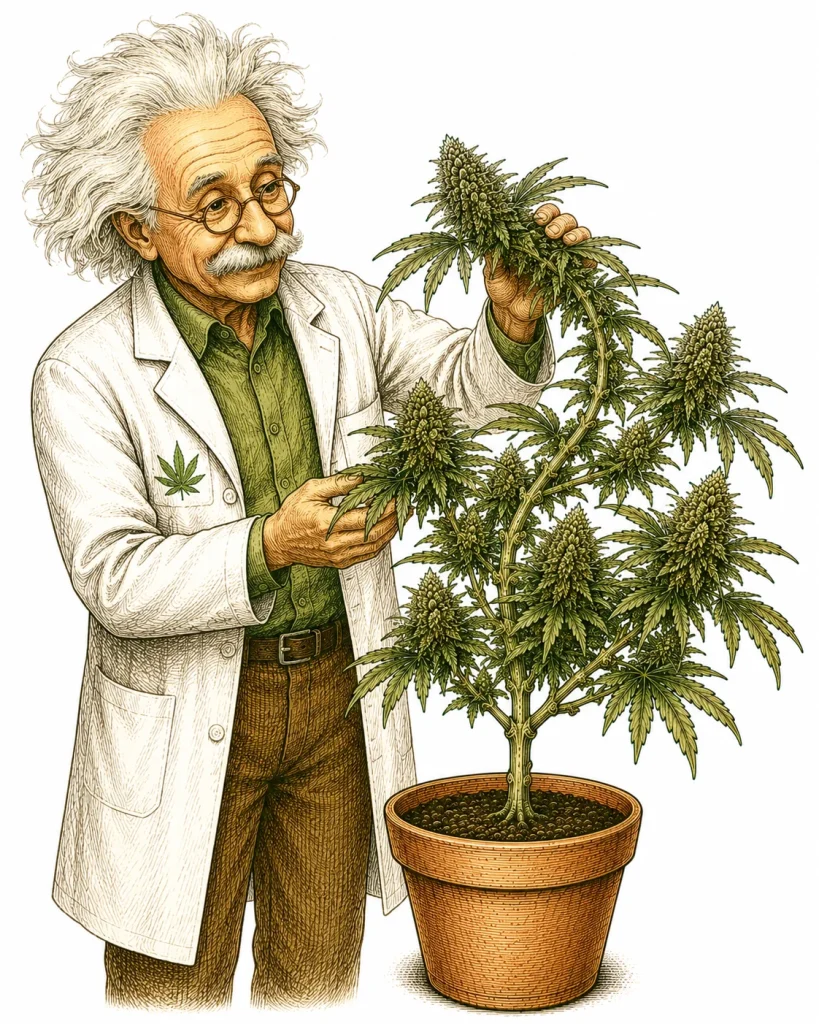
Cannabis supercropping is one of the most effective forms of HST (high stress training) for boosting your yield. With cannabis supercropping, you deliberately pinch and bend branches without breaking them all the way through. The plant responds with stronger growth and thicker knuckles. The technique works for experienced growers and for intermediate growers who want to take their plants to the next level. In this article, you’ll learn the right timing, the correct technique and the most common mistakes with cannabis supercropping HST.
What Is Cannabis Supercropping HST and How Does It Work?
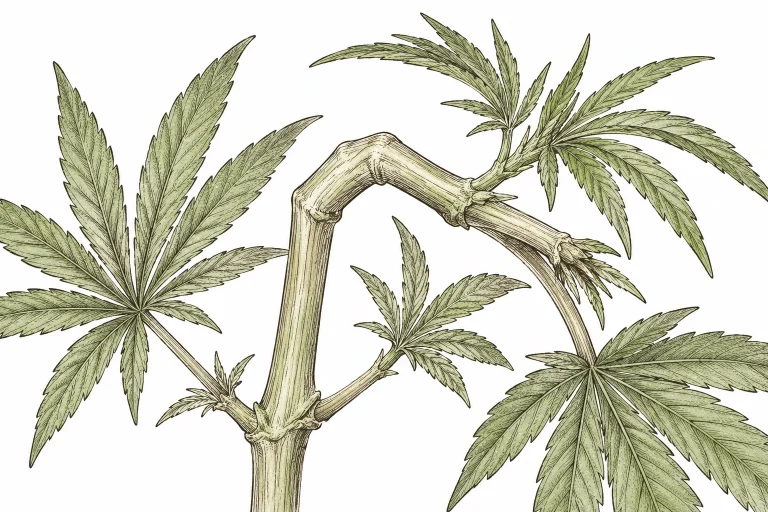
Cannabis supercropping falls under HST and is fundamentally different from gentler methods like LST (low stress training). With supercropping, you squeeze a branch between your thumb and index finger until the soft inner tissue (phloem and xylem) gives way, while the outer skin of the branch stays intact. Then you bend the branch into a horizontal or downward position without snapping it off.
The biology behind it is fascinating. The plant reacts to the stress by ramping up auxins and other growth hormones. At the bend, a so-called callus forms – a knobby knuckle of repair tissue. This callus stays thicker than the original branch for good and can improve the flow of water and nutrients. The result: a stronger, bushier plant with more cola sites and a more even canopy.
Another plus of supercropping is height control. In indoor growing especially, space under the light is often tight. By bending branches that shoot up too high, you can create an even canopy where every bud site sits the same distance from the light. That gets the most out of your light and helps you grow evenly sized buds on every branch.
- Inner branch tissue gets crushed, the outer skin stays intact
- A callus forms at the bend and makes the branch permanently stronger
- Increased hormone production drives bushier growth
- Even canopy through targeted height control
- Better nutrient flow once the branch has healed
Cannabis Supercropping HST: The Right Timing
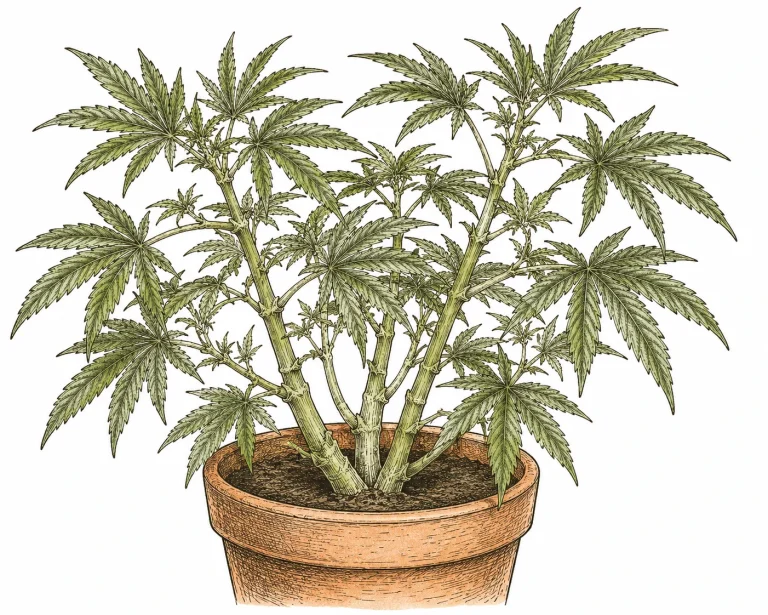
The best time for cannabis supercropping HST is late in the vegetative stage, about 1–2 weeks before you flip to a 12/12 light cycle. At that point, branches are still flexible enough to bend without snapping right away. At the same time, the plant has built up enough mass to handle the stress and fully recover before flowering.
In early veg, branches are often too young and thin. They can snap clean through, leaving wounds that invite infections. Very woody stems on older plants, on the other hand, are too stiff and tend to splinter instead of bending. The sweet spot is when branches are about 1/8–5/16 in (3–8 mm) thick and feel slightly soft between your thumb and index finger without giving way right away.
Supercropping in flower is possible, but only very early – in the first 1–2 weeks of the flowering stage, while the plant is still actively growing (the so-called flower stretch). Later in flower, you risk serious stress that can slow bud development and, in the worst case, turn your plant hermaphrodite. Be extra careful with autoflowering strains: their fixed life cycle leaves them very little time to recover, so supercropping autos is only recommended if you have plenty of experience.
- Ideal: 1–2 weeks before the flip to 12/12
- Branches should be about 1/8–5/16 in (3–8 mm) thick
- Early flower (weeks 1–2) still possible, but go easy
- Late flower: avoid supercropping completely
- Autoflowering strains: recommended for experienced growers only
Step-by-Step Guide: How to Supercrop the Right Way

Before you start supercropping, make sure your hands are clean and your scissors or tape are within reach. Have tools wiped down with rubbing alcohol and something to secure the branch (like garden tie tape or plain tape) ready to go. First, pick a branch that’s growing too tall or that you want to move into a horizontal position.
Step 1 – Pick the right spot: Find a spot on the branch between two nodes (the internode). This section is softer than the nodes themselves and bends more easily. Hold the lower part of the branch firmly with one hand so you don’t put any strain on the roots. Step 2 – Squeeze: Wrap the thumb and index finger of your other hand around the branch and press gently but firmly while rolling the branch back and forth. You’ll feel the inner tissue give way. A slight crunch is normal and exactly what you want. Step 3 – Bend: Slowly bend the branch in the direction you want until it stays in its new position. Ideally, the angle should be between 90 and 120 degrees from the original position.
Step 4 – Secure: If the branch won’t stay in place on its own, tie it to a stake or the pot with plant tie tape or plant clips. Don’t tie it too tight, or you can cut off the nutrient flow. Step 5 – Watch: Over the next 24–48 hours, the plant may look a little droopy at the bend. That’s normal. After 3–7 days, a callus (knuckle) starts to form and the branch perks back up. If the branch does snap all the way through, wrap the break tightly with tape right away. In many cases it heals anyway.
Experienced growers often combine supercropping with other techniques. Pairing it with cannabis topping and LST can give you an extremely wide, bushy canopy. Just make sure the plant gets enough recovery time between stress events so you don’t overload it.
- Disinfect your hands and tools before you start
- Bend in the internode, not at the node
- Squeeze gently until the inner tissue gives way (a soft crunch)
- Slowly bend the branch to 90–120 degrees and secure it
- If it snaps all the way: stabilize it with tape right away
- Drooping for 24–48 hours is normal and no cause for alarm
Combining Supercropping With Other HST: The Best Techniques at a Glance
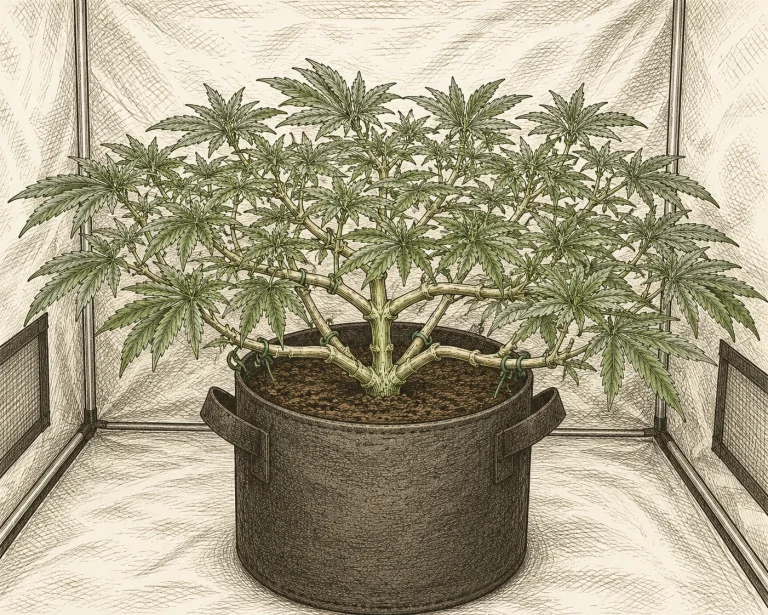
Supercropping really shines when you combine it with other training techniques. The best-known combo is supercropping plus SCROG (screen of green). First, you use supercropping to move the branches into a horizontal position. Then you weave them through trellis netting, which gives you a perfectly even canopy. The result: lots of equally sized colas at the same height, so you get the most out of your light.
Pairing it with topping is also very popular. Topping removes the main growing tip, which leads to two new main colas. Combine that with supercropping on the side branches and you get a seriously bushy plant with lots of strong cola sites. The difference from topping alone: supercropping lets you actively strengthen and position the side branches too, without removing any more plant material.
FIMing (Fuck I Missed) is another HST technique that pairs well with supercropping. FIMing creates several new growing tips, and supercropping helps those new shoots grow strong and even. If you’re going for a compact, dense canopy indoors, this combo is ideal. Also check out our overview of cannabis growing techniques for a complete rundown of all training methods.
- Supercropping + SCROG: the most even canopy possible
- Supercropping + topping: lots of strong cola sites
- Supercropping + FIMing: a bushy plant with multiple tops
- Supercropping + LST: gentle positioning after bending
- Always plan recovery time between stress events
Common Cannabis Supercropping Mistakes and How to Avoid Them
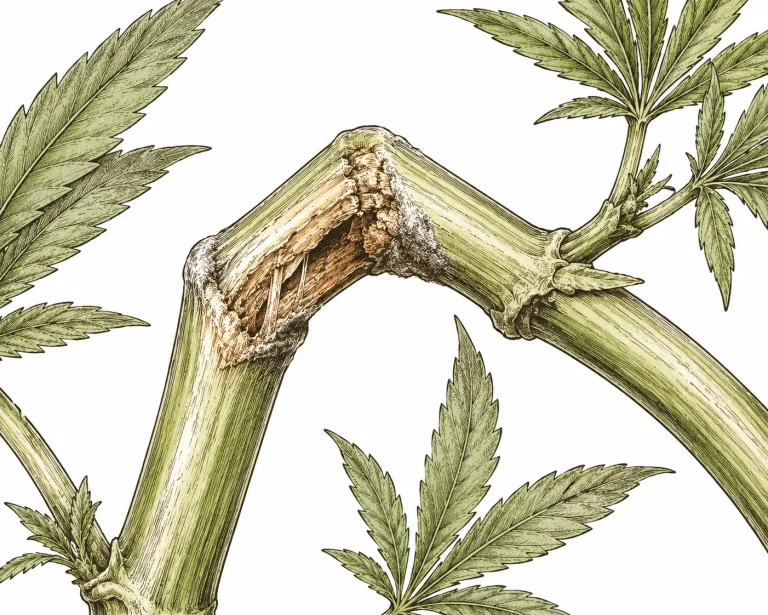
The most common supercropping mistake is snapping the branch clean through. That usually happens when you apply too much force at once, or when the branch is too old and woody. A fully broken branch loses its nutrient flow right away and can die if you don’t support and secure it immediately. Clean tape can often save the day: wrap the break completely and brace the branch with a small stake. In many cases it heals fully and can even form an extra-strong callus.
Another common mistake is supercropping too late in flowering. Stress in mid or late flower can seriously hurt bud development and, in the worst case, trigger hermaphroditism. Also make sure your plant is well cared for after supercropping: stress briefly raises its need for water and nutrients. Check the pH for cannabis and make sure the roots can take up all the nutrients they need.
Some growers make the mistake of working too many branches at once. Start with 1–3 branches per session and watch how your plant responds. If it shows strong stress signs like lasting wilting, deformed leaves or stalled growth, dial back the intensity and give the plant more recovery time. Keep in mind that supercropping works much better on healthy, well-fed plants. Watering cannabis the right way and balanced feeding are the foundation.
- Too much force → branch snaps completely: tape it up right away
- Avoid supercropping late in flowering
- Don’t work too many branches at once
- Keep an eye on water and nutrient needs afterward
- Check pH so nutrient uptake stays on track
- Only use HST (high stress training) on healthy, well-fed plants
Supercropping Different Cannabis Strains: What You Need to Know
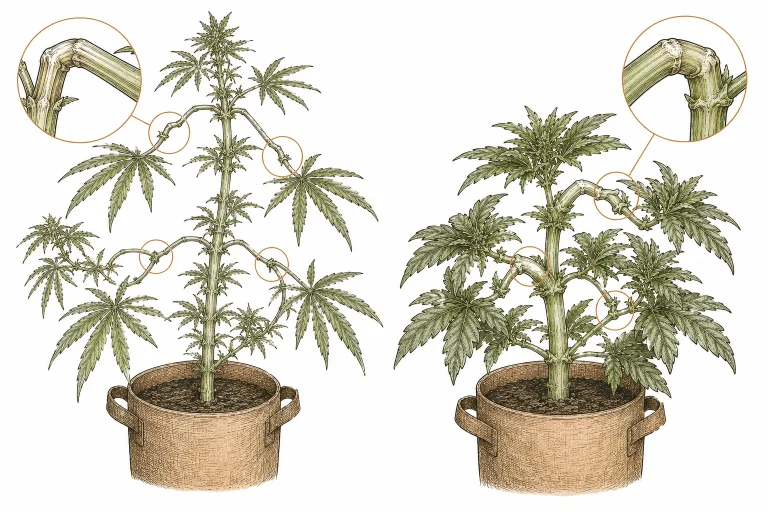
Not every cannabis strain responds the same way to supercropping. Sativa-dominant strains, which tend to grow tall anyway, benefit the most from this technique. Their branches are often longer and softer, which makes them easier to bend. Supercropping helps you keep the typical sativa flower stretch in check without cutting the plant back. That’s a huge advantage in indoor growing when headroom is limited.
Indica-dominant strains are naturally more compact and bushy. Their branches are shorter and usually stiffer, which makes supercropping a bit trickier. Still, indicas benefit too: by bending the fastest-growing branches on purpose, you can build a more even canopy and get light down into the lower parts of the plant. Hybrids fall somewhere in between depending on their genetics and usually take training very well.
With autoflowering strains, be extremely careful. Autoflowers bloom regardless of the light cycle and have a fixed life cycle of usually 70–90 days, so they have very little time to recover from stress. If you supercrop autoflowers at all, do it only in the early vegetative stage (weeks 2–3), and only if you’re an experienced grower. Much gentler LST (low stress training) is a good alternative here. To give any training technique the best foundation, you should also know how to feed cannabis the right way so you avoid stress from nutrient deficiencies.
- Sativa: Benefits a lot, branches are soft and bend easily
- Indica: Shorter, stiffer branches – takes a bit more force
- Hybrids: Train well, depending on genetics
- Autoflower: Only very early and only with experience
- All strains: A healthy starting point is key
Cannabis Supercropping HST: Aftercare and Healing
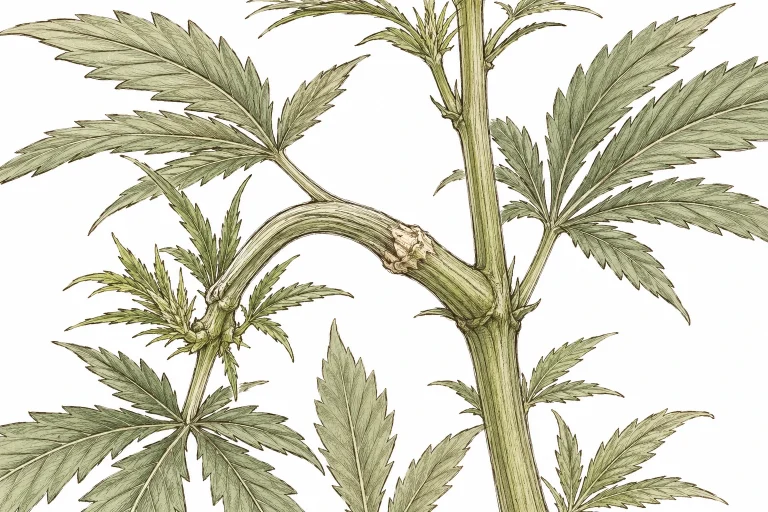
The healing phase after supercropping is key to making the technique work. For the first 24–48 hours, the plant will often look a little droopy. That’s a normal stress response, not a sign you did something wrong. Make sure the plant gets enough water during this time, but avoid overwatering. The roots need oxygen to support the healing process.
After 3–5 days, the callus starts to grow. You’ll spot it as a small, knobby swelling at the bend. This swelling shows that the plant is repairing the damage and permanently strengthening the branch. After about 7–10 days, the callus is fully formed and the branch is sturdier than before. Once the branch holds the position you want on its own, you can remove the support.
While your plant heals, keep a close eye out for signs of nutrient deficiencies or nutrient burn. Stress symptoms like yellow leaves can come from the training itself or from a feeding problem. Check the leaves and your cannabis pH regularly so you can spot deficiencies early. A stable environment with steady temperatures, good ventilation and the right light helps your plant bounce back quickly after supercropping.
- 24–48 hours of drooping after supercropping is normal
- Water enough, but don’t let the roots get waterlogged
- A callus (knuckle) usually shows up after 3–5 days
- Remove the tape or support after 7–10 days
- Check pH and feeding regularly
- Stable growing conditions help speed up healing
Since this technique injures the plant on purpose, the line between healthy recovery and real training stress can be blurry. Read up on how to tell the difference.
Frequently Asked Questions
What’s the difference between supercropping and LST?
Supercropping is an HST (high stress training) method: you deliberately crush the inner tissue of a branch and bend it over. LST (low stress training), on the other hand, gently bends branches down with ties without damaging any tissue. Supercropping works better for building a callus and triggering a hormone response, but it takes more experience and can backfire if you do it wrong.
Can I supercrop during flowering?
Yes, but only in the first 1–2 weeks of flowering, while the plant is still growing actively (the flower stretch). From week 3 of flowering on, skip supercropping. The stress can slow down bud development and, in the worst case, cause your plant to turn hermaphrodite.
What do I do if a branch snaps completely while supercropping?
Don’t panic! Wrap the break tightly with tape or plant tape right away and support the branch with a stake. In many cases the branch heals completely, as long as the outer skin is still connected. Leave the tape on for at least 10–14 days and keep an eye on the healing. Often you’ll even get an extra-strong knuckle at that spot.
How often can I supercrop a plant?
In theory, you can supercrop each branch more than once, as long as you give your plant enough time to recover. In practice, growers usually work on no more than 3–5 branches per session. Start with just a few branches and watch how your plant reacts before you plan more. Give it at least 5–7 days to recover between sessions.
Does supercropping work on autoflowers?
You can supercrop autoflowers, but their short life cycle makes it very risky. If you do it at all, only do it early in the vegetative stage (weeks 2–3) and only on 1–2 branches at a time. Supercropping autoflowering strains isn’t a good idea for beginners. Gentler LST is the better choice for autoflowers.
How can I tell if supercropping worked?
Success shows up as callus formation: after 3–7 days, a visible knuckle forms at the bend. The plant bounces back from the droop and starts growing actively again. Once it heals, the treated branch is thicker and stronger than before. In flower, you should see especially fat, resin-packed colas at these spots.
Final Thoughts
Supercropping is a powerful HST technique. Done right, it can give you noticeably bigger yields and sturdier plants. The keys are good timing, clean technique and solid aftercare while the branches heal. Start with a few branches, watch closely how your plant reacts, and dial up the intensity as you gain experience. Combine it with other techniques like topping or SCROG (screen of green), and you can unlock your plants’ full potential and get pro-level results.
