

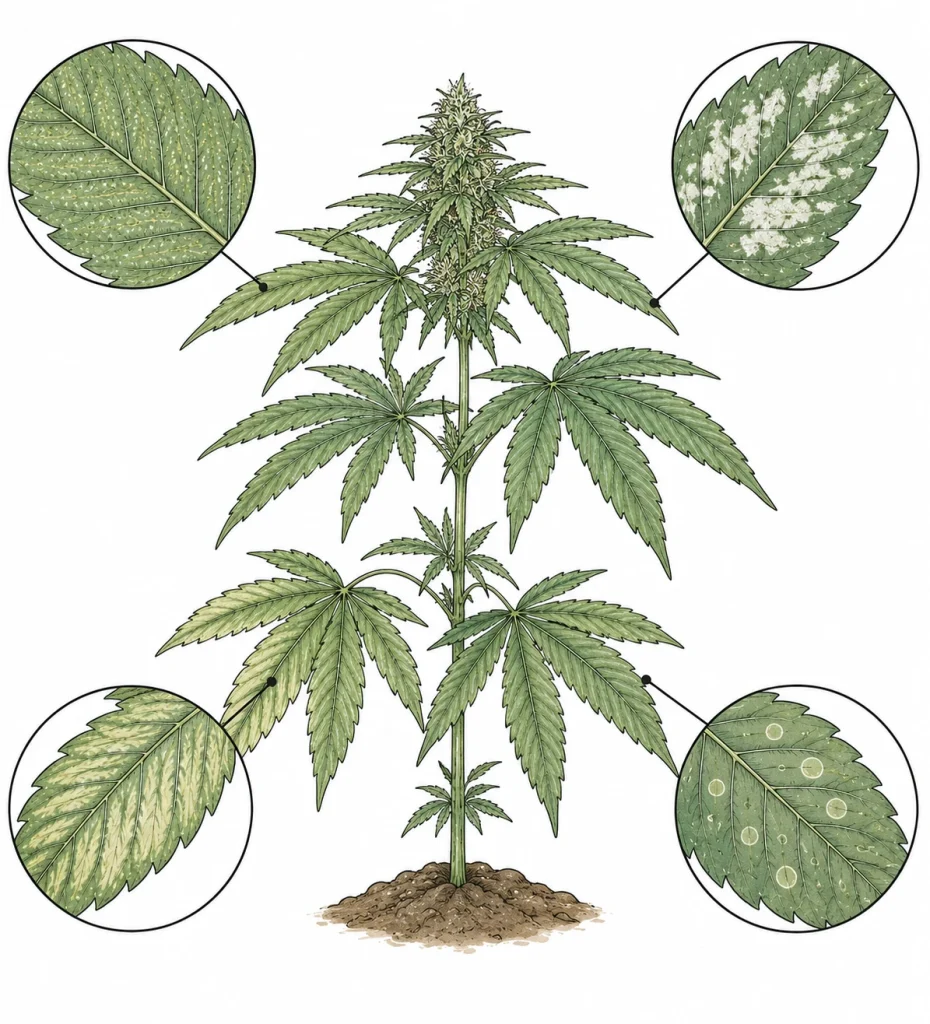
White spots on cannabis leaves are one of the most common warning signs growers run into, indoors and outdoors. They’re also one of the most often misread. Those tiny pale specks can point to very different problems: spider mites, powdery mildew, nutrient deficiencies, or even spray damage from misting too aggressively. If you don’t know the cause, it’s easy to grab the wrong fix and make things worse. In this article, you’ll learn step by step how to tell the most common culprits apart and how to save your plant with the right moves. For a full overview of all possible symptoms, check out the Plant Diagnosis overview on PlantClue.
White Spots on Cannabis Leaves: The Four Most Common Causes at a Glance
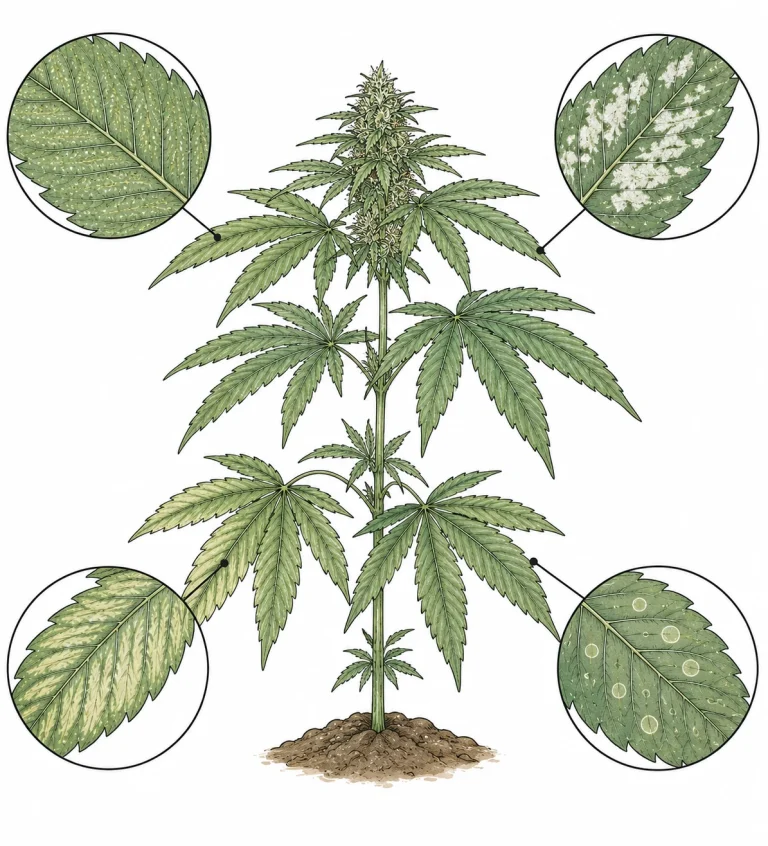
Before you start treating anything, you need to know what you’re dealing with. At first glance, white spots on cannabis leaves all look pretty similar. Take a closer look, though, and the differences are clear. The key question: Are the spots on the top of the leaf, the underside, or both? Do they look like a fine white powder, tiny translucent specks, or sharply defined round spots? Getting this right is what makes or breaks your diagnosis.
The four most common causes of white spots on cannabis leaves are spider mites (tiny feeding marks on the top of the leaf), powdery mildew (a white, powdery coating), thrips (silvery-white patches with droppings), and water spots or spray damage from hard water or badly applied foliar feed. In rare cases, a magnesium deficiency or an off pH can also cause light gray discoloration that gets mistaken for white spots.
- Spider mites: Small pale specks on the top of the leaf, fine webbing on the underside
- Powdery mildew: White, powdery coating that wipes off and spreads fast
- Thrips: Shiny silvery, irregular patches, often with tiny black droppings
- Water spots: Round white rings after misting under the lights
- pH-related nutrient deficiency: More of a diffuse fading, no sharply defined spots
How to Spot Spider Mites as the Cause of White Spots on Cannabis
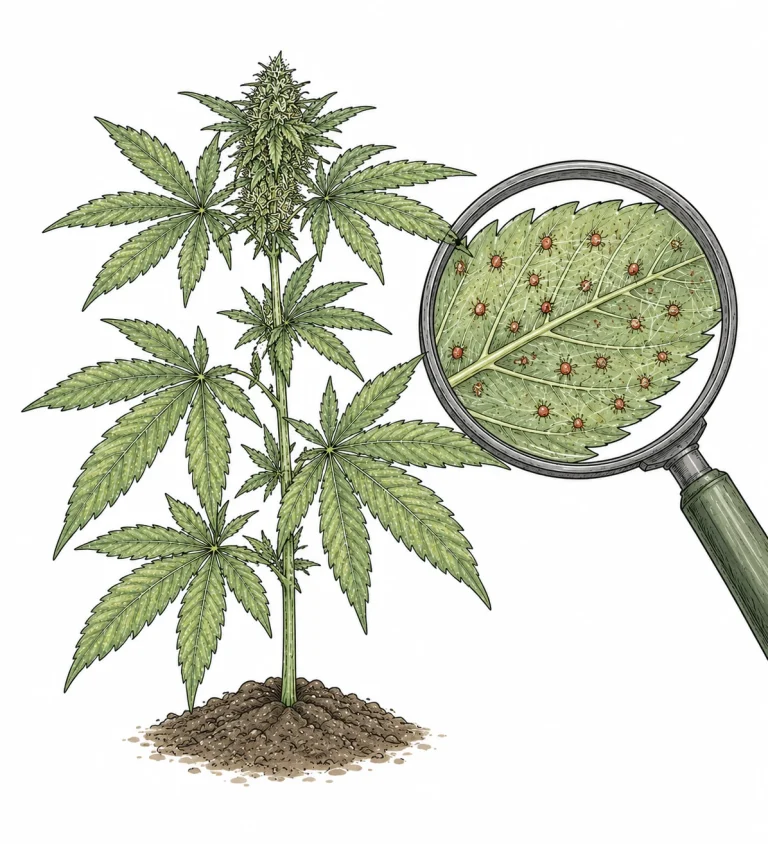
Spider mites (Tetranychus urticae) are by far the most common cause of white spots on cannabis leaves, especially in indoor growing. These tiny arachnids – barely 0.02 in (0.5 mm) long – pierce the leaf cells and suck out their contents. That leaves a telltale pattern on the top of the leaf: hundreds of small, slightly translucent specks that together look like a fine white haze. The spots usually show up near the midrib first and spread outward from there.
The giveaway for spider mites isn’t on top of the leaf – it’s underneath. Gently flip the leaf over and check it with a magnifier or jeweler’s loupe. Spider mites leave fine strands of webbing, and you can see the mites themselves as tiny orange-red or yellowish-green dots. In a heavy infestation, the webbing can stretch between the branches. Spider mites thrive at temperatures above 81 °F (27 °C) and low humidity – conditions that can build up quickly in an indoor grow without good climate control.
For a light infestation, start by blasting the leaf undersides with a strong jet of water to knock the mites off physically. For heavier infestations, organic options based on neem oil, pyrethrum, or predatory mites (Phytoseiulus persimilis) have a solid track record. Chemical miticides shouldn’t be used once your plants are in the flowering stage. Also raise the humidity to 50–60 % and drop the temperature below 77 °F (25 °C) to slow down mite reproduction. Repeat every treatment after 3–5 days, since most products don’t kill the eggs directly.
- Telltale sign: Fine specks on the top of the leaf, webbing on the underside
- Favorite conditions: Heat above 81 °F (27 °C), dry air below 40 % RH
- Organic control: Neem oil, pyrethrum, predatory mites
- Repeat treatment every 3–5 days (keep the egg cycle in mind)
- Dial in humidity and temperature as a preventive measure
Powdery Mildew on Cannabis: A White Coating Instead of Spots
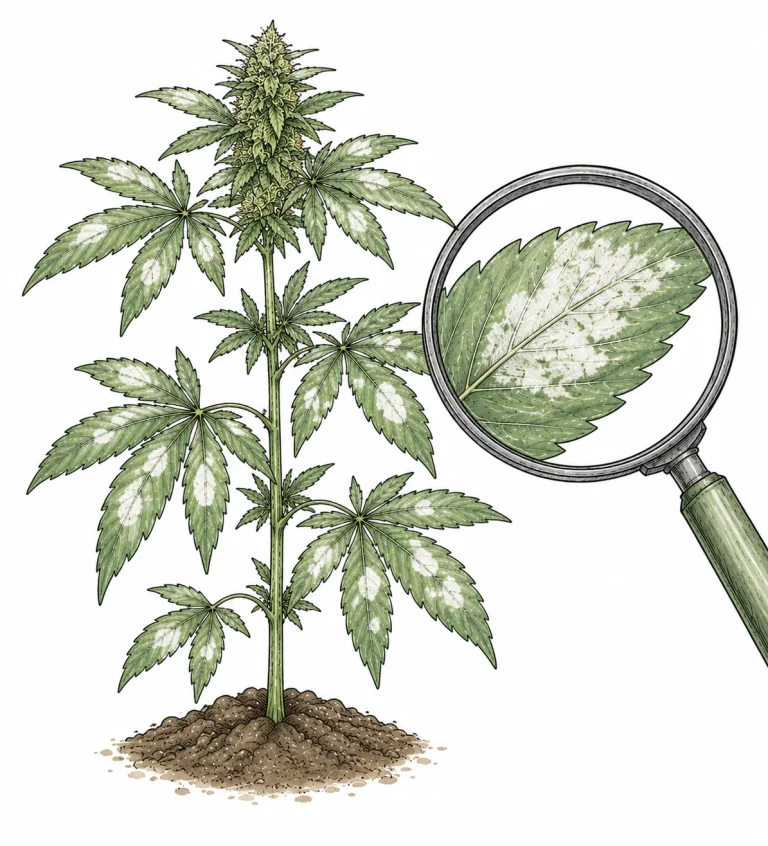
Powdery mildew (Oidium sp.) first shows up as small, round white spots on the top of the leaves. New growers often mistake them for spider mite damage. The key difference: you can wipe powdery mildew off with your finger, and it feels dusty, almost like flour. Right under the spot, the leaf tissue is still green and healthy at first. As the fungus spreads, the spots merge, and the leaf starts to yellow and die off.
Powdery mildew is a fungus that loves cool, damp nights paired with warm days. That’s classic outdoor weather in the fall. But it can also hit your indoor grow when air circulation is poor and humidity (relative humidity, RH) climbs above 50 % during the flowering stage. Common entry points are damaged leaves, poor ventilation or contaminated tools. Powdery mildew is highly contagious and can spread to the whole plant and its neighbors within days.
Act at the first sign: carefully cut off infected leaves and bag them right away. Don’t shake them, or you can release spores. Proven treatments include a diluted baking soda solution (1 tsp baking soda per quart (1 L) of water), potassium bicarbonate spray or a baking powder solution. These raise the pH on the leaf surface and can kill the fungus. Neem oil spray also works well as prevention. Many fungicides are no longer a good fit once your plants are flowering, so check the pre-harvest intervals carefully. During flowering, keep humidity below 45 %.
- Telltale sign: White powdery coating that wipes off, no webbing on the leaf undersides
- Risk factors: Humidity above 50 %, poor air circulation
- First step: Carefully remove infected leaves and throw them away
- Treatment: Baking soda solution, potassium bicarbonate, neem oil as prevention
- Prevention: Keep humidity below 45 % in flowering, good ventilation
Thrips as the Cause of White Dots and Silvery Patches
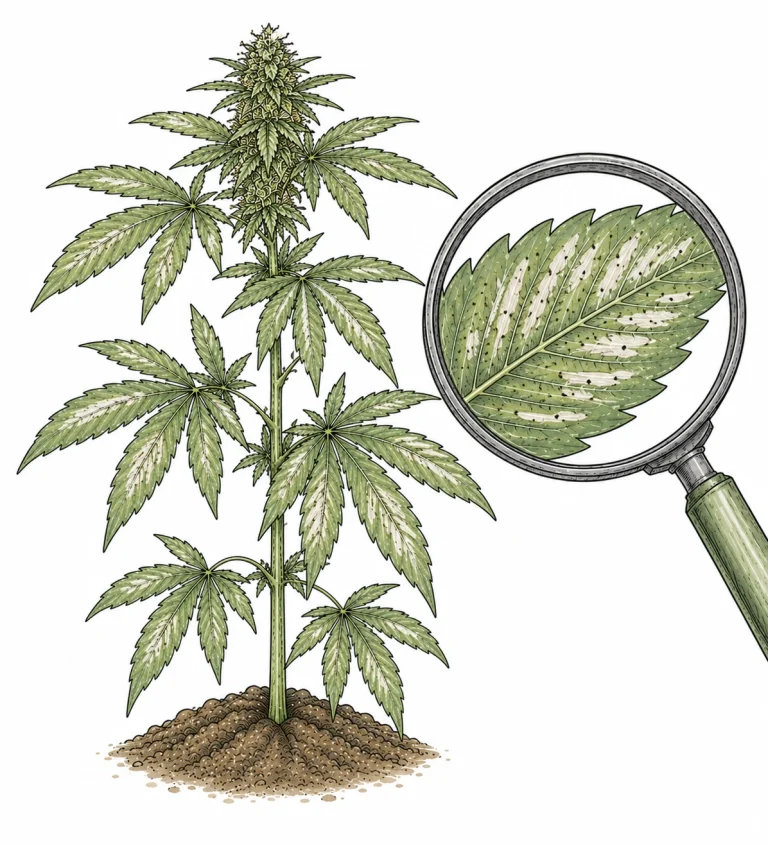
Thrips (Frankliniella occidentalis and other species) leave a different damage pattern than spider mites. They rasp open the leaf surface and suck out the cell sap. That leaves silvery-white, slightly shiny patches, often irregular and elongated, scattered across the leaf. The giveaway is tiny black droppings in and around the pale areas – that’s the most reliable way to identify them. You can just barely see thrips with the naked eye: slender, yellowish to brown insects about 1/16 in (1–2 mm) long that move very fast.
Thrips prefer young shoot tips and buds, but they can damage the whole plant. With a heavy infestation, leaves can get distorted and the plant loses vigor. Here’s the sneaky part: thrips can spread plant viruses. Indoors, they usually get in on infested new plants or through open vents. To fight them, use yellow sticky traps (German) for monitoring, neem oil treatments, pyrethrum spray and beneficial insects like predatory mites (Amblyseius cucumeris). Same rule as always: repeat treatments every 3–5 days.
- How to spot them: Silvery-white scraping marks plus black droppings
- The bugs: Slender, yellowish insects, visible to the naked eye
- Favorite spots: Young shoots, buds, leaf undersides
- Treatment: Neem oil, pyrethrum, predatory mites (Amblyseius cucumeris)
- Monitoring: Hang yellow sticky traps in your grow
White Spots on Cannabis Leaves From Water Droplets and Spray Damage
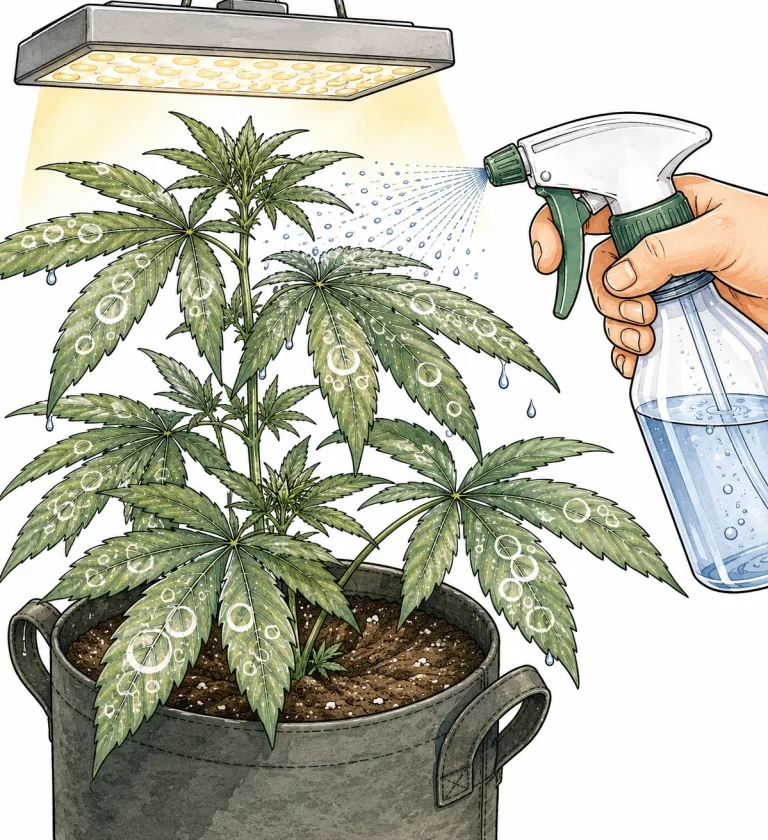
Not every white spot on cannabis leaves means pests or disease. Very often – especially with beginners – pale spots come from water droplets after misting. Under strong grow lights, droplets on the leaves can act like tiny magnifying glasses and burn small spots into the leaf tissue. Hard tap water also leaves round white mineral deposits on the leaf surface once it evaporates. You can wipe those off easily.
Foliar feeding solutions that are too strong, or pH adjusters that land on the leaves, can cause similar-looking damage. It’s easy to tell this spray damage apart from pests: no webbing, no insects, no droppings, and the spots always show up shortly after spraying. The fix is simple: stop spraying your plants under running lights, use RO water or tap water that has sat out, and let the leaves dry before the lights come on. If you want to check your watering routine, you’ll find all the key basics there.
- Cause: Magnifying-glass effect from water droplets under the lights
- Minerals: White deposits from hard tap water, easy to wipe off
- Spray damage: Happens after foliar feeding at too high a concentration
- How it differs from pests: No webbing, no insects, no droppings
- Fix: Use soft water, don’t spray while the lights are on
White Spots on Cannabis Leaves from Nutrient Deficiencies and pH Problems
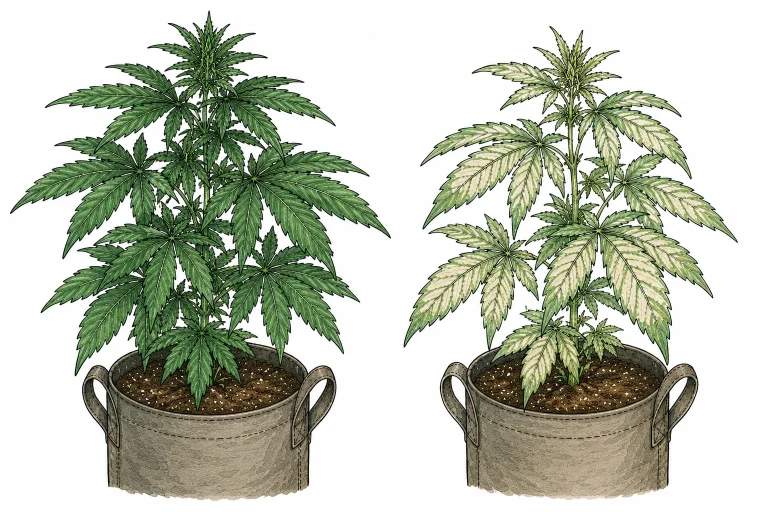
Sometimes those pale spots on your cannabis leaves aren’t pests at all. They can come from a nutrient deficiency instead. The usual suspects are magnesium deficiency, calcium deficiency, or a pH that’s off and blocks nutrient uptake. Magnesium deficiency typically shows up as interveinal chlorosis: the veins stay green while the leaf tissue between them turns pale. Early on, it can also look like small, scattered light spots on older leaves. Calcium deficiency, on the other hand, often causes brown to reddish dead spots (necrosis) surrounded by pale areas.
If the pH of your water or growing medium falls outside the ideal range (6.0–7.0 for soil, 5.5–6.5 for hydro), your roots can’t take up nutrients like magnesium, calcium, or iron anymore – even though they’re right there in the medium. The result: deficiency symptoms that start as pale patches and can turn into whitish-gray spots later on. So always check the pH of your water first, before you diagnose a deficiency. If you suspect calcium deficiency, our in-depth article on calcium deficiency in cannabis covers all the symptoms and fixes.
The fix depends on which nutrient is missing. For magnesium deficiency, Epsom salt (magnesium sulfate) works well as a foliar spray or added to your water. For calcium deficiency, a Cal-Mag product is your best bet. Important: correct the pH first, then feed. Otherwise extra nutrients won’t help, because uptake stays blocked. Also watch out for cannabis nutrient burn – overfeeding can also lead to nutrient lockout and leaf damage.
- Magnesium deficiency: pale areas between the veins, older leaves affected first
- Calcium deficiency: pale to brown spots, often with necrosis
- pH out of range: nutrients are there, but the plant can’t take them up
- Ideal pH: 6.0–7.0 in soil, 5.5–6.5 in hydro
- Treatment: correct the pH first, then add the missing nutrient specifically
Quick Diagnosis: Figuring Out What’s Causing the White Spots
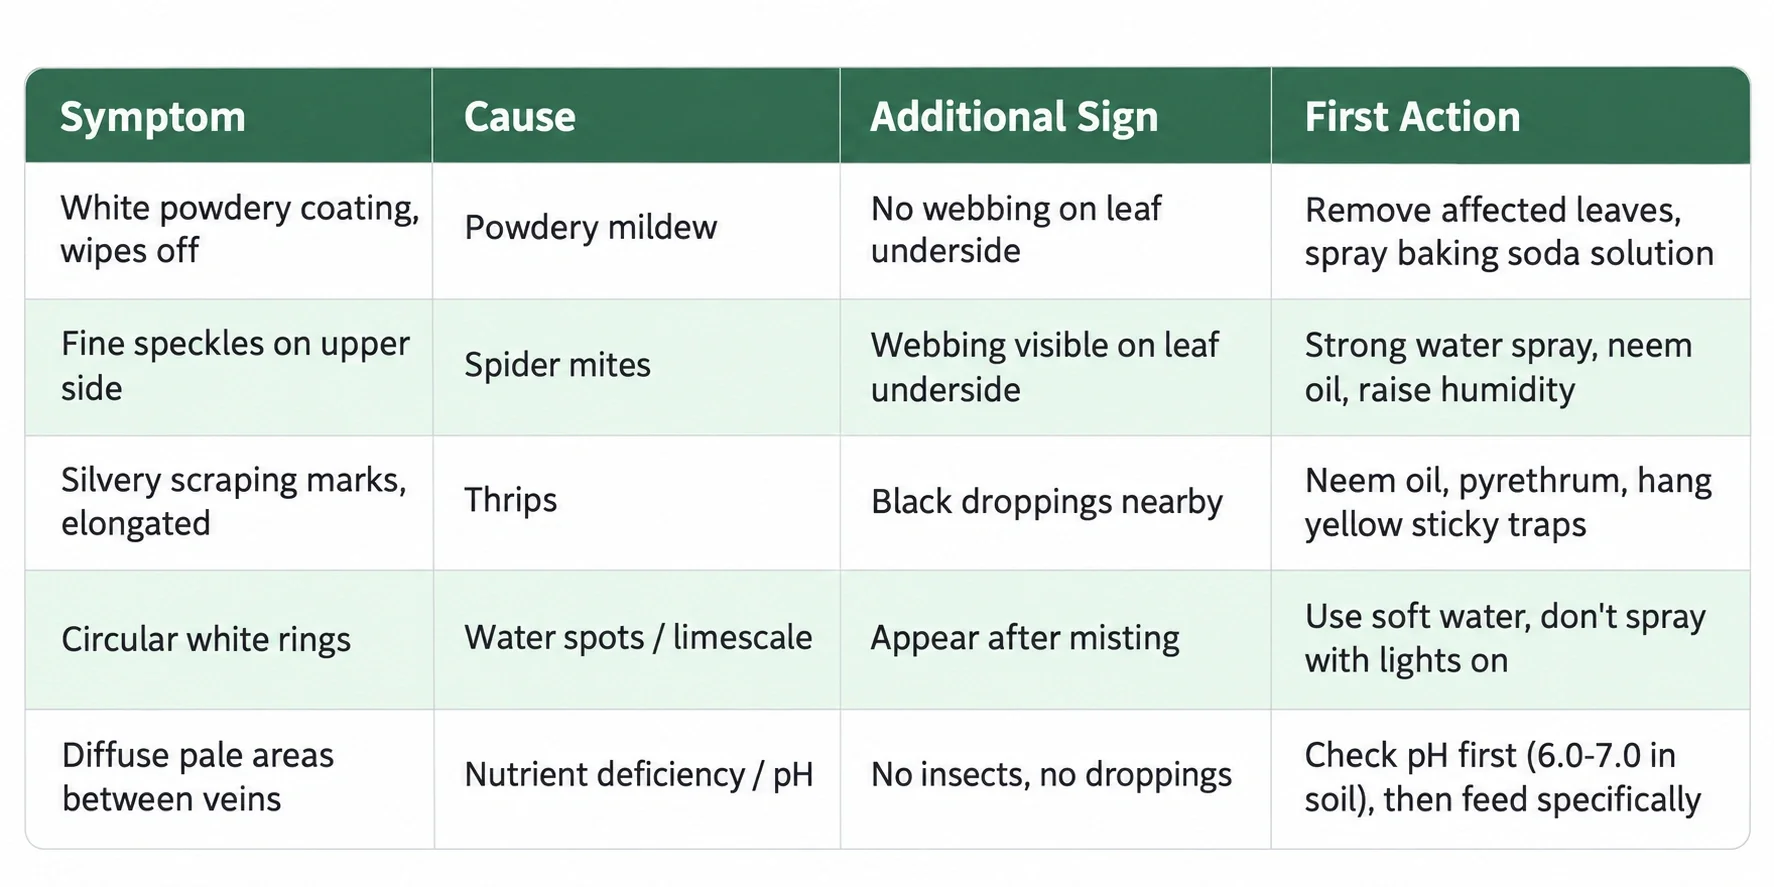
Don’t waste time guessing – this quick diagnosis routine helps. Look at the affected leaves in good light and with a magnifier or jeweler’s loupe. Flip the leaves over and inspect the undersides. Check whether the white coating wipes off. Note when the spots first appeared and whether you sprayed anything recently. Look at whether new or old leaves were hit first – that often points to nutrient issues (old leaves = mobile nutrients like N, P, K, Mg; new leaves = immobile nutrients like Ca, Fe).
Follow this simple decision tree: White, powdery coating that wipes off, no insects? → Powdery mildew. Tiny speckles on top, webbing underneath? → Spider mites. Silvery, streaky scraped patches with black specks of droppings? → Thrips. Round white rings after spraying that wipe off easily? → Water spots / mineral deposits. Diffuse pale areas between the veins, no insects, pH not checked in a while? → Nutrient deficiency – measure pH first. With this step-by-step approach, you can reliably rule out causes and land on the right treatment fast.
- Powdery coating that wipes off → Powdery mildew
- Speckles + webbing on the underside → Spider mites
- Silvery scraped patches + black specks → Thrips
- Round rings after spraying → Water spots
- Diffuse paling between the veins → Nutrient deficiency / check pH
- Always inspect leaf undersides and measure pH first
Prevention: How to Keep White Spots Off Your Cannabis Leaves for Good
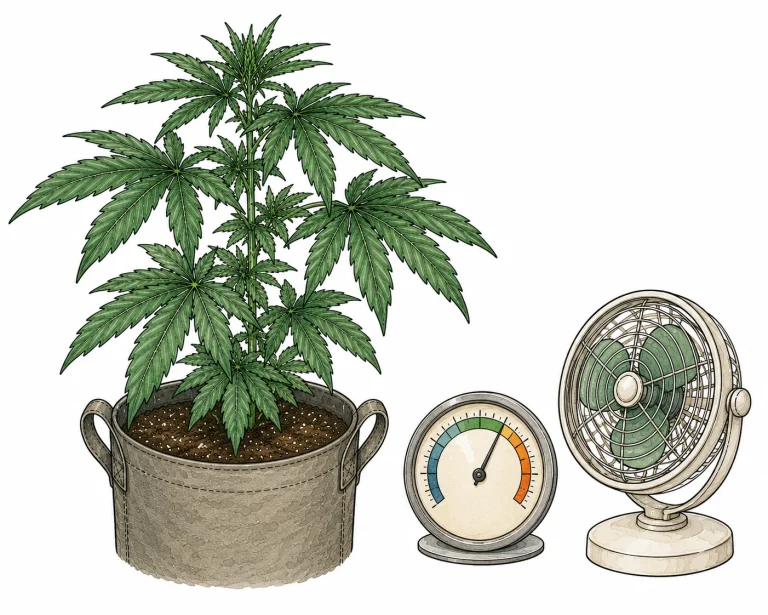
The best treatment is prevention. Spider mites, powdery mildew, and thrips always exploit the same weak spots: poor ventilation, high or swinging humidity, temperature stress, and plants weakened by nutrient or pH problems. A clean grow space with a thorough cleaning between runs, quarantining new plants, and sterilized tools can cut your risk dramatically.
For ongoing prevention: keep humidity (RH) at 50–60 % in the vegetative stage and 45–55 % in the flowering stage. Aim for daytime temps of 72–79 °F (22–26 °C) and don’t let nights drop below 64 °F (18 °C). Run circulation fans so every leaf moves gently. Use water with a properly adjusted pH and stick to your feeding schedule to avoid deficiencies. If you run your grow by these basics and check your plants closely every day, you’ll catch problems early – while they’re still easy to fix. You’ll find more diagnosis tips in the PlantClue Plant Diagnosis overview.
- Humidity: veg 50–60 %, flowering 45–55 %
- Temperatures: 72–79 °F (22–26 °C) during the day, above 64 °F (18 °C) at night
- Always quarantine new plants before they go into your grow
- Disinfect your tools between plants
- Make a daily check of both leaf sides part of your routine
- Stay consistent with your pH and feeding schedule
If you’re seeing leaf tips curling down like claws instead, check out our article on clawing leaves. For larger, more irregular spots, take a look at spotted leaves.
Frequently Asked Questions
Why are white spots suddenly showing up on my cannabis leaves?
The most common causes are spider mites, powdery mildew, thrips or water spots after foliar spraying. Flip the leaf over and grab a magnifier: webbing points to spider mites, a powdery coating that wipes off points to powdery mildew, and tiny black specks (droppings) point to thrips. Round rings after spraying under the lights are usually harmless water spots.
Are white spots on cannabis leaves a threat to my harvest?
That depends on the cause and how far it has spread. A light spider mite infestation in veg is very treatable. Powdery mildew in flower, on the other hand, can wipe out your whole harvest if it spreads unchecked. Mineral water spots from hard water are harmless. Always act early and pick the right fix based on the cause.
How can I tell spider mites from powdery mildew on cannabis?
Spider mites leave fine stippling on the top of the leaf and – this is the key sign – visible webbing on the underside. Powdery mildew forms a white, powdery coating on the top of the leaf that you can wipe off with your finger. With powdery mildew, you won’t find any webbing on the underside.
Can I still spray cannabis leaves that have white spots?
With pests, targeted spraying with the right products (neem oil, pyrethrum) makes sense. Always spray with the lights off and let the leaves dry before the lights come back on. Go easy with powdery mildew – heavy spraying can spread the spores.
What gets rid of spider mites on cannabis fast?
As a first step, hit the leaf undersides with a strong spray of water to knock the mites off. Then treat with a neem oil solution or pyrethrum. Repeat every 3–5 days so you also catch newly hatched eggs. At the same time, raise the humidity and lower the temperature, since spider mites love it hot and dry.
Can the wrong pH cause white spots on cannabis leaves?
Not as classic white spots, but the wrong pH blocks nutrient uptake. That can lead to deficiency symptoms like pale areas and light gray spots, which often get mistaken for pest damage. So always check the pH of your water and your growing medium first before you try anything else.
How do I prevent powdery mildew on cannabis in an indoor grow?
Keep humidity below 45 % during flowering and make sure you have good air circulation with fans. Never bring new plants into your grow without quarantining them first. Clean your grow space thoroughly between runs. Preventive sprays with diluted neem oil during the vegetative stage can lower the risk even further.
White spots are just one of several cannabis symptoms that don’t fit neatly into a classic category — you’ll find other special cases like foxtailing or hermaphrodites in the overview.
The Bottom Line
White spots on cannabis leaves are no reason to panic – but they’re a clear signal to take a closer look and act fast. With the right diagnosis routine, you can tell within minutes whether you’re dealing with spider mites, powdery mildew, thrips, harmless water spots, or a nutrient deficiency. The sooner you pin down the cause and respond with the right fix, the less damage your plant and your harvest take. Keep humidity, temperature, pH, and feeding in the sweet spot, and your plants stay resilient – and most problems never get a chance to start.
