

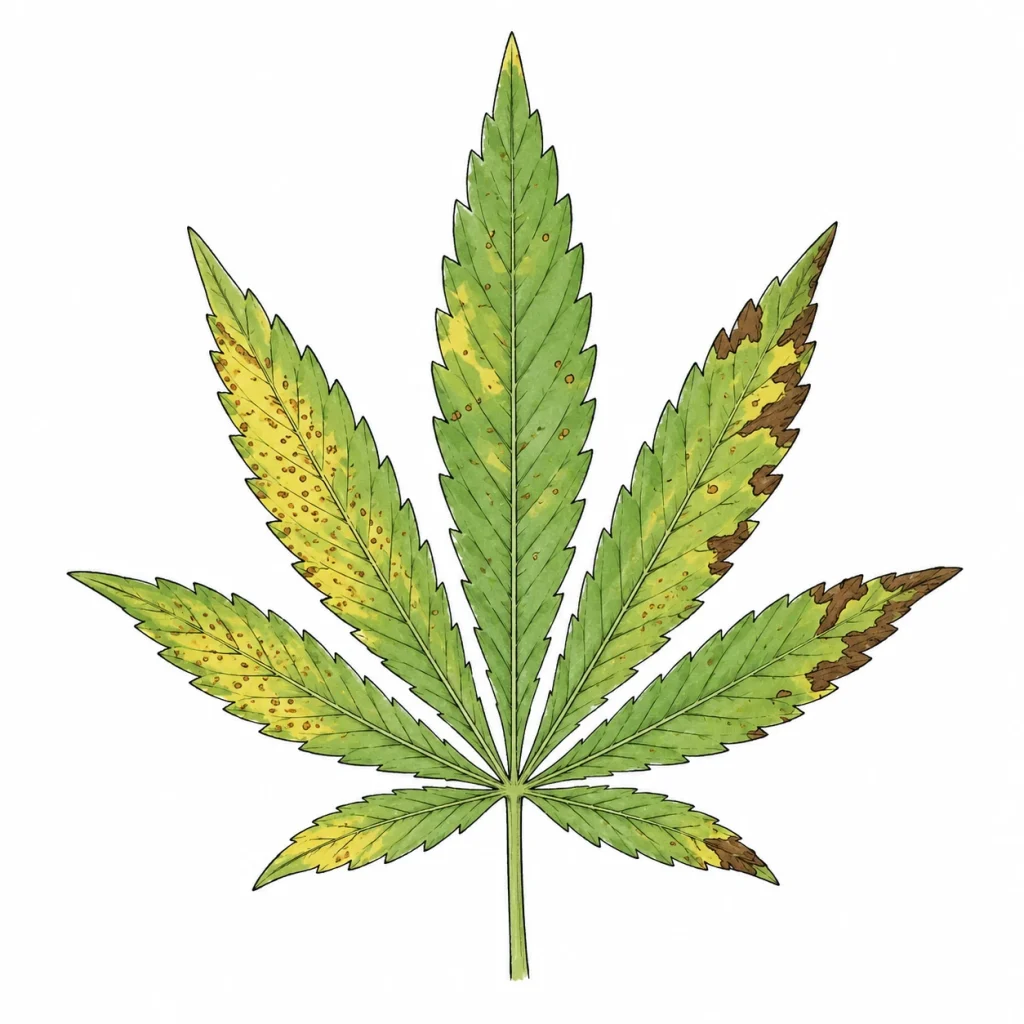
Whether you see brown spots on cannabis leaves or yellow patches, being able to identify the spots is one of the most important skills any grower can have – because every type of spot tells a different story about your plant’s condition. Brown dots, yellow patches, rust-colored areas or silvery discoloration: the way the spots look gives you valuable clues as to whether a nutrient deficiency, the wrong pH, a fungal disease or a pest infestation is behind the problem. If you read the symptoms early, you can take targeted action and still save your harvest. In this guide, we’ll show you step by step how to reliably diagnose spots on cannabis leaves and treat them the right way.
Identifying spots on cannabis leaves: how to start your diagnosis
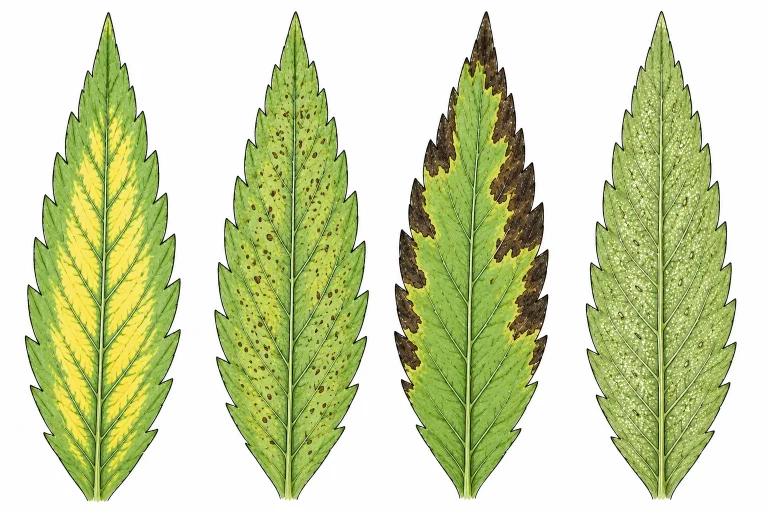
Before you start any treatment, it’s essential to take careful stock. Look at where the spots are on the leaf – whether they tend to appear in the center, on the edges, between the leaf veins or spread across the whole surface. Also note whether the spots look dry and crispy or moist and soft. This detail already tells you a lot about the root cause; if mainly the leaves are curling instead of showing spots, that’s a separate symptom with different triggers.
The position of the affected leaves on the plant is just as important. Spots that first appear on the old, lower leaves often point to a deficiency in mobile nutrients such as nitrogen, magnesium or phosphorus. If, on the other hand, the spots first appear on the young shoot tips and new leaves, that suggests a deficiency in immobile nutrients such as calcium, iron or sulfur. Also note the color, shape and edge of the spots – these features are key to the diagnosis.
One last important factor is your grow setup. Check your current pH in the growing medium or in your water right away, along with your nutrient feeding and the temperature and humidity levels in your grow room. Many spot problems don’t have a single trigger but come from several small mistakes adding up. Use our complete plant diagnosis overview as a starting point if you’re not sure how to classify the problem.
- Location of the spots: leaf center, edges, between the veins or all over?
- Texture: dry/crispy (nutrients/heat) or soft/moist (fungus/rot)?
- Position on the plant: old lower leaves (mobile nutrients) or new shoots (immobile nutrients)?
- Color of the spots: yellow, brown, rust, purple, white or silvery?
- Environmental conditions: check pH, temperature, humidity and light intensity
Yellow and light green spots: nutrient deficiency as a common cause
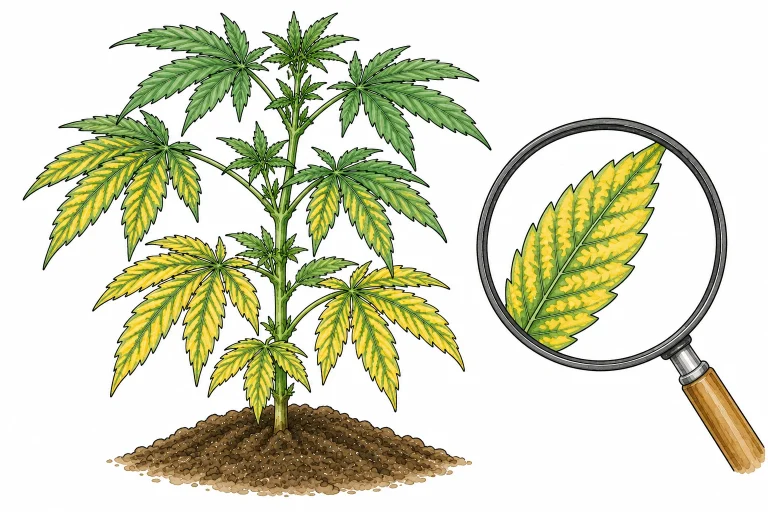
Yellow spots are among the most common problems with spotted cannabis leaves, and in most cases a nutrient deficiency is the trigger. Magnesium deficiency is especially widespread: it shows up as characteristic interveinal yellowing – the leaf veins stay green while the tissue between them turns increasingly yellow. This deficiency often occurs with very soft water or with a pH that’s too far off the optimal range.
Nitrogen deficiency, by contrast, shows up as even yellowing that starts on the oldest leaves in the lower part of the plant and slowly moves upward. Unlike magnesium deficiency, nitrogen deficiency doesn’t produce clearly defined spots – instead, the whole leaf yellows and eventually drops off. Phosphorus deficiency, on the other hand, often shows up as dark green to purple discoloration with small brown necrotic spots, especially on older leaves.
Sulfur and iron deficiencies, in contrast, mainly affect new leaves: they look pale yellow to almost white, because these immobile nutrients can’t be moved around within the plant. In most of these cases, an incorrectly adjusted pH is the real trigger – even if there are enough nutrients available, the plant can’t take them up. So be sure to read our guide on how to adjust the pH for cannabis, before you simply add more nutrients.
- Magnesium deficiency: interveinal yellowing, veins stay green, starts on old leaves
- Nitrogen deficiency: widespread, even yellowing from the bottom up
- Phosphorus deficiency: dark green to purple leaves with brown necrosis on the edges
- Iron/sulfur deficiency: new leaves pale yellow or almost white (interveinal or entire leaf)
- Calcium deficiency: dark brown dots on young leaves with a reddish edge
Brown spots on cannabis leaves: identifying pH problems and calcium deficiency
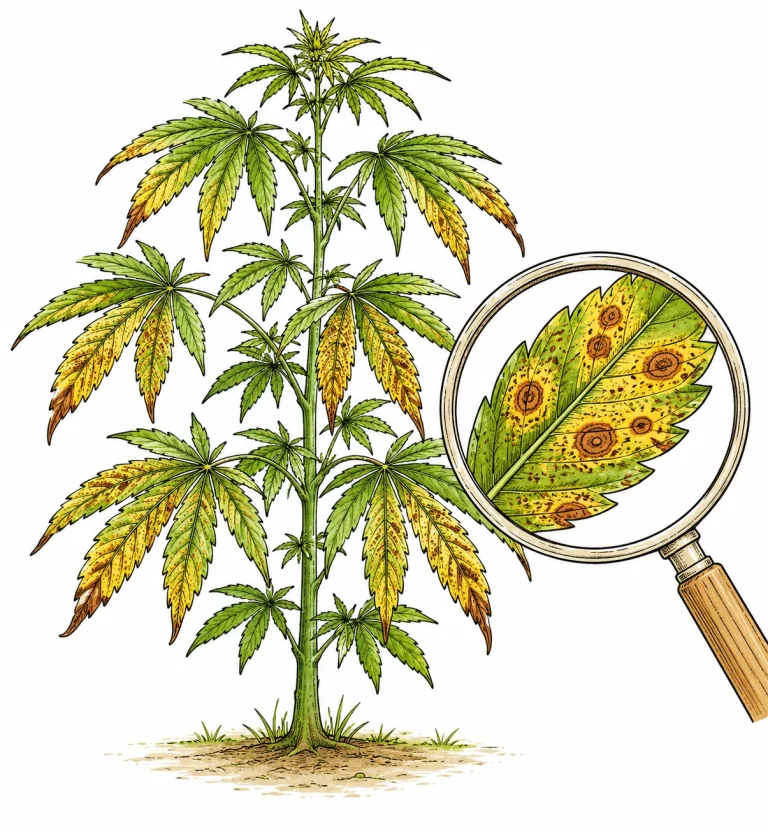
Brown and rust-colored spots on cannabis leaves are a warning sign you should never ignore. The most common single trigger is calcium deficiency, which shows up as irregular, slightly raised brown dots or spots on the middle to upper leaves. The spots often start out small and dark brown, but they grow quickly and can destroy whole sections of the leaf. Typically, the leaf edges are also slightly curled and look deformed.
Calcium deficiency is especially common with soft water (low in minerals), when you use RO water without adding minerals back, or with a pH below 6.0 in a soil grow. If you suspect a lack of calcium, we recommend our detailed article on how to identify and fix calcium deficiency in cannabis. Another classic cause of rust-colored spots is wind burn – direct airflow from fans creates small brown areas, mainly on the leaf tips and edges of the leaves exposed to the wind.
Nutrient burn can also cause brown burn spots that can be mistaken for a nutrient deficiency. With nutrient burn, the leaf tips start turning yellowish-brown, the discoloration moves from the edges toward the center and the leaf texture looks dry and papery. In this case, flushing the growing medium right away and drastically cutting back the nutrient dose will help. You’ll find everything you need to know in our guide on how to identify and fix nutrient burn in cannabis.
- Calcium deficiency: irregular dark brown dots, starts on middle/upper leaves
- Nutrient burn: brownish-yellow discoloration from the leaf tips inward, dry texture
- Wind burn: brown areas on leaves exposed to wind from airflow that’s too strong
- pH-related lockout: brown and necrotic spots with no clear pattern, several deficiencies at once
- Heat damage: light brown, slightly bleached spots on the top leaves near the light source
White, silvery and powdery spots: fungi and pests as the trigger
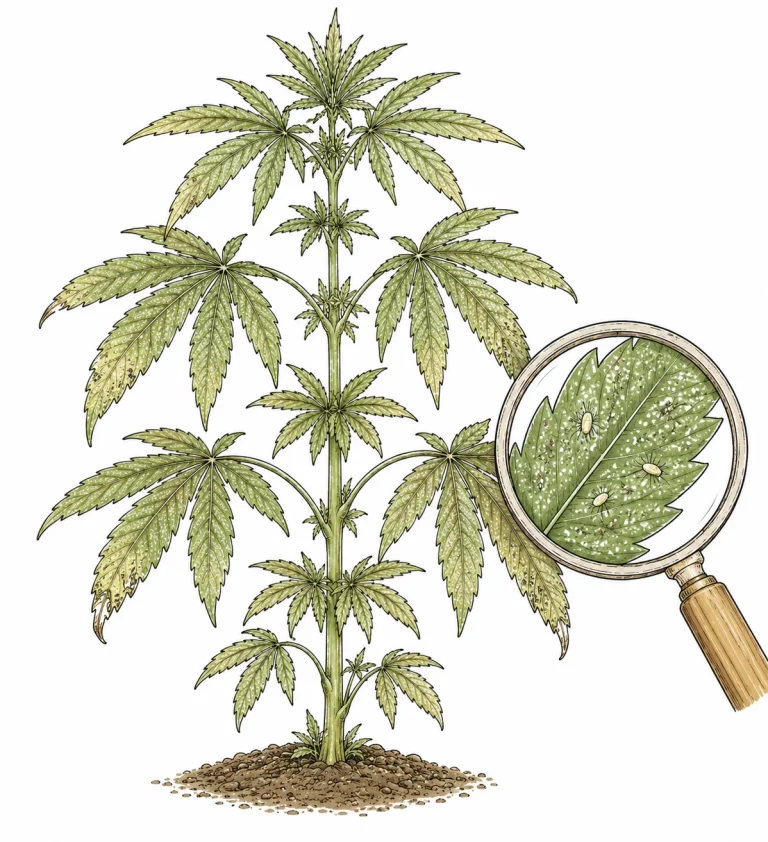
If you find white or silvery spots on your cannabis leaves, it’s time for maximum alert – because in many cases there’s a fungal disease or pest infestation behind them that can spread extremely fast if you don’t step in. Powdery mildew (Oidium) is probably the best-known fungal disease in the grow room: it shows up as a white, flour-like coating on the upper side of the leaves and spreads quickly at high humidity (above 65 %) and with poor air circulation. Infected leaves look as if they’ve been dusted with powder.
Downy mildew, on the other hand, appears as yellow spots on the upper side of the leaf and a grayish-purple, spore-forming coating on the underside. It thrives in high humidity and cool temperatures and is a particular problem in outdoor growing. Spider mites instead leave tiny white-silvery dots or streaks on the upper side of the leaf because they suck out the cells. With a magnifying glass, or when you turn the leaf over, you can see the tiny mites or their typical fine webbing.
Thrips also cause shiny silvery streaks and patches, combined with small dark specks of droppings on the leaves. With a pest infestation, you need to act fast: isolate the affected plants immediately, remove heavily infested leaves and treat with suitable organic products such as neem oil, potassium soap or predatory mites. At the same time, get humidity and temperature under control, because fungi and pests love warm, humid conditions – our beginner’s guide to growing cannabis indoors covers the right levels for your grow room in detail.
- Powdery mildew: white, flour-like coating on the upper side of the leaf, at RH above 65 %
- Downy mildew: yellow spots on top, grayish-purple spore mass on the underside of the leaf
- Spider mites: tiny silvery-white dots, fine webbing on the underside of the leaf
- Thrips: shiny silvery streaks and patches with dark specks of droppings
- Aphids: sticky spots (honeydew) with deformation and yellowing
Spots on cannabis leaves from environmental stress: heat, light and water
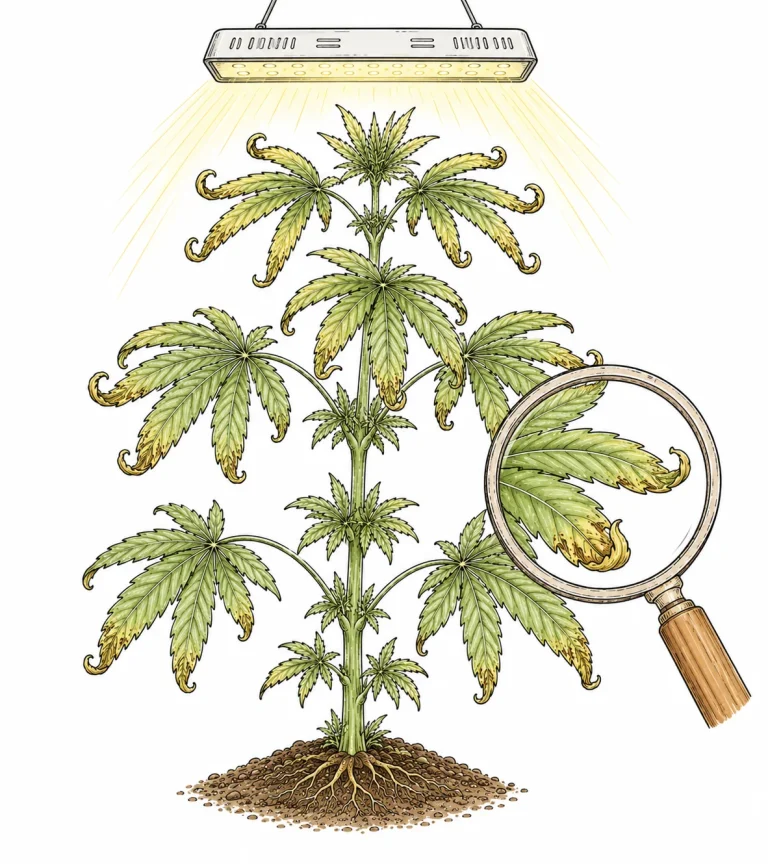
Not every discoloration on your cannabis leaves has a biological cause. Environmental stress from temperature, light or incorrect watering is one of the most underestimated causes of spots on cannabis leaves. Heat stress develops when the room temperature stays above 82–86 °F (28–30 °C) for long periods or when the light source is too close to the plants: the leaves then get pale, yellowish-brown spots on the surfaces facing upward and start to curl.
Light burn from LED lights that are too intense also produces similar symptoms – the leaves near the light source bleach out and look scorched. In this case, increase the distance to the light or dim the intensity to a level suited to the growth stage. On the other hand, too little light and temperatures that are too low can also cause spots, especially combined with overwatering.
By the way, overwatering is one of the most common sources of mistakes for beginners and causes yellowish-brown, soft spots that move up from the lower leaves. The growing medium stays wet all the time, the roots can’t breathe and nutrient uptake collapses. Our article how to water cannabis plants explains in detail how to work out exactly how much water your plants need and how to do the finger test the right way. A growing medium that’s too dry can also cause isolated brown necrotic spots on the leaves – so balanced moisture management is fundamental for healthy leaves.
- Heat stress above 86 °F (30 °C): pale, brown spots on leaf surfaces facing upward
- Light burn from an LED that’s too close: bleaching and drying out of the upper leaves
- Overwatering: yellowish-brown soft spots, starts at the bottom, growing medium always wet
- Underwatering: isolated dry necrotic spots, leaves look thin and dull
- Cold stress below 59 °F (15 °C): purple and brown discoloration, growth stops
Treating spots on cannabis leaves: a step-by-step action plan
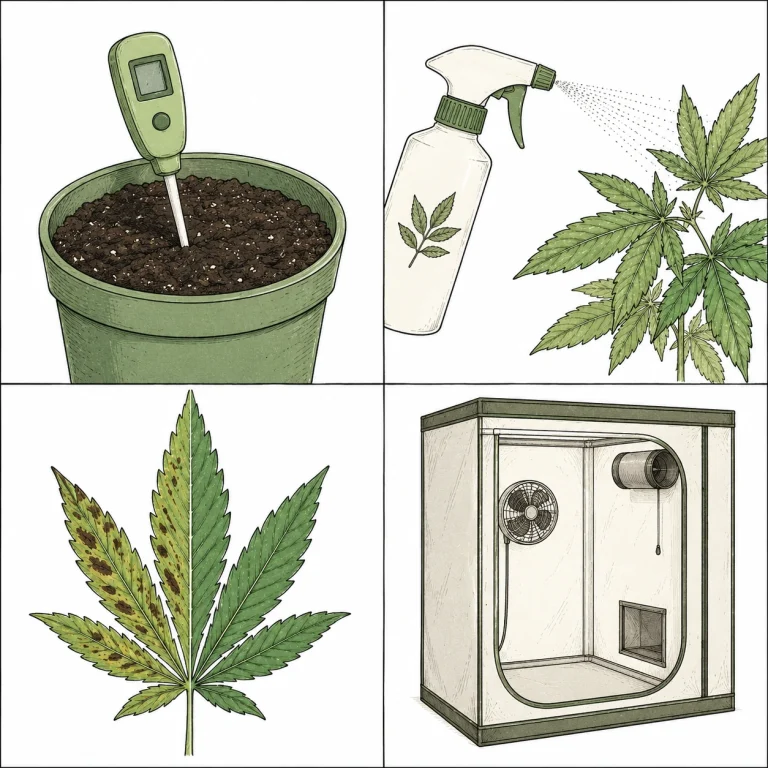
As soon as you’ve identified the cause of the spots on your cannabis leaves, it’s time to act quickly and in a targeted way. Always start with the pH: measure the pH of your irrigation water and growing medium and correct it to the target range of 6.0–7.0 for soil or 5.5–6.5 for coco and hydroponics. In many cases, a correctly adjusted pH solves nutrient problems on its own, because nutrients get locked out at the wrong pH even when there’s plenty of them in the growing medium.
With a confirmed nutrient deficiency, correct the pH first and wait 3–5 days before adding extra nutrients. For magnesium deficiency, Epsom salt (magnesium sulfate) has proven itself as a quick emergency fix: dissolve 4–8 g per gallon of water (1–2 g per liter) and water or spray your plant with it. For calcium deficiency, a Cal-Mag supplement is a good choice. Avoid making several corrections at the same time, or you’ll lose track of what actually helped.
With a fungal infection, remove all affected leaves immediately and lower the humidity to below 50 %. Treat the plant with a baking soda solution (1 tsp per liter of water, about 4 tsp per gallon, with a little potassium soap), neem oil or an approved fungicide. With pests, rely on organic products and repeat the treatment consistently every 3–5 days so you also catch freshly hatched eggs. Document what you do and check the plant daily – healthy new leaves are a sure sign that your treatment is working.
- Step 1: Measure the pH and correct it to the target range (soil: 6.0–7.0)
- Step 2: Identify the type of nutrient deficiency, then add Cal-Mag or micronutrients as needed
- Step 3: Check environmental factors – temperature, humidity, light distance, ventilation
- Step 4: For fungi/pests – remove affected leaves, start organic treatment
- Step 5: Check and document daily – healthy new leaves = success
- Step 6: Correct only one variable at a time so you can pin down the cause
If mainly the tips are affected rather than the whole leaf surface, read our article on brown leaf tips.
Frequently asked questions
What does it mean when cannabis leaves have brown spots with a yellow edge?
Brown spots with a yellow edge on cannabis leaves are a classic sign of calcium deficiency or a pH-related nutrient lockout. Check your pH first and correct it to 6.0–7.0 in soil. Then add a Cal-Mag product and watch whether the new leaves grow back healthy.
Can watering mistakes cause spots on cannabis leaves?
Yes, definitely. Both overwatering and underwatering can lead to spots. Overwatering causes soft, yellowish-brown spots and poor nutrient uptake because the roots are starved of oxygen. Underwatering produces dry, brown necrotic spots. The finger test helps: push your finger about 1 in (2–3 cm) deep into the growing medium – if it’s still moist, hold off on watering.
How do I recognize powdery mildew on cannabis and what should I do?
Powdery mildew shows up as a white, flour-like coating on the upper side of the leaves. It develops at humidity above 65 % and with poor air circulation. Remove affected leaves immediately, lower the humidity to below 50 % and treat the plant with a baking soda solution (1 tsp per liter of water, about 4 tsp per gallon, with a drop of potassium soap) or neem oil. Repeat the treatment every 3 days.
Is a spotted leaf lost, or will the plant recover?
A leaf that’s already damaged won’t fully recover – the brown or yellow spots stay. What matters is that the new leaves growing in are healthy and spot-free. That’s the surest sign your treatment has worked. Remove badly damaged leaves so the plant can put its energy into healthy growth.
Can pH alone cause spots on cannabis leaves?
Yes, an incorrectly adjusted pH is one of the most common triggers for spotted leaves. If the pH is outside the optimal range, the plant can’t take up certain nutrients – even though they’re present in the growing medium. This is called nutrient lockout, and it leads to deficiency symptoms that show up as spots, yellowing and necrosis.
How do I prevent spots on cannabis leaves in the future?
Prevention is everything: measure the pH every time you water, water only when needed, provide good ventilation and keep the humidity in the recommended range (veg: 50–70 %, flowering: 40–50 %). Use a high-quality growing medium from the start and begin with a reduced dose of nutrients. Checking your plants regularly lets you spot problems early, before they spread. Neutral information on responsible use is available from Germany’s Federal Institute for Public Health.
What does it mean when cannabis leaves turn yellow and get brown spots at the same time?
This combination usually points to an advanced nutrient deficiency or a pH problem that has gone on for a while: the yellow area shows the deficiency, and the brown spots within it are leaf tissue that has already died. The most common cause is magnesium or potassium deficiency combined with a pH that’s too low or too high. Correct the pH first, then the nutrient supply, and watch whether the new leaves grow back healthy.
Conclusion
Identifying and correctly reading spots on cannabis leaves isn’t rocket science – as long as you know what to look for. In most cases, a pH that’s gotten out of hand, a nutrient deficiency or environmental stress is behind the problem, and with targeted corrections your plant will quickly be back on track. Always react early, correct only one variable at a time and watch whether new leaves grow back healthy. With this structured approach to diagnosis, you’ll no longer see spotted leaves as a disaster, but as a clear signal from your plant that you can confidently interpret and fix.
