

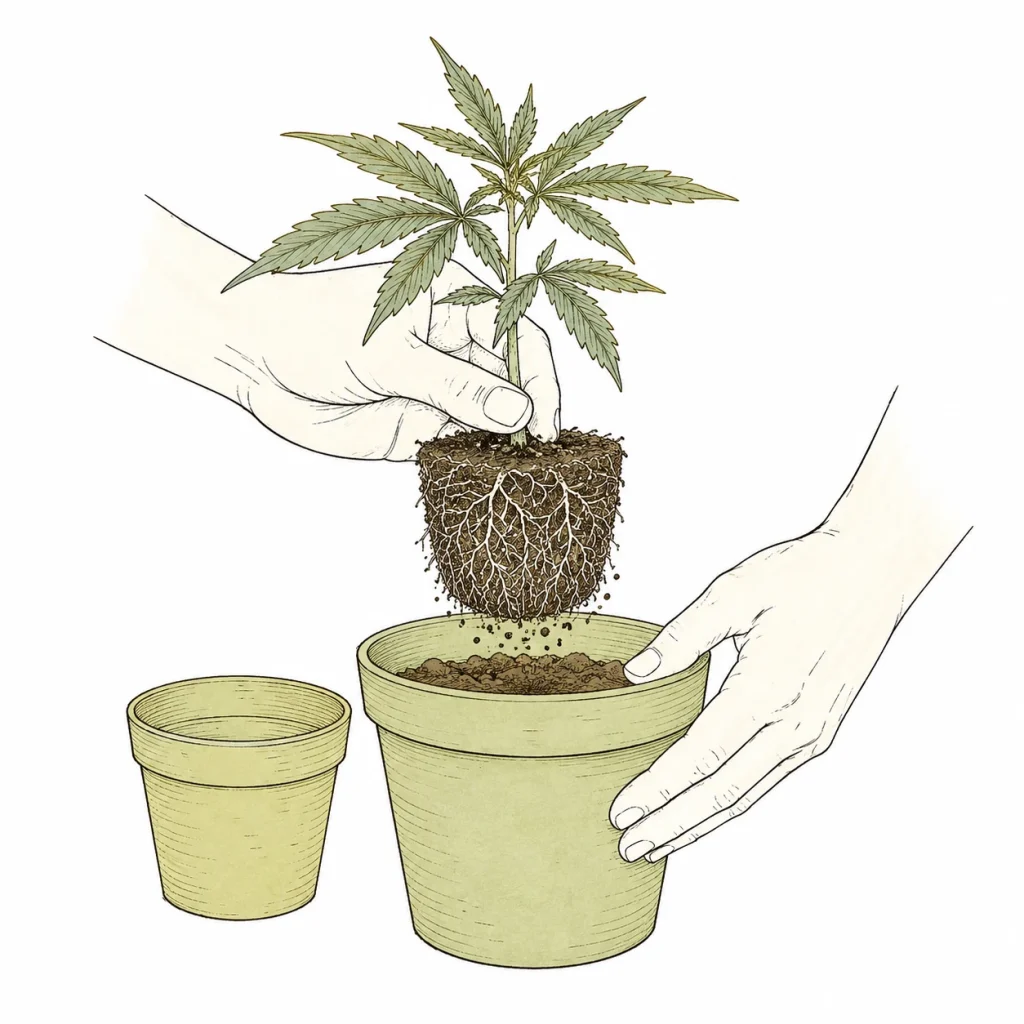
Transplanting cannabis is one of the most important jobs in the whole grow cycle, and beginners often do it too late or the wrong way. Miss the right moment and you can end up with rootbound plants, nutrient deficiencies and badly stunted growth. In this guide you’ll learn when your plant really needs a bigger pot, which pot sizes fit each growth stage, and how to transplant step by step with as little stress as possible. That way your cannabis plant can grow back stronger after every pot change.
Why Transplanting Cannabis Matters So Much
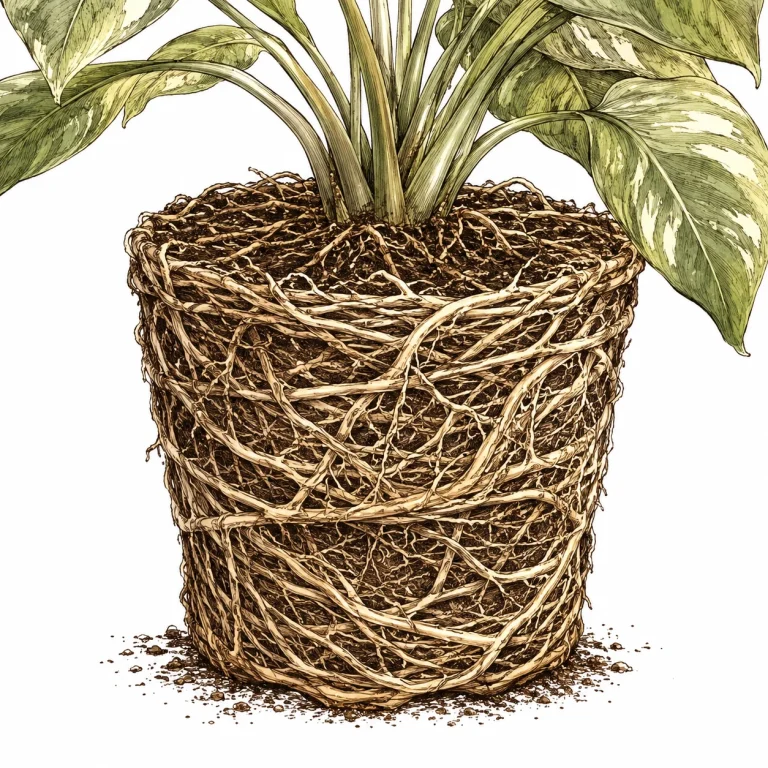
Cannabis is one of the fastest-growing plants out there, which is why you need to transplant it early and often. In the first few weeks, a plant can practically outgrow its pot. The roots fill every bit of space, circle along the pot walls and eventually start poking out of the drainage holes. Growers call this “rootbound” or “pot-bound,” and it’s one of the most common but most overlooked growth stalls in indoor growing.
A pot that’s too small has direct consequences. Your plant can’t take up new nutrients because the roots have no fresh soil left to explore. Oxygen levels in the growing medium drop because water can no longer drain through evenly. The result often looks like a nutrient deficiency or overwatering, even though the real problem is a lack of space. So when you transplant on time, you’re not just keeping the roots healthy. You’re laying the groundwork for maximum yields.
This matters most in indoor growing: a small volume of growing medium gives you less buffer when mistakes happen. A bigger pot is more forgiving if you water too much or too little, and it gives your plant more room for its biochemical processes. For beginners, regular, well-timed transplanting is one of the easiest ways to head off problems before they start.
- Rootbound plants stop growing and can mimic deficiency symptoms
- Fresh growing medium delivers new nutrients and microorganisms
- Bigger pots make watering mistakes more forgiving
- Better root aeration supports nutrient uptake and overall plant health
- Regular transplanting is cheap and very effective
When to Transplant Cannabis: Spotting the Telltale Signs
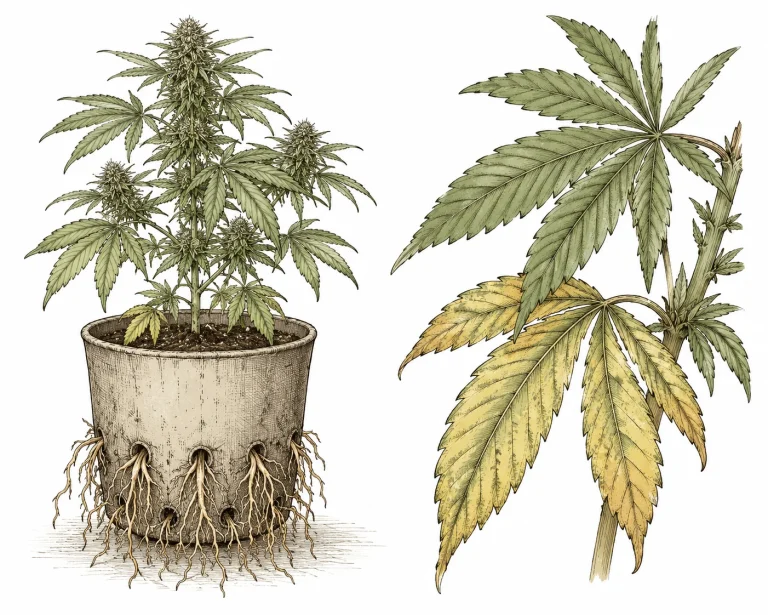
Knowing the right time to transplant cannabis is a skill you’ll pick up quickly with a little experience. There are both visual and physical clues that tell you when your plant needs more room. The most reliable sign is roots growing out of the drainage holes at the bottom of the pot. That’s a sure signal the pot has gotten too small.
Another clear clue is how the pot takes water. If water runs straight through without really soaking in, the roots are packed so tight that there’s hardly any growing medium left. On top of that, a rootbound pot dries out unusually fast: within 24 to 36 hours after watering, the soil can already be bone dry. To better understand how proper watering and dry-back cycles fit together, check out our article on how to water cannabis the right way.
Growth itself gives you hints, too. If your plant suddenly stalls for no obvious reason despite good lighting, ideal temperatures and correct feeding, take a look at the pot. Lift it up and check from below. If you see a dense web of roots almost plugging the holes, it’s high time to transplant.
- Roots are growing out of the drainage holes
- Water runs straight through the pot without soaking in
- The growing medium dries out unusually fast (in under 24 hours)
- Growth stalls despite ideal conditions
- The plant looks droopy or shows deficiency signs with no clear cause
- The pot barely comes off the root ball anymore
For more signs of root-bound plants, check out the detailed RHS expert guide to repotting from the Royal Horticultural Society.
How to Transplant Cannabis: The Right Pot Size for Every Stage
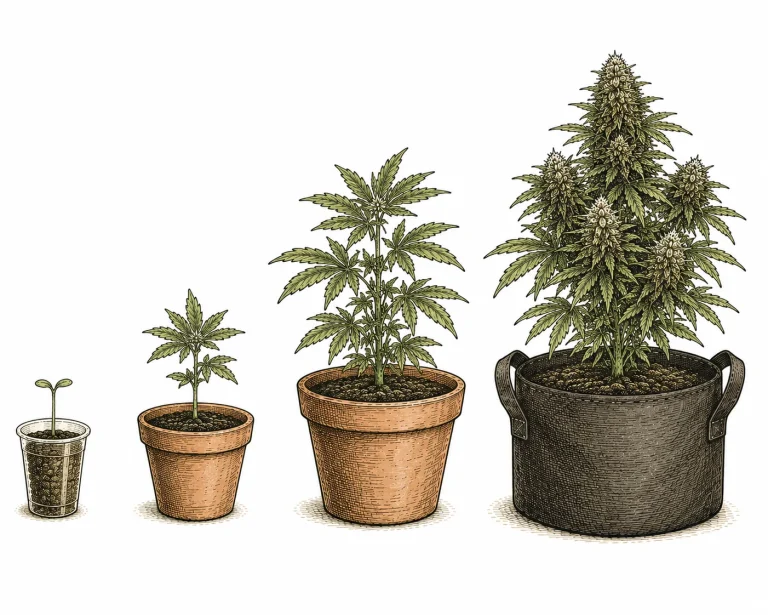
One of the most common questions about transplanting is how big the new pot should be. The rule of thumb: always go up one size, never take huge jumps. If you put a seedling straight into a 5.3-gal (20 L) pot, you can actually slow its growth. The root system has to explore a huge volume of soil before the plant above ground really takes off. On top of that, too much wet growing medium that roots haven’t reached yet can invite mold and overwatering.
Proven pot sizes by growth stage:
- Seedling and first few days: 3 to 17 fl oz (0.1 to 0.5 L) (starter cubes or a small yogurt-cup size)
- Seedling, 1 to 2 weeks old: 0.25 gal (1 L)
- Early vegetative stage: 0.8 to 1.3 gal (3 to 5 L)
- Late vegetative stage: 1.8 to 2.9 gal (7 to 11 L)
- Flowering stage: 3.2 to 6.6 gal (12 to 25 L), depending on the strain and how big you want the plant
Autoflowering strains are the exception: they usually don’t handle transplanting well and should germinate right in their final pot (1.6 to 3.2 gal / 6 to 12 L).
With photoperiod strains, your transplant schedule can be more flexible. A good guideline: for every liter (about a quart) of pot volume, the plant can handle roughly one week of growth before it needs a bigger pot. So a 0.8-gal (3 L) pot lasts about three weeks before it’s time for the next size. If you want to grow big plants and have plenty of space, you can also start photoperiod strains straight in 6.6-gal (25 L) containers – as long as you adjust your watering to match.
- Seedling: 3 fl oz – 0.25 gal (0.1 – 1 L) (starter cubes, yogurt cups)
- Early veg: 0.25 – 0.8 gal (1 – 3 L)
- Late veg: 1.3 – 2.9 gal (5 – 11 L)
- Flowering stage: 3.2 – 6.6 gal (12 – 25 L)
- Autoflowering: straight into a 1.6 – 3.2 gal (6 – 12 L) final pot, no transplanting
- Rule of thumb: only ever go up one size at a time
How to Transplant Cannabis: Step by Step
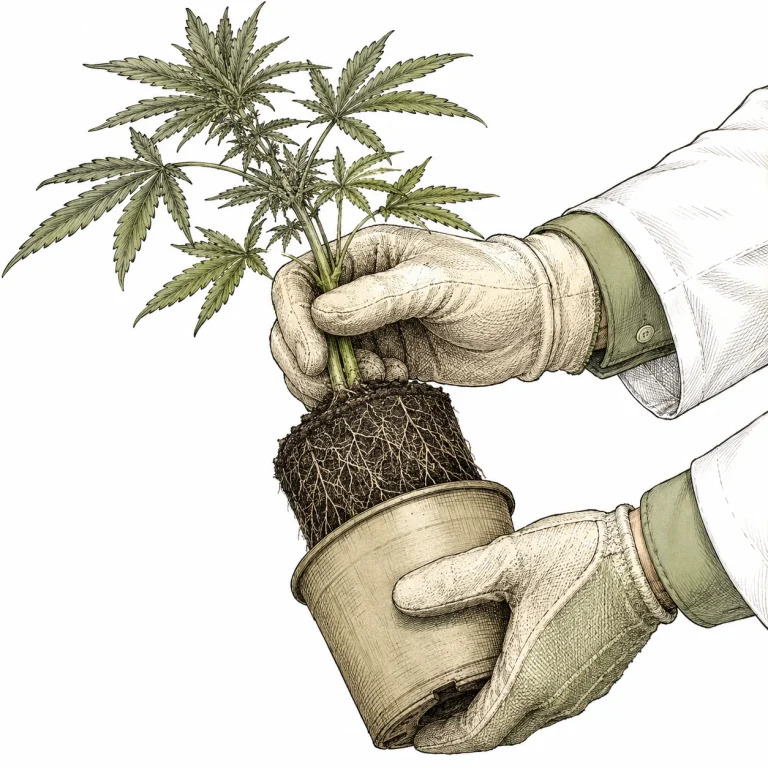
Transplanting cannabis is less complicated than many beginners fear – as long as you prep properly. Water your plant thoroughly 24 to 48 hours before transplanting. A slightly moist, but not wet, root ball holds together better and stays intact when you pull it out. Medium that’s too dry can crumble apart and damage the fine root hairs. Get the new pot ready by filling it one-third of the way with fresh, lightly moistened growing medium.
Then lay one hand flat on the soil surface of the old pot, with the stem between your index and middle fingers, and slowly turn the pot upside down. A little pressure on the bottom of the pot or a gentle squeeze of the sides usually frees the root ball without any trouble. Don’t force anything – never pull on the stem. Once the root ball is out, take a quick look at the roots: healthy roots are white to cream-colored. Brown, slimy or foul-smelling roots can point to a problem.
Set the root ball in the center of the new pot on top of the prepared medium. The stem should sit at the same depth as before – planting too deep can lead to stem rot. Fill in the gap around the root ball with fresh soil, but don’t pack it down too hard – the roots need air. Transplanting is also the best time to get mycorrhizal fungi right onto the fresh roots. Afterward, water moderately until a little water runs out of the drainage holes. Then move the plant to a somewhat sheltered spot without intense light for 24 to 48 hours so it can recover.
A common mistake is feeding right after transplanting. Fresh growing medium already contains nutrients – adding more too soon can quickly lead to cannabis nutrient burn. Wait at least a week before going back to your full feeding schedule. During that time, check the pH of your water – values between 6.0 and 7.0 are ideal in soil grows to keep nutrients as available as possible. Learn more in our article on pH for cannabis.
How long recovery takes also depends on where you started: with an especially big jump in pot size (say, straight from a small starter pot into a large final pot) or when transplanting during the flowering stage, recovery can take up to 7 days even if you did everything right – without any real problem behind it. Only if the drooping lasts longer than a full week, or the plant’s condition keeps getting worse, should you systematically look for deeper causes like root rot or nutrient problems.
- Water 24 – 48 hours before transplanting for a stable root ball
- Pre-fill the new pot one-third of the way with moist growing medium
- Turn the plant upside down and ease the root ball out gently – never pull on the stem
- Check the roots: white and firm = healthy; brown and slimy = problem
- Plant the stem at the same depth as before
- Don’t feed for at least one week after transplanting
- Give it 24 – 48 hours of dimmed light and time to recover
Best Pots for Transplanting Cannabis: Materials Compared
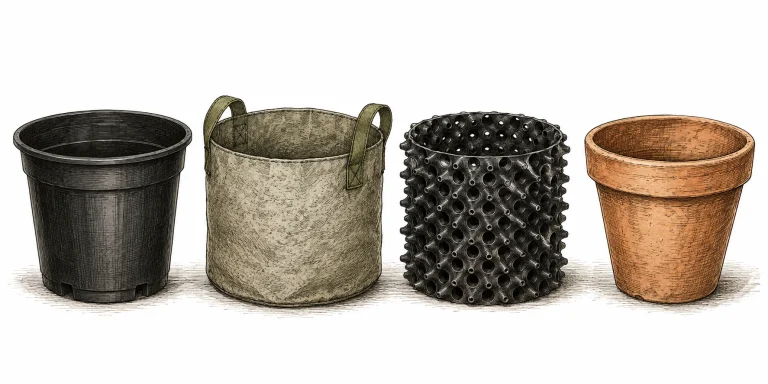
When you transplant cannabis, it’s not just the pot size that matters. The pot material also plays a big role in healthy roots and a healthy plant. The classic black plastic pot is cheap, light and everywhere. But it has one major drawback: roots grow straight out to the walls, turn around and start wrapping in circles. This is called root circling, and it can hurt nutrient uptake.
Fabric pots (see our fabric pot picks (German)) have become the go-to choice for many cannabis growers, and for good reason. The breathable fabric automatically prunes roots when they reach the pot walls. This is called “air pruning.” Instead of circling, the root tip dies back and the plant pushes out more side roots. The result is a denser, more efficient root system. Airflow through the sides also helps the growing medium dry out more evenly, which can greatly reduce the risk of overwatering. Want to take watering off your plate too? You can pair these pots with automatic watering like Autopot or Blumat.
Air-Pots work much like fabric pots, but they’re made of perforated plastic. Their upside: they last longer and are easier to clean. Clay pots are less ideal for cannabis. They hold moisture evenly, but they’re heavy, pricey and hard to clean. For outdoor growing with big plants, non-woven grow bags or large fabric pots of 6.6 gal (25 L) and up are a popular choice. A word on color: dark pots heat up more. In hot climates, go for light-colored pots or insulate them.
- Plastic pot: Cheap, but encourages root circling – only a so-so choice
- Fabric pot: Best choice for most growers – air pruning and great airflow
- Air-Pot: Similar benefits to fabric, more durable and easier to clean
- Clay pot: Heavy, holds moisture evenly, hard to clean
- Dark pots heat up – in high temperatures, choose light colors
- Outdoors: Large fabric bags of 6.6 gal (25 L) and up work great
How to Transplant Cannabis: Common Mistakes and How to Avoid Them
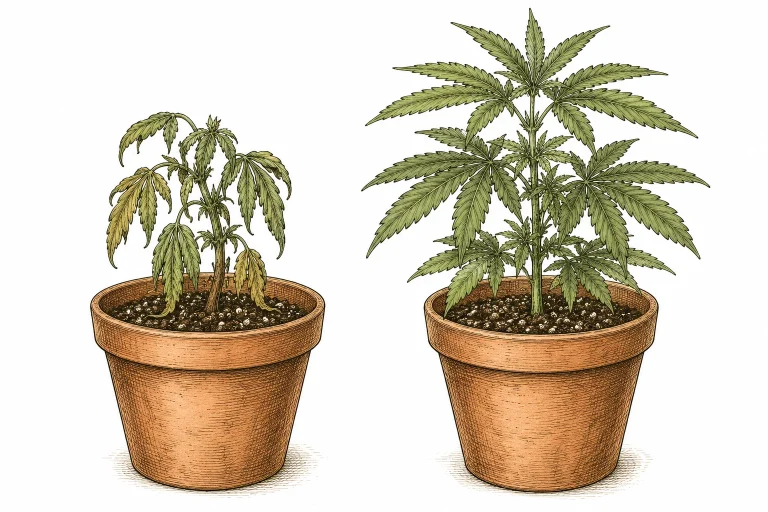
One of the most common transplanting mistakes is bad timing – specifically, waiting too long, until the plant already shows clear signs of stress. By then the rootball is packed tight, and the plant has to deal with transplant stress and nutrient shortages from its cramped roots at the same time. Ideally, you transplant before the first signs of stress appear – purely preventive, on schedule.
Another classic mistake is moving up to a pot that’s way too big. Lots of beginners think: “Then I won’t have to do it as often.” The problem: fresh growing medium without roots stays wet for a long time, because there are no roots yet to drink up the water. That can quickly lead to overwatering and root rot. If you notice yellow leaves after transplanting, it could be a mix of transplant stress and the nutrient profile of the new medium. Check out our article on causes of yellow cannabis leaves to pin down the exact problem.
As a rule, avoid transplanting during the flowering stage. The plant is in a hormone-sensitive phase and puts all its resources into bud development. Repotting after you flip to 12/12 can cost you a big chunk of your yield. The only exception is a real emergency – like severe root rot. Even then, be extremely careful and try not to damage the rootball.
As a rule, don’t transplant autoflowering strains. These plants start flowering automatically on a genetically fixed schedule – no matter the light cycle. Any transplant stress eats into precious growing time you can’t get back. So always sow autos straight into their final pot (1.5 to 3 gal / 6 to 12 L) and leave them there until harvest.
- Transplanting too late: Plant already shows heavy stress – growth may barely recover
- Pot jumps that are too big: Wet, unused medium can lead to root rot
- Transplanting during flowering: Avoid it – it can cost yield and quality
- Transplanting autoflowers: Avoid it – start them in their final pot
- Rootball too dry when transplanting: It falls apart and damages fine root hairs
- Full-strength feeding right after transplanting: Risks nutrient burn
Transplanting Cannabis and Transplant Shock: What to Do When Your Plant Struggles
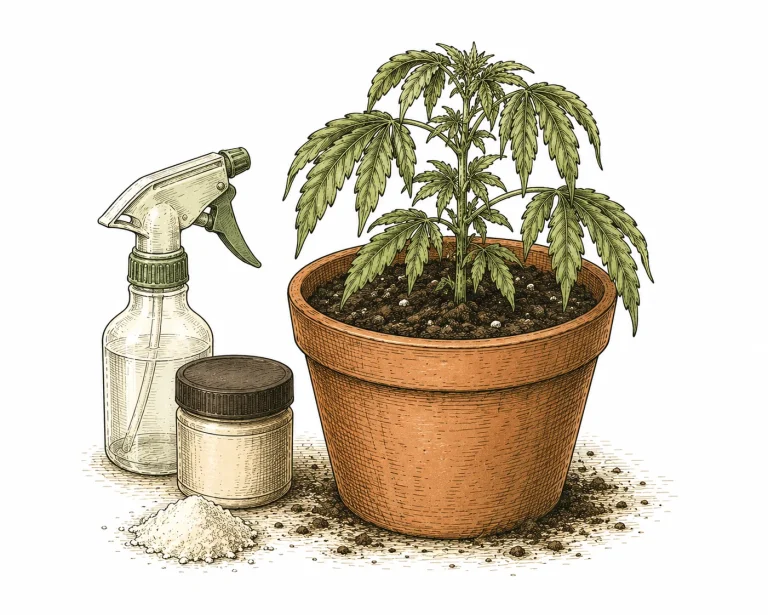
Even if you work carefully, your plant can show some mild transplant stress after you repot it. The leaves droop a bit, growth slows down for a short time and the plant looks a little dull overall. That’s normal and no reason to panic. In most cases the plant fully recovers within 24 to 72 hours. During this phase, don’t add any extra stress: no sudden jump in light intensity, no temperature extremes and no heavy feeding.
You can actively help the recovery along. Mycorrhizal fungi (mycorrhizae) added straight into the planting holes when you transplant help the root system connect with the new growing medium faster. These symbiotic fungi form an extended root network and can boost nutrient uptake significantly. A light foliar spray of plain water on the leaves also cuts down water loss through the stomata while the roots aren’t working at full capacity yet.
If the plant is still drooping hard after three to four days, or keeps getting worse, take a closer look at the roots and the growing medium. Possible causes of lasting stress after transplanting include the wrong pH in the new medium, an unsuitable or contaminated medium, or damaged main roots. Check your pH. You’ll find the ideal ranges in our article on pH for cannabis.
- Slightly droopy leaves after transplanting are normal (up to 72 hours)
- No extra stress factors for the first 48 hours after transplanting
- Mycorrhizal fungi help the roots recover faster
- A foliar spray of plain water reduces water loss
- Dim the light for 24 – 48 hours after transplanting
- No full-strength feeding for at least 7 days after transplanting
- Big jump in pot size or transplanting during the flowering stage: up to 7 days of recovery can be normal, with nothing actually wrong
Choosing the Right Growing Medium for Transplanting Cannabis
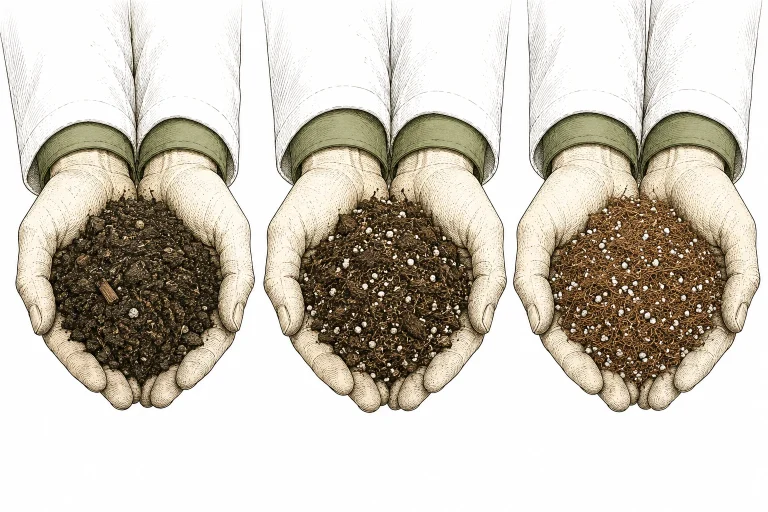
The growing medium you transplant into matters at least as much as the pot size. For most indoor grows, a quality cannabis mix or a light, nutrient-rich potting soil with 20 to 30 percent perlite is a solid choice. Perlite greatly improves drainage and aeration, which lowers the risk of waterlogged soil and overwatering. For a detailed look at coco, peat, rockwool and perlite, check out our growing medium comparison.
Skip cheap all-purpose soil with a very high peat content. It tends to compact after watering and pushes the air out of the root zone. Heavily amended soil (“hot soil”) isn’t a good fit for seedlings and young plants either, because the high nutrient load can burn the roots. For seedlings and the early vegetative stage, always go with a light, low-nutrient starter mix. We compare branded soils like BioBizz Light-Mix in our cannabis soil buying guide (German).
If you grow in coco coir (coco), keep in mind that it contains no nutrients at all and needs a hydro-style feeding schedule. Coco allows very fast root growth and is more forgiving of overwatering, but it needs consistent feeding with every watering. Our coco coir comparison (German) shows which products work well for beginners. Keep the pH in coco between 5.5 and 6.2, a bit lower than in soil. Calcium deficiency shows up more often in coco grows. Learn more in our article on calcium deficiency in cannabis.
- Recommended: cannabis mix or potting soil with 20 – 30% perlite
- Perlite improves drainage and aeration and reduces waterlogging
- No “hot soil” for seedlings – it can cause nutrient burn
- Coco coir: fast root growth, but needs consistent feeding
- pH in soil: 6.0 – 7.0 | in coco: 5.5 – 6.2
- Starter mix for seedlings: keep it light and low in nutrients
Which growing medium you use for transplanting depends on your goals. You’ll find a step-by-step guide to mixing your own growing medium in our separate article.
Frequently Asked Questions
When is the best time to transplant cannabis?
The best time to transplant cannabis is just before the first signs of stress show up. That means when roots are just starting to reach the drainage holes, or when the pot dries out very fast. A good rule of thumb: about one week per quart (1 L) of pot volume. Avoid transplanting during the flowering stage.
Can I transplant cannabis during the flowering stage?
Generally, no. Transplanting cannabis during the flowering stage causes a lot of stress and can noticeably cut your yield. It only makes sense in a real emergency, such as root rot. So always plan your pot change for the vegetative stage (veg).
Why shouldn’t I transplant autoflowering cannabis?
Autoflower strains have a genetically fixed life cycle that you can’t stretch out. Any transplant stress costs them valuable time they won’t make up. That’s why you should sow autos straight into their final pot (1.5 to 3 gal / 6 to 12 L).
How much bigger should the new pot be?
When you transplant cannabis, only go up one size at a time. A typical progression: 1 qt (1 L) > 0.8 gal (3 L) > 2 gal (7 L) > 4 to 6.5 gal (15 to 25 L). Jumping too big leaves wet growing medium with no roots in it, which can seriously raise the risk of overwatering and root rot.
What are fabric pots and why are they better?
Fabric pots are a favorite for transplanting cannabis. They’re breathable cloth pots that use air pruning to keep roots from circling around the pot walls. Instead, the plant builds a denser, more efficient root system. Fabric pots also dry out more evenly, which lowers the risk of overwatering.
What should I do if my plant droops after transplanting?
Some light drooping for 24 to 72 hours is normal and nothing to worry about. Move the plant to a spot with dimmed light, and skip feeding and any other stress. Lightly mist the leaves with water. If the plant still hasn’t bounced back after four days, check your pH and growing medium.
How many times does cannabis need to be transplanted in total?
Photoperiod plants grown indoors usually need to be transplanted two or three times over the whole grow: from the starter pot to an intermediate pot, then into the final pot shortly before or right after you flip to the flowering stage. Outdoor plants can go through four or five transplants, depending on how big you want them to get in the end.
If you’re transplanting freshly rooted plants, it helps to know how to get healthy young plants in the first place. Check out our guide Taking and Rooting Clones.
Want to know which pots hold up best for transplanting? Take a look at our Recommended Gear page.
Do I need to transplant when the soil is just “worn out”?
Not every reason to transplant shows up in the roots. With organic growing mediums especially, the built-in nutrient reserves can run dry after about 6 to 8 weeks, even if the pot isn’t root-bound yet. Signs of exhausted soil: slower growth despite ideal conditions, paler green on the upper leaves, and soil that looks visibly more compacted and darker than when you started.
In that case, you don’t necessarily have to do a full transplant. Adding a layer of worm castings or compost on top (“top-dressing”) is often enough to keep the plant fed through harvest. If you want to skip transplanting for good, you can set up your growing medium as a living soil mix from day one. It regenerates itself through active soil life.
Bottom Line
Transplanting cannabis isn’t rocket science, but it’s a key factor for healthy growth and big yields. Know the right timing, pick the right pot size and handle your plant gently, and you give it ideal conditions for every stage. Choosing the right pot material (fabric pots are your best bet) and a loose, well-draining growing medium makes a big difference over the long run. Stick to one simple principle: transplant before problems show up, not after. Your plants will thank you with strong, stress-free growth.
