


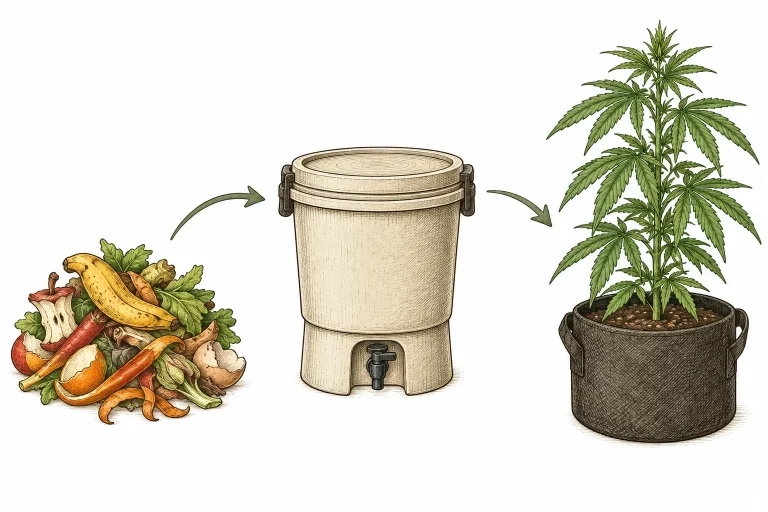
Bokashi for cannabis means using fermented kitchen scraps to feed your plants. It’s one of the most sustainable ways to turn leftovers into valuable nutrients. Instead of tossing your scraps, you ferment them airtight with effective microorganisms. The result is a nutrient-rich liquid fertilizer plus solid compost for your growing medium. If you want to grow organically and waste less, Bokashi is a real alternative to synthetic nutrients. In this article, we’ll walk you through how to start Bokashi, how to use it the right way, and how to avoid common mistakes.
What Is Bokashi and Why Does It Work for Cannabis?
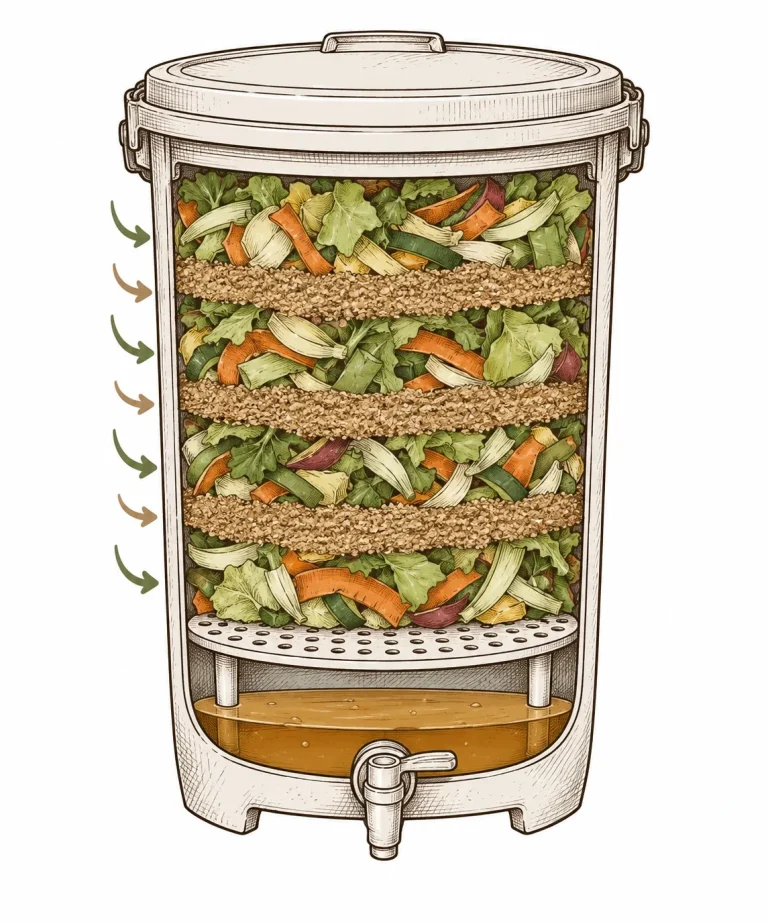
Bokashi is a Japanese word that means fermented organic matter. Classic composting lets scraps rot down with plenty of oxygen. Bokashi fermentation is different: it’s anaerobic, so it happens without oxygen, in a bucket sealed airtight. Effective microorganisms (EM) break down your kitchen scraps within a few weeks into an acidic, nutrient-rich mass. Once it goes into the soil, it keeps breaking down from there.
This process is especially interesting for growing cannabis. It delivers organic nutrients like nitrogen, phosphorus and potassium, plus lots of micronutrients, in a form your plants can take up easily. At the same time, the microorganisms boost healthy soil life. That supports root development and can make your plants more resistant to pathogens. Want to build up your soil life even more? Bokashi pairs well with mycorrhizal fungi. And if you already run an organic cannabis grow, Bokashi is a perfect addition to your nutrient cycle.
Compared to regular compost, Bokashi is ready much faster. Done right, it doesn’t smell rotten, more sweet and sour. And you can easily start it in a small apartment with no yard.
What You Need for Bokashi Cannabis Fertilizer
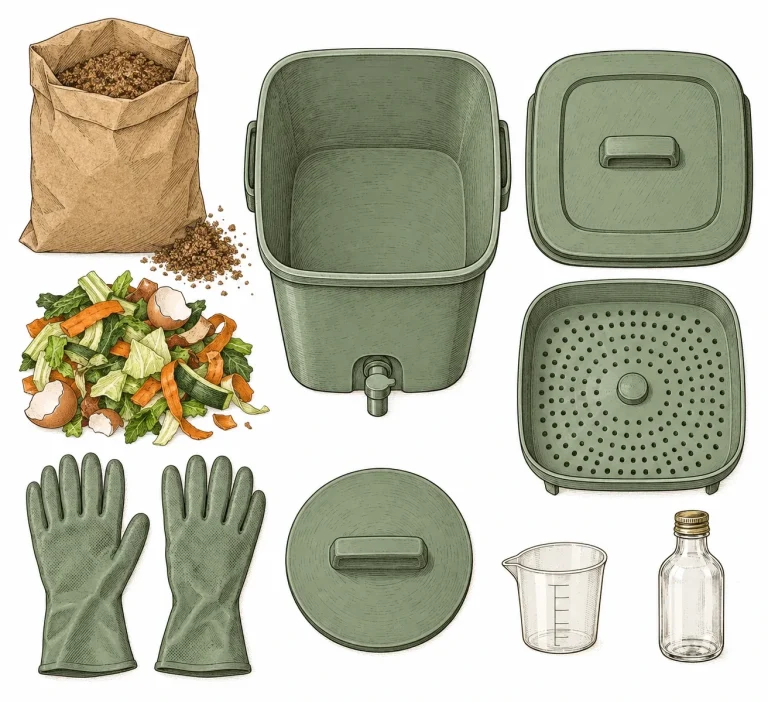
Before you start fermenting, get the right equipment and good-quality ingredients. The quality of your Bokashi ferment depends a lot on how clean and oxygen-free the fermentation stays.
A dedicated Bokashi bucket with a spigot at the bottom is ideal. It lets you drain off the Bokashi juice regularly, so the scraps don’t sit in their own liquid. A regular bucket with a tight-fitting lid works too. Just open it regularly and scoop out the liquid.
- Airtight fermentation bucket with a spigot (2.6 to 5.3 gal (10 to 20 L) is enough for most growers)
- Bokashi starter culture or effective microorganisms (EM), usually sold as bran or liquid concentrate
- Kitchen scraps like vegetable and fruit leftovers, coffee grounds, eggshells and plastic-free tea bags
- A weight or press to pack the scraps down airtight
- Gloves and a knife to chop up the scraps
- A second container to catch the Bokashi juice
How to Start Bokashi: 6-Step Guide
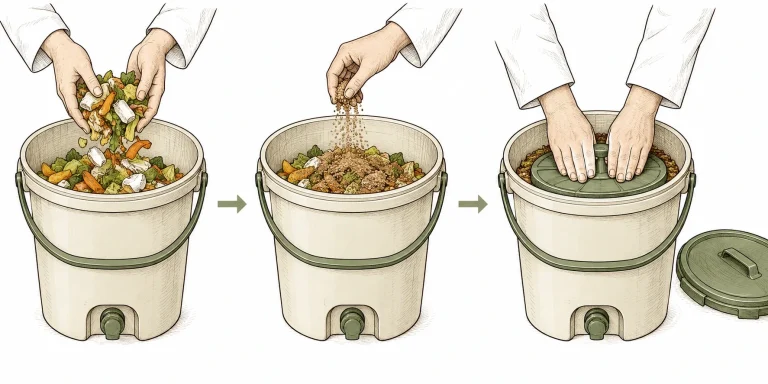
Starting bokashi is easy, and you don’t need any experience. The key is to be strict about sealing the bucket airtight. Oxygen is fermentation’s biggest enemy: it can lead to rot instead of the lactic acid fermentation you want.
Follow these steps in order, and your first bokashi batch for cannabis should turn out reliably.
- Step 1: Chop your kitchen scraps into small pieces so the microbes have more surface area to work on
- Step 2: Add a thin layer of scraps to the bucket, about 1 to 2 in (3 to 5 cm) deep
- Step 3: Sprinkle a handful of bokashi bran or EM solution evenly over the layer
- Step 4: Press the layer down firmly with a spoon or a tamper to squeeze out the air
- Step 5: Repeat steps 1 to 4 until the bucket is full, then seal it airtight
- Step 6: Every two to three days, drain the bokashi juice through the spigot
Fermentation Time and Signs of Successful Bokashi
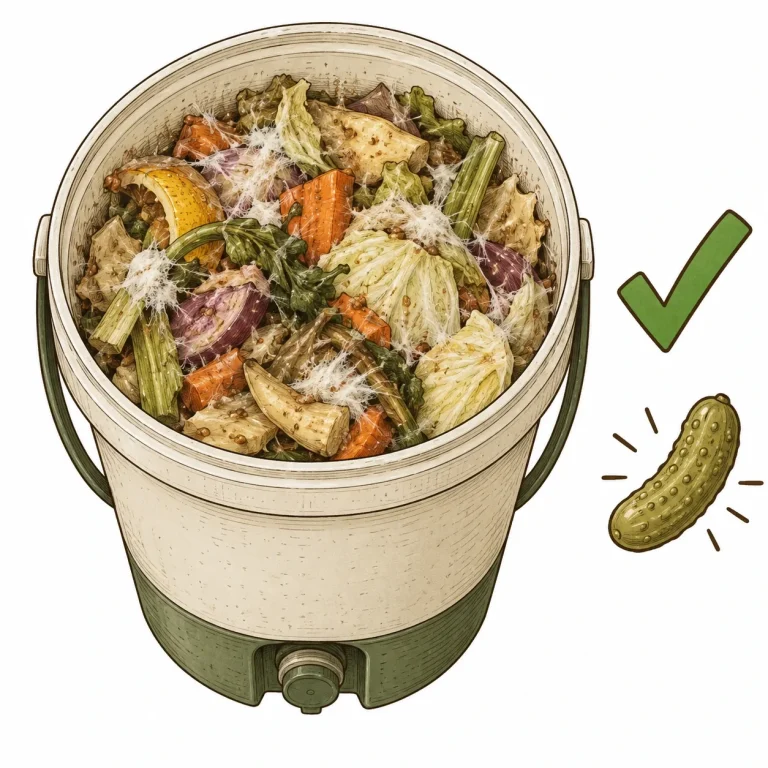
After the last fill, keep the bucket tightly sealed for about two weeks so the fermentation can fully finish. Keep draining the bokashi juice regularly during this time, because standing liquid can disrupt the fermentation.
A good ferment smells pleasantly sour, slightly boozy or vinegary, a lot like pickled veggies. You’ll often see a whitish layer on the surface. That’s beneficial yeasts and lactic acid bacteria, and it’s completely harmless. If the contents smell rotten, musty or like spoiled meat, oxygen got in during fermentation, and you should toss the batch.
After the two weeks, the solid bokashi ferment is ready for the next step. It looks almost unchanged, but it has lost its structure and is highly acidic. That’s why you should never give it straight to your plants.
How to Use Bokashi Juice and Bokashi Ferment
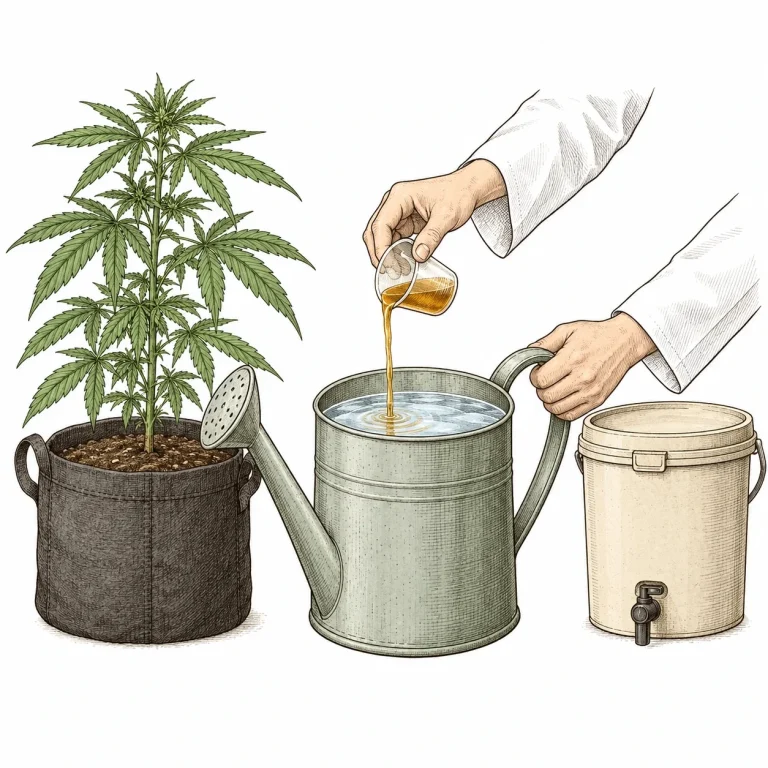
The bokashi juice that drains off during fermentation is highly concentrated. Never use it undiluted: with a pH that can drop below 4, it can burn your plants’ roots. Dilute it 1:100 to 1:200 with water, which works out to about 20 to 40 ml of juice per gallon (5 to 10 ml per liter), and pour the solution directly onto the growing medium.
Always check the pH of your watering solution before you use it, ideally with a reliable pH meter and EC meter. For soil grows, aim for a pH of 6.0 to 6.5 so your plants can take up nutrients as well as possible. To estimate how much pH Up or pH Down your watering solution needs, try the pH Calculator.
Solid bokashi ferment doesn’t go straight to your plants. First you bury it in soil or mix it with compost or your growing medium. There, soil life breaks it down further over two to four weeks. During that time, keep roots away from the fresh ferment, because its fermentation acids need time to neutralize. The easiest way is to bury the ferment about 6 in (15 cm) deep in unused soil or to start a separate curing pile.
How to Fit Bokashi Into Your Cannabis Feeding Schedule
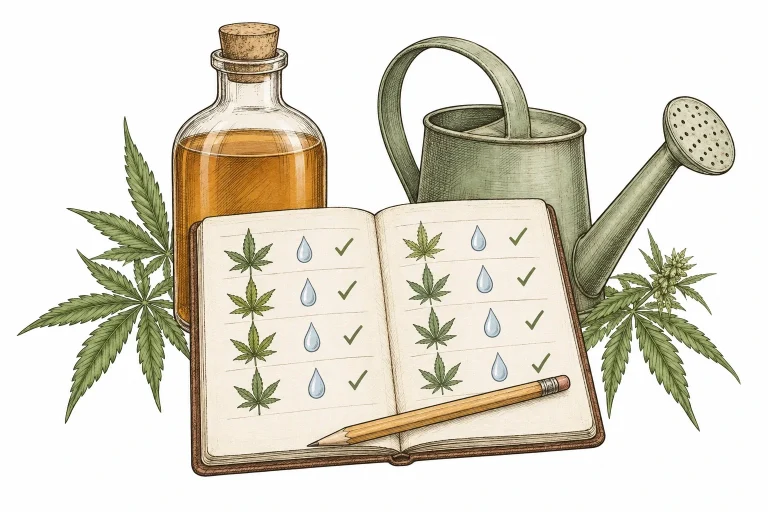
Bokashi mainly supplies nitrogen and potassium, plus a wide range of micronutrients. But it doesn’t replace a complete feeding strategy, especially not in the flowering stage, when your plant’s need for phosphorus climbs sharply. Think of bokashi tea as a valuable add-on to your base medium. Also check the values in the cannabis NPK chart so you don’t overfeed or underfeed.
In the vegetative stage, you can use bokashi tea about every 7 to 10 days in place of a regular feeding. In flower, cut back how often you use it and pair it with phosphorus-rich organic nutrients like guano or bone meal. Keep a close eye on your plant’s leaves. Organic nutrients often act with a delay, and an overdose usually only shows up after a few days.
Also, don’t use bokashi at the same time as strong synthetic mineral nutrients. High salt levels can weaken the microorganisms, and you may lose the biological effect you’re after. If you want liquid biology without fermentation, you can brew compost tea instead.
Common Bokashi Mistakes With Cannabis (and How to Avoid Them)
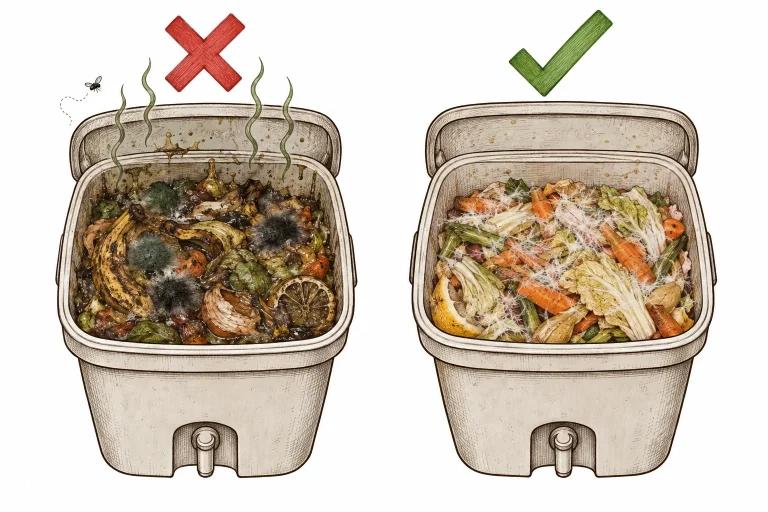
Bokashi is easy to pull off, but beginners often run into the same few mistakes that can ruin a batch. Once you know these pitfalls, you can avoid them from day one.
A common mistake is chopping kitchen scraps too coarsely. Fermentation then runs unevenly, and some pieces rot instead of fermenting. Not packing the layers down often enough is just as bad: it leaves air pockets that favor unwanted putrefying bacteria. And if you forget to drain the bokashi tea regularly, the mass ends up sitting in its own juice and starts to rot.
Another frequent mistake is giving your plant too strong a dose of the finished tea. Bokashi tea is very acidic and salty, so an overdose can quickly damage roots. The signs can look a lot like other overfeeding problems, for example the symptoms of nitrogen toxicity in cannabis. So always stick to the recommended dilution ratios and raise the strength slowly.
- Always chop kitchen scraps small, never add big chunks
- Press down every layer firmly to squeeze out the air
- Drain the bokashi tea at least every 2 to 3 days
- Always dilute the finished tea at 1:100 to 1:200
- Never add larger amounts of meat or dairy scraps
- Don’t use bokashi at the same time as synthetic nutrients
Frequently Asked Questions
Can I make bokashi for cannabis if I only have a grow tent and no balcony or yard?
Yes. Bokashi stays almost odor-free and takes up very little space in a closed bucket, as long as the lid stays airtight. You don’t need a yard or a balcony. A spot in your kitchen or pantry is all it takes. Just keep the bucket out of direct sun and extreme cold. Room temperatures between 59 and 77 °F (15 and 25 °C) are ideal.
How often can I give Bokashi tea to my cannabis plants?
Diluted correctly at 1:100 to 1:200, you can use Bokashi tea about every 7 to 10 days in place of a regular feeding. During the flowering stage, cut back on how often you use it and lean more on phosphorus-rich supplements. Bokashi mainly supplies nitrogen and potassium.
Which kitchen scraps don’t work for Bokashi?
Skip larger amounts of meat, fish, dairy or heavily processed, oily leftovers, or add them only in very small amounts. They can disrupt fermentation and lead to nasty smells. Large amounts of citrus peels and onion or garlic scraps aren’t a good fit either. Their essential oils can slow down the microbe culture.
Is there anything legal to consider when using Bokashi for cannabis?
Bokashi itself is simply an organic feeding method, the same one gardeners use for vegetables and flowers. What matters is the grow, not the nutrients. Check the cannabis laws where you live before growing.
How long does finished Bokashi tea keep?
Stored undiluted in a cool, dark place, Bokashi tea keeps for several months. Its natural acidity acts as a preservative. Once you dilute it with water, though, use the solution within a few hours. The microbes lose their activity quickly at that point.
The Bottom Line
Bokashi for cannabis combines sustainability with an effective organic feeding approach. It turns kitchen scraps into plant food instead of trash. With the right bucket, a quality starter culture and strictly airtight fermentation, even beginners can pull it off reliably. Stick to the dilution ratios and treat Bokashi as a supplement to a well-planned feeding schedule, and you can expect sturdier plants and a livelier soil food web. If you want to run a truly eco-friendly grow, for example with a living soil mix, Bokashi is one of the most rewarding methods out there.
