

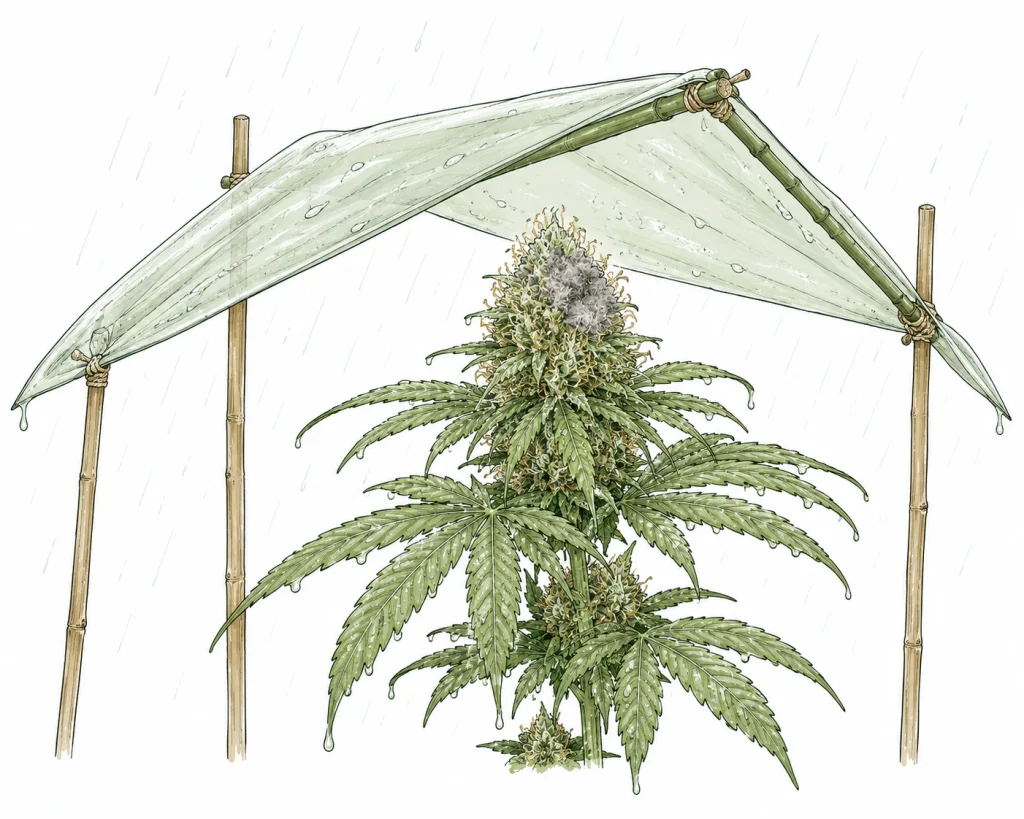
Mold after rain is one of the most common and most destructive outdoor problems home growers face — especially in the damp fall weeks right before harvest. Bud rot (botrytis, gray mold), caused by the fungus Botrytis cinerea, can infest and ruin entire buds within 24 to 48 hours of persistent rain. If you know the early symptoms and react quickly, you can often still prevent a total loss. In this article, we show you how to reliably spot cannabis mold after rain, prevent it the right way and, if worst comes to worst, still save infected plants.
Step 1: Why cannabis mold after rain is so dangerous
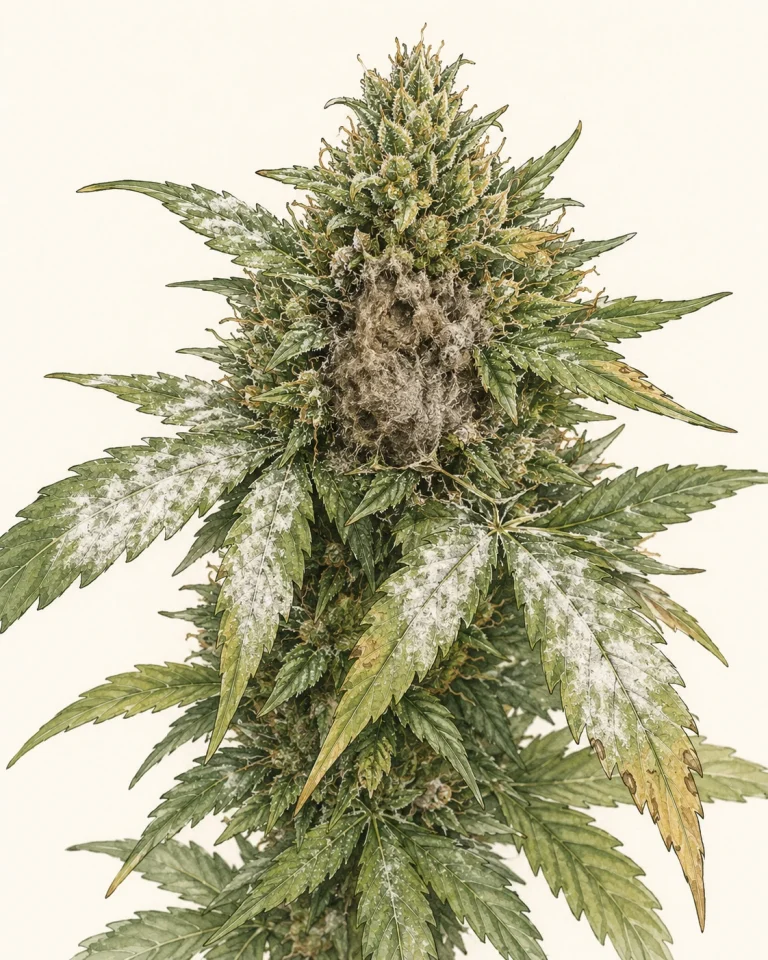
After several days of steady rain, humidity around your outdoor plants rises dramatically. Water can stay trapped in dense buds for hours because hardly any evaporation happens inside the bud. This exact mix of warmth and moisture is the perfect habitat for Botrytis cinerea — the notorious gray mold. The fungus produces millions of spores that are carried on the wind and infect neighboring plants in no time.
Plants with very dense, compact buds are especially at risk, because moisture stays trapped there the longest. Indica-dominant strains with large, tightly packed colas show mold far more often after rainy spells than airier sativa structures. Plants that already show mild nutrient stress or are otherwise weakened also get infected faster — a stressed immune system can’t stop the spread.
In cool, wet climates the weather makes the problem worse: late summer and early fall often bring rain fronts right into the main flowering period from August to October. If you grow outdoors, you need to be especially alert during this time and check your plants daily.
- Botrytis cinerea needs only 12–24 hours of moisture to establish itself
- Temperatures of 59–77 °F (15–25 °C) with humidity above 70% are ideal conditions
- Dense bud structures hold water especially long
- Spots that are already infected release millions of spores that can infect whole plants
- Weakened plants with nutrient problems are more susceptible to fungal infections
Step 2: Spotting cannabis mold after rain – symptoms in detail
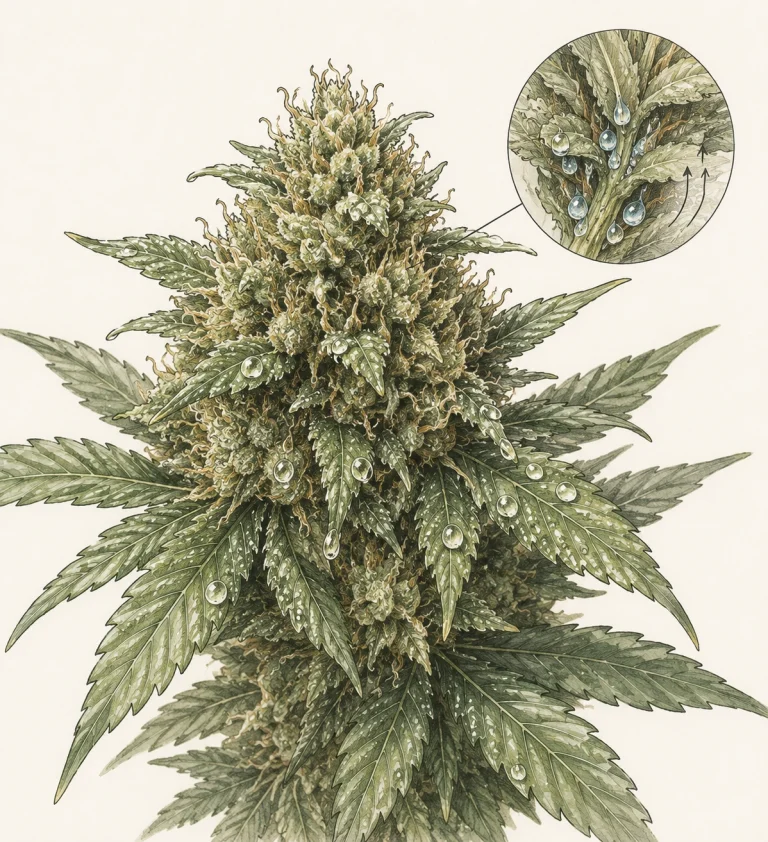
Bud rot first shows up as small gray or brownish spots that look like wet, soft patches on the bud. In the early stage, you can easily mistake them for normal signs of ripening or water spots — so look closely. If you lightly tap a suspicious spot and a gray puff of spores comes off, the infection is confirmed. That’s the moment you need to act immediately.
In the advanced stage, you’ll see the typical gray, cotton-like mycelium covering the entire bud. The plant tissue underneath is soft, brown and literally rotting away. A musty, damp smell — similar to wet soil or old hay — is another sure sign. If you pull apart the stem of an affected bud, you’ll often see brown-black discoloration deep inside the bud, while the outside still looks fairly normal.
It’s most easily confused with pythium root rot, powdery mildew and normal nutrient deficiency symptoms. Powdery mildew, on the other hand, shows a white, powdery coating on the leaves — not on the buds — and smells different. Bud rot always smells musty and damp and prefers to sit inside the buds themselves, not on the leaves. If you’re unsure about symptoms, check out the Plant Diagnosis overview on PlantClue.
- Early: soft, wet, gray-brown spots on the bud leaves
- Middle: gray, dusty spore coating — comes off as a cloud when tapped
- Late: cotton-like gray mycelium with soft, brown rotting tissue underneath
- Musty, earthy smell — clearly different from healthy buds
- Brown discoloration deep inside the bud stem when you pull it apart
- Sometimes the first symptoms show only on a single sugar leaf
Step 3: First steps when you find cannabis mold after rain outdoors
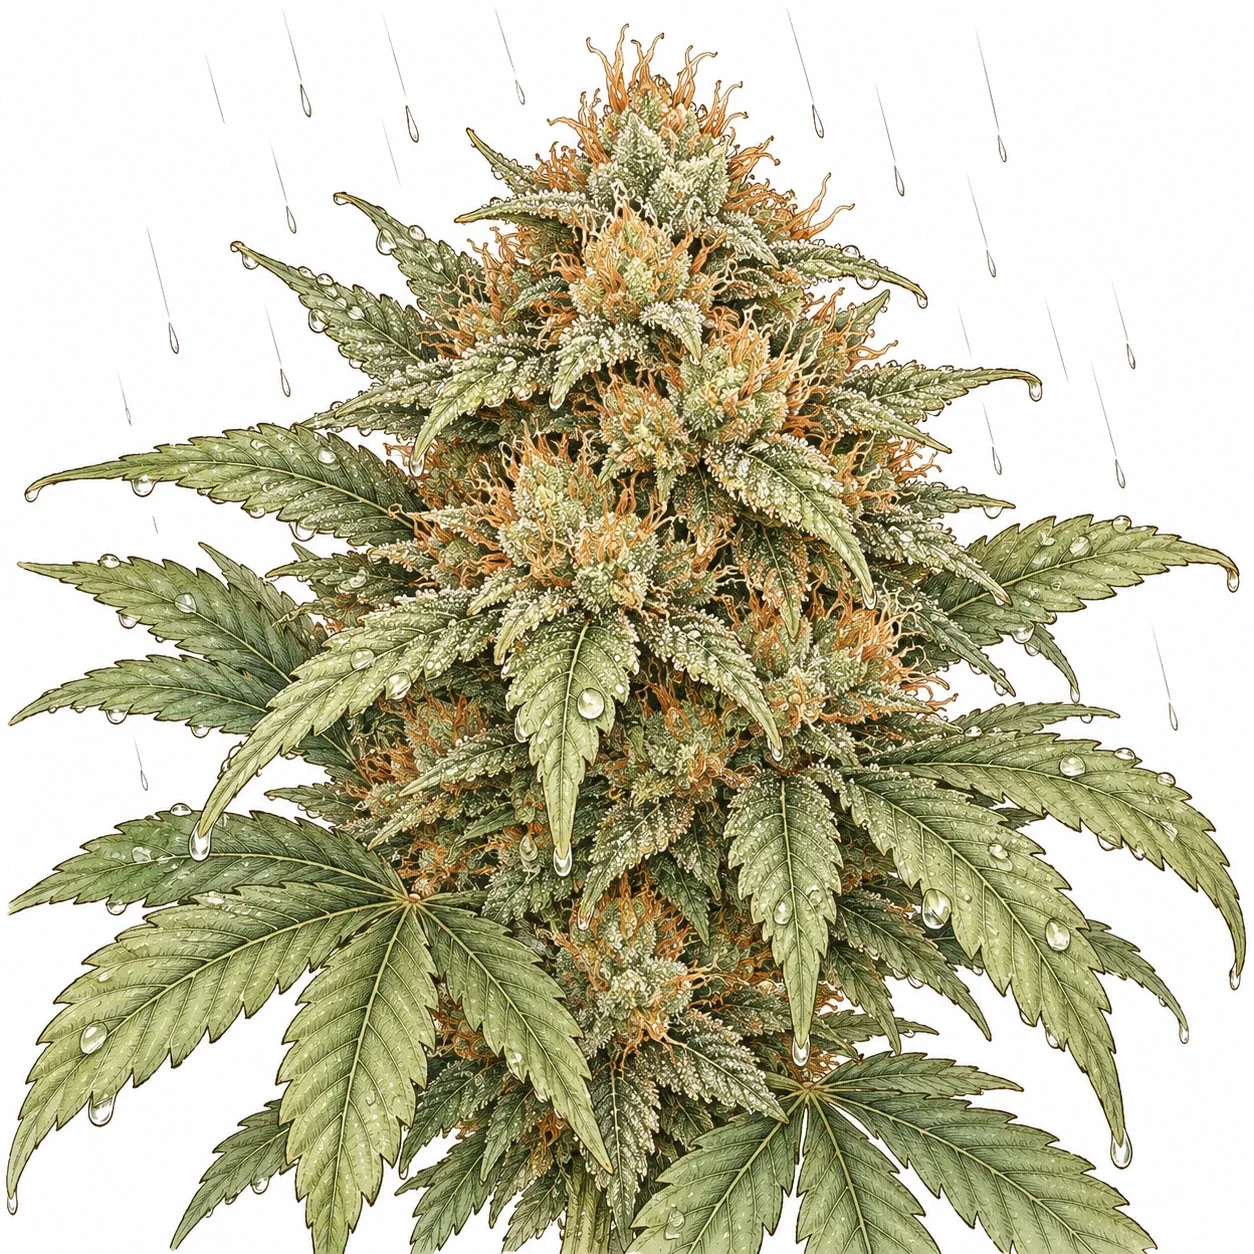
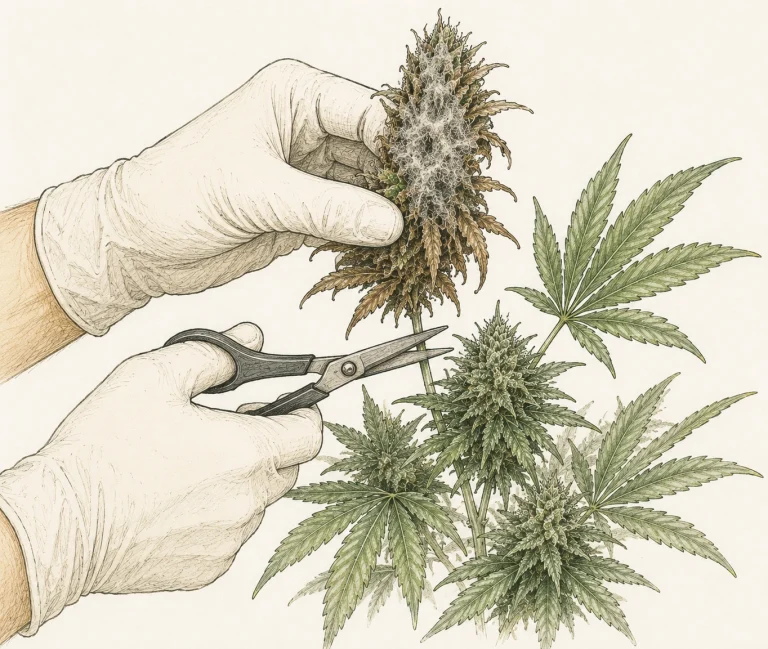
When you find bud rot, there’s only one right first response: act immediately and remove the affected area generously. Always wear disposable gloves so you don’t carry spores to other plants. Cut at least 2–4 in (5–10 cm) into healthy tissue around the visibly infected spot — mold often spreads further than you can see at first. Don’t put infected material on the compost; seal it in a plastic bag and throw it in the household trash, otherwise the spores will keep spreading.
After removing it, good airflow matters most. Take off excess large leaves around the remaining buds so air can circulate better and moisture dries faster. If you can, move container plants to a covered but well-ventilated spot. After a rainy spell, don’t water again until the growing medium has noticeably dried out — learn how to water correctly in our article on how to water cannabis plants.
If mold has infested more than 30–40% of the plant, you face a tough decision: harvest early as an emergency measure, or keep going and risk losing everything. If your plants are still 2–3 weeks from their ideal harvest time and the infection has already spread far, an emergency harvest followed by careful drying can be the better choice. Material that’s already infected isn’t fit for consumption, though, and shouldn’t be processed any further.
- Wear disposable gloves so you don’t spread spores
- Cut away generously, at least 2–4 in (5–10 cm) into healthy tissue
- Clean your scissors with isopropyl alcohol after every cut
- Dispose of infected material in the household trash, don’t compost it
- Thin out foliage around the buds for better airflow
- Move container plants to a covered, ventilated area
- Consider an emergency harvest if more than 40% is infected
Step 4: Telling bud rot apart from other types of mold
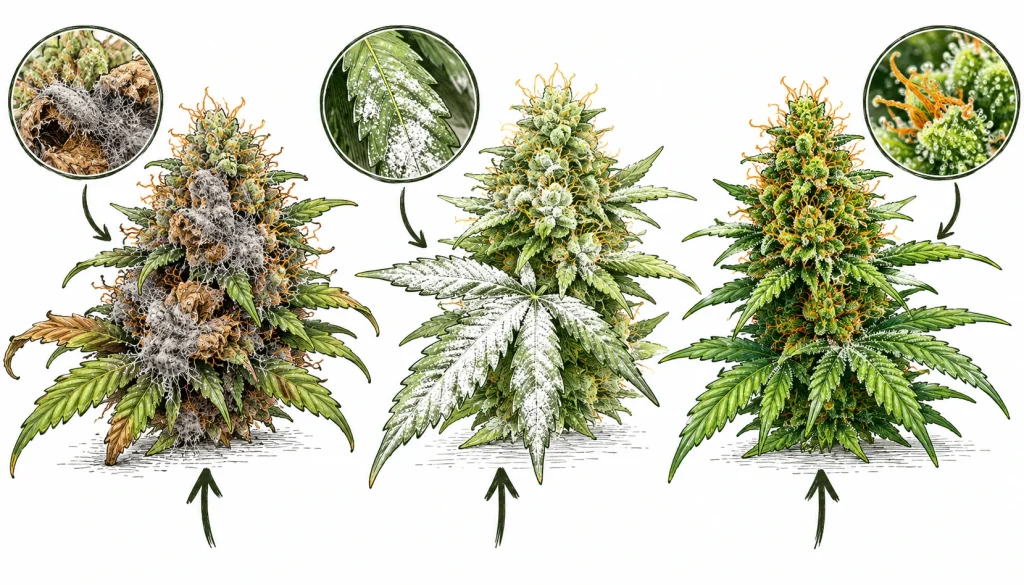
Not every infection is bud rot. With powdery mildew (Erysiphe), you’ll see a white, powdery coating mainly on leaves and young shoots — but hardly ever inside the buds themselves. Powdery mildew doesn’t smell musty, and the tissue underneath stays intact longer. It often appears with temperature swings between day and night and spreads across the leaves without rotting right away. Treatment and prevention are similar, but bud rot is far more destructive because it attacks the buds directly.
Pythium and other oomycetes mainly affect the root system and show up on the plant as general wilting and yellow leaves, without the typical mold coating on the buds. Slimy, brown roots in a potted plant are a clear sign of root pathogens — you’ll find more in the article on cannabis nutrient burn and stress symptoms, which also explains water stress symptoms. Septoria (a leaf spot fungus), on the other hand, shows yellow to brown spots with a dark edge on the leaves, but no gray spore coating.
If you’re unsure, try the simple finger test: lightly tap the suspicious spot. If a visible gray cloud of spore dust comes off, it’s very likely bud rot. If no dust rises and the texture is more dry and powdery, it points more toward powdery mildew. If no visible spore cloud forms and the tissue is simply brown and soft, sunburn, cold stress or heat stress could also be the cause.
- Bud rot: gray dust, musty smell, attacks buds from the inside
- Powdery mildew: white powdery coating on leaves, no musty smell
- Pythium: attacks the roots, general wilting, no coating on buds
- Septoria: yellow-brown leaf spots with a dark edge, no spore coating
- Finger test: spore dust when tapped = strong sign of bud rot
Step 5: Prevention – how to protect your outdoor plants from mold after rain
When it comes to cannabis mold after rain outdoors, prevention always beats cure. The most effective mechanical protection is a plastic roof or a simple greenhouse that keeps rain out but lets air through. The key point: the side openings must be large enough for humidity to escape — a completely closed tent without ventilation makes everything worse. If possible, position your plants so the wind blows through from the main side and moisture dries quickly. In addition, lollipopping improves airflow in the lower part of the plant and lowers the risk of mold.
Biological fungicides based on Bacillus subtilis or copper can be used preventively before mold appears. These products form a kind of protective film on the plant surface that makes it harder for fungal spores to take hold. Don’t spray them directly onto buds in sunshine, though — do it in the evening or early morning, and leave enough time before harvest; the manufacturer’s instructions are binding here. After using biological products, make sure everything dries well so the moisture from spraying doesn’t become a problem itself.
On the nutrient side, potassium plays an important role in fungal resistance: it strengthens cell walls and makes the plant more resistant to invading fungal hyphae. Make sure the supply is balanced, especially during the flowering stage, and avoid excessive nitrogen at the same time, since lush, soft tissue gets infected more easily. If you’re not sure whether your plant shows nutrient problems, take a look at our Plant Diagnosis overview — you’ll find all deficiency symptoms at a glance there.
- Plastic roof or mini greenhouse with side ventilation
- Strain choice: favor mold-resistant strains with an airy bud structure
- Position plants so the wind blows through
- Apply Bacillus subtilis products preventively before rainy spells
- Use copper-based fungicides sparingly and carefully
- Thin out foliage regularly during flowering (lollipopping/defoliation)
- Ensure a balanced potassium supply during flowering
- Don’t water right after rain — let plants dry out first
Step 6: Weather timing and emergency strategies right before harvest
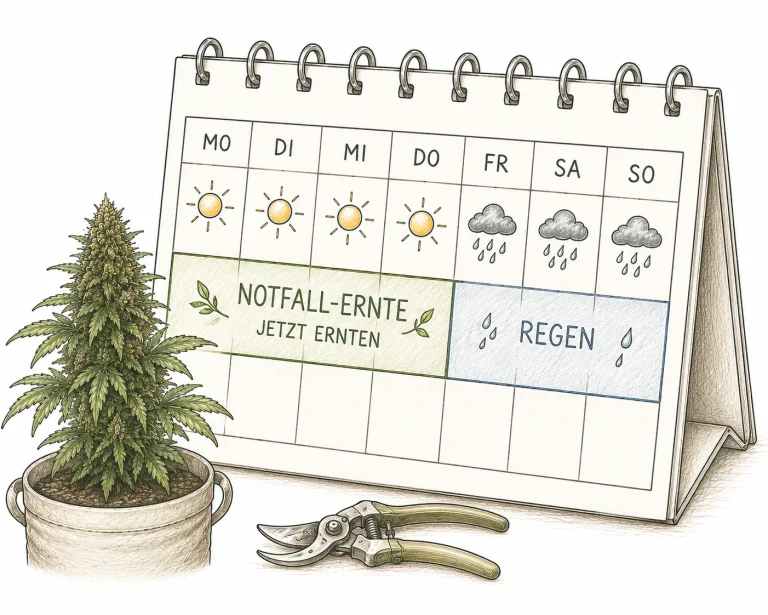
If your plants are still 1–3 weeks from the ideal harvest time and a longer rainy spell is in the forecast, you have an important trade-off to make. Harvesting early costs potency and weight, but it doesn’t risk losing your crop to mold. Most experienced outdoor growers follow a rule of thumb: if 50–60% of the trichomes are already cloudy (milky) and more than 3–4 days of rain are forecast, an early harvest is often the smarter decision. A 10–15% loss in potency is better than an 80% loss to rot.
If you decide to wait, actively protect your plants. You can quickly and cheaply stretch clear plastic sheeting over simple PVC frames above container plants. Large operations sometimes even use heater fans to actively lower humidity — for home growers, a battery-powered mini fan that keeps the air moving between the plants is often enough. Avoid direct heat on the buds, though, because heat stress also seriously harms quality and the terpene profile.
After a rainy spell, check every single plant and every branch carefully — from top to bottom and from the outside in. Pay special attention to the so-called “hidden spots”: the inside of large colas, the junctions between branches and the main stem, and the lower, less ventilated parts of the plant. That’s exactly where mold takes hold first, because there’s little air movement and a lot of moisture.
- At 50–60% cloudy trichomes and 3+ days of rain: consider an emergency harvest
- Stretch clear plastic over container plants when steady rain is forecast
- Use a fan between plants to keep the air moving
- Check intensively for mold every day after rainy spells
- Check junctions between branches and stem especially thoroughly
- Inspect colas from the inside out for hidden mold spots
Prevention starts with good rain protection. You’ll find a complete guide to growing cannabis outdoors in our outdoor grow guide.
Frequently asked questions
Can I still dry and consume moldy cannabis?
No, absolutely not. Mold on cannabis produces mycotoxins, which don’t go away when the buds are dried. Infected buds should never be consumed — neither smoked nor as an extract. Remove all affected spots generously and dispose of them in the household trash. Clean, unaffected buds from the same branch can still be used after a thorough inspection.
How fast does cannabis mold develop after a rainy spell?
Under ideal conditions — humidity above 70%, 59–77 °F (15–25 °C) — bud rot can spread from a single bud to the entire branch and neighboring plants within 24 to 48 hours. After several days of rain, check thoroughly every day, ideally in the morning before the sun spreads the spores further with rising air.
Which strains are most resistant to mold after rain?
Strains with ruderalis or sativa genetics usually have airier bud structures and are more mold-resistant. You’ll find an overview of suitable outdoor strains for cool, wet climates in our separate article. Breeders offer strains specifically labeled “mold-resistant,” such as Northern Lights, Durban Poison or special outdoor autoflowers. Indica-dominant strains with massive, dense buds are especially vulnerable in damp climates and should only be grown under cover.
Does baking soda or hydrogen peroxide help against mold on cannabis?
Baking soda solutions (sodium bicarbonate) can briefly change the pH on the leaf surface and slow down powdery mildew, but they hardly work against bud rot. Diluted hydrogen peroxide (3%) can disinfect affected areas but doesn’t reliably kill all fungal spores inside the bud. Both methods are supplementary at best and don’t replace consistently removing infected spots.
What’s the difference between bud rot (botrytis) and powdery mildew on cannabis?
Bud rot (gray mold) forms gray, dusty spore masses right inside the buds, smells musty and damp and makes the tissue rot. It’s especially active after rain and in high humidity. Powdery mildew shows a white, powdery coating mainly on leaves and stems, barely smells and doesn’t make the tissue rot at first. Both are dangerous, but bud rot is the bigger threat during the flowering stage.
Can I fight mold with a copper fungicide?
Copper-based fungicides (e.g., copper oxychloride) work very well preventively because they inhibit spore germination. They’re less effective once an infection is established, because they don’t penetrate plant tissue. Important: don’t use copper products in the last 3–4 weeks before harvest, and follow all of the manufacturer’s safety instructions. For buds in late flowering, biological products like Bacillus subtilis are often the better choice.
Conclusion
Cannabis mold after rain outdoors isn’t an unavoidable fate — with the right preparation, daily checks and quick action, you can save your harvest in most cases, or at least most of it. The key is to spot bud rot early, remove affected spots immediately and generously, and maximize airflow. If you’re well prepared for the next downpour — with a plastic cover, ventilation and a trained eye for the first symptoms — you’ll lose far less than someone who only reacts once the whole plant is affected.
