

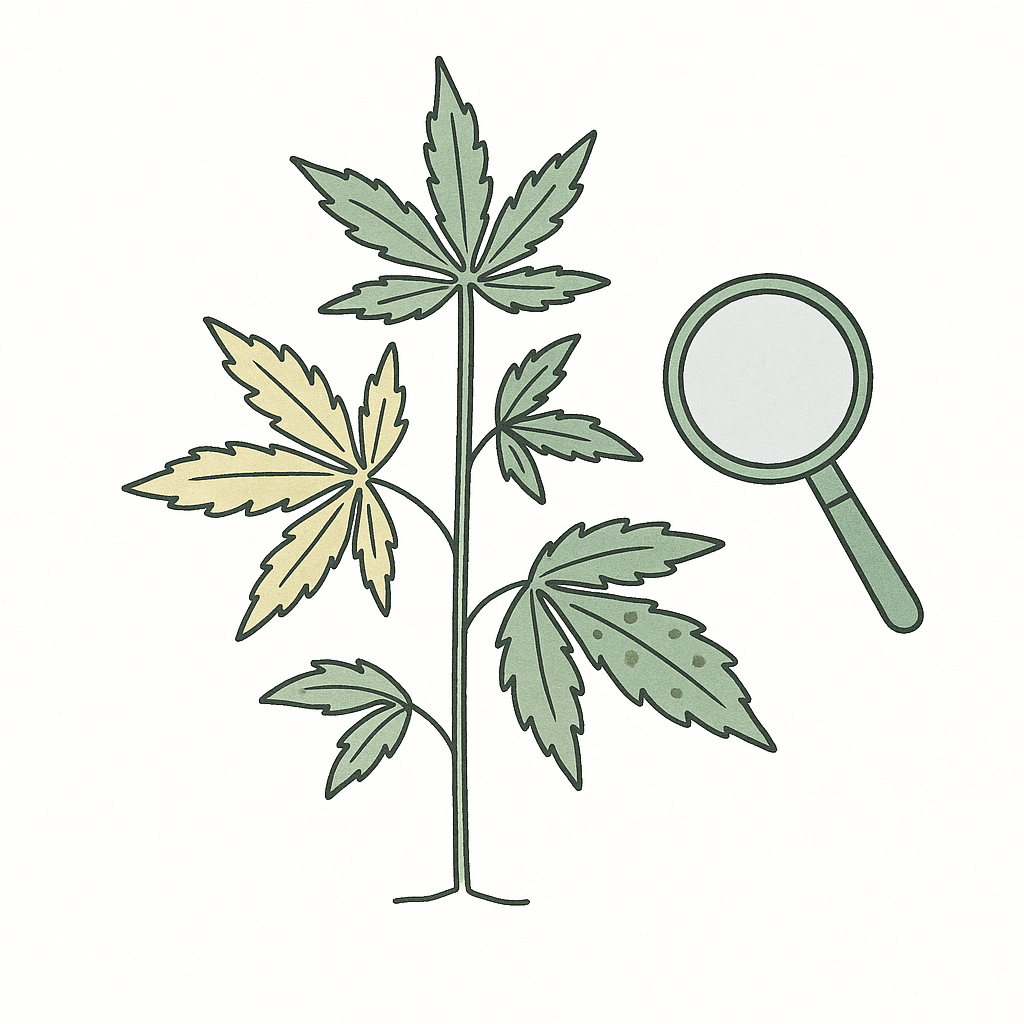
Spotting outdoor cannabis problems is one of the most important skills you can develop as a grower – because outside, your plant is exposed to sun, rain, wind, pests and temperature swings all at once. Unlike an indoor grow, you can’t control temperature, humidity or light hours, which is why problems show up faster and are often more varied. If you look closely early on and know the typical warning signs, you can step in before a small problem turns into a disaster. This guide shows you systematically which outdoor cannabis problems are the most common, how to identify them reliably and what you can do about them. You’ll find the basics for a successful grow in our complete outdoor growing guide.
Spotting outdoor cannabis problems: the most common causes at a glance
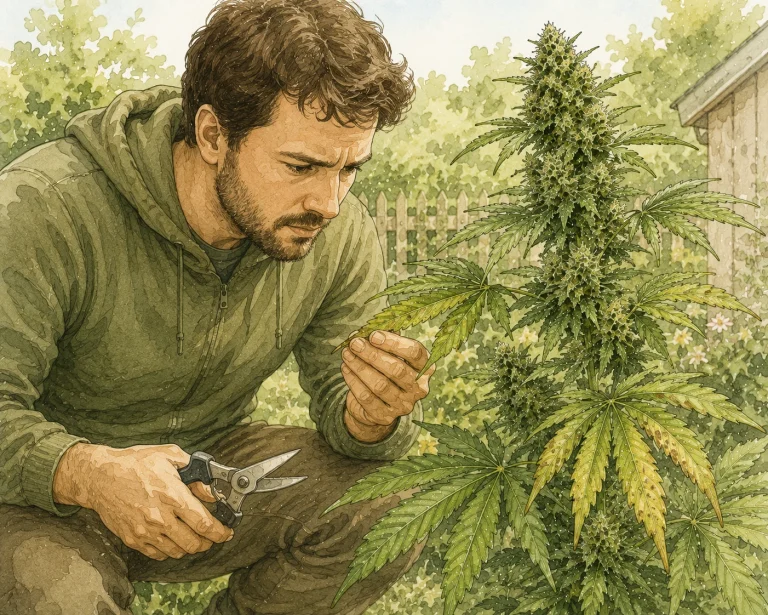
In an outdoor grow, many stress factors come together and can reinforce each other. A plant weakened by heavy rain is more susceptible to fungal diseases. A plant stressed by a nutrient deficiency attracts pests. That’s why it’s important not to look at problems in isolation, but to always keep the overall condition of the plant and the current environmental conditions in view.
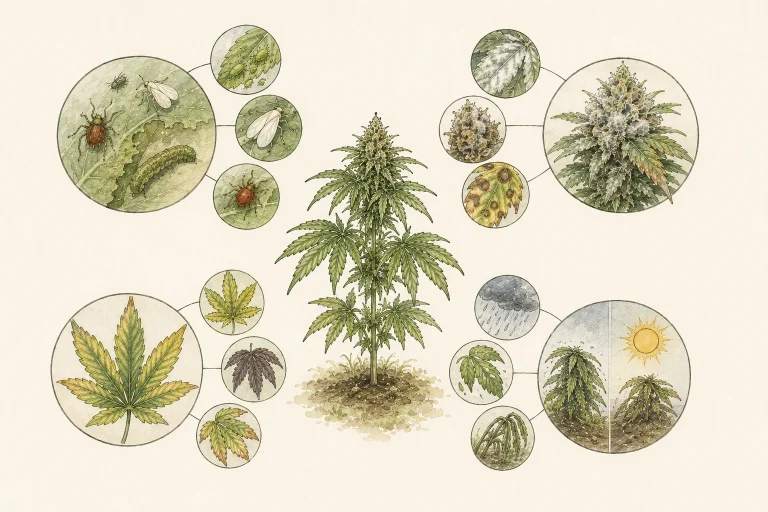
The most common outdoor cannabis problems fall into a few categories: nutrient deficiencies or toxicities, infestations by insects and animals, fungal diseases such as powdery mildew or bud rot (botrytis, gray mold), physical damage from wind and rain, and pH problems in the soil. On top of that come stress reactions to heat or cold. Each of these categories leaves typical traces on leaves, stems and buds – if you know what to look for, you can make an initial diagnosis within minutes.
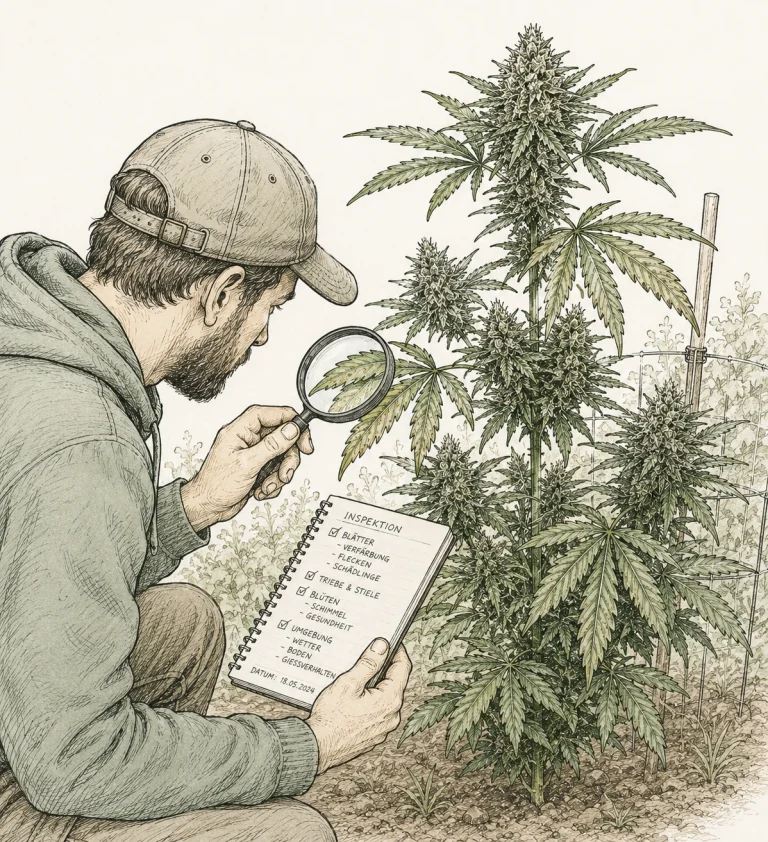
A structured approach helps enormously: always start with a thorough visual check from top to bottom, look at both the upper and lower sides of the leaves, and examine the stems and the soil around the plant. Note which areas are affected – only old leaves at the bottom, only new shoots at the top, or evenly across the whole plant. This first step already rules out many possible causes.
- Nutrient deficiencies usually show up in specific leaf areas or leaves of a certain age
- Pests leave feeding damage, webbing, droppings or the critters themselves
- You can recognize fungal diseases by a white coating, brown spots or rotting areas
- Weather damage such as sunburn or wind damage is often unevenly distributed
- pH problems show up as vague deficiency symptoms despite adequate feeding
Diagnosing nutrient deficiencies in outdoor plants correctly
Nutrient deficiencies are among the most common outdoor cannabis problems growers deal with – and they’re often harder to identify than indoors, because rain, evaporation and soil biology constantly change how available nutrients are. Heavy rain can wash water-soluble nutrients out of the soil, while drought blocks nutrient uptake even though there would be enough in the soil.
Nitrogen deficiency is the classic suspect: the lower, older leaves turn yellow first, the yellowing starts evenly across the whole leaf and slowly moves upward. The plant looks paler overall and grows more slowly. During the flowering stage in particular, some natural yellowing of the lower leaves is normal – but if the yellowing progresses quickly or also affects young leaves, you should step in. A balanced, nitrogen-rich liquid feed helps quickly. But check first whether the problem might be caused by the wrong pH blocking nutrient uptake.
Iron deficiency and other micronutrient deficiencies, on the other hand, show up almost exclusively on the young, new shoots at the top of the plant. The leaves turn yellowish-green or bright yellow while the leaf veins stay green – this is called interveinal chlorosis. Here, a pH that’s too high or too low is often the real cause, not an actual lack of nutrients. Magnesium and calcium deficiencies show up as brown spots or necrosis spreading from the center of the leaf outward or in from the edges. The key to the right diagnosis is always which leaves are affected and what the pattern looks like on the individual leaf. Learn more about one of the most common micronutrient problems in our article on how to identify and fix calcium deficiency in cannabis.
Nutrient burn is another typical outdoor cannabis problem, especially when you add nutrients on top of an already nutrient-rich soil. Burned leaf tips, dark green to almost black leaves and an overall stressed appearance are typical signs. In the worst case, the leaves curl up as if trying to protect themselves. Learn more in our guide on how to identify and fix nutrient burn in cannabis.
- Nitrogen deficiency: older leaves at the bottom yellow first, even yellowing
- Iron deficiency: new leaves at the top turn yellow, veins stay green (interveinal chlorosis)
- Magnesium deficiency: brown spots between the veins on middle leaves
- Calcium deficiency: brown spots with a yellow edge, leaves become deformed
- Nutrient burn: burned leaf tips, dark green leaves, curled leaves
- Always check the soil pH first before feeding
Identifying and controlling pests in an outdoor grow
No outdoor grow stays free of pests forever – the only question is whether you spot them early enough to protect your plant. Outdoors, your plant does have the pests’ natural enemies on its side, but once an infestation grows, nature alone usually isn’t enough. You can actively encourage these natural helpers by planting companion plants for cannabis such as marigolds or lavender in the bed. Regularly checking the undersides of the leaves is essential.
Aphids are the most common pests on outdoor cannabis. You can recognize them as small, soft-bodied insects in green, black or brown that sit in colonies on shoot tips and the undersides of leaves. Another sign is sticky honeydew on the leaves, on which blackish sooty mold often develops. For an early infestation, neem oil, insecticidal soap or releasing beneficial insects such as lacewings will help. With a heavy infestation, you should take a systematic approach with organic insecticides.
Spider mites are small and often only noticeable from the damage they cause: dotted, pale yellow spots on the upper side of the leaf and fine webbing on the underside, especially in dry heat. Caterpillars and beetle larvae leave irregular feeding holes in leaves or eat away entire leaf edges, while flea beetles leave lots of small, round holes in a typical shotgun pattern on seedlings and young outdoor plants and jump away when touched – a row cover right after planting out helps prevent this. You can recognize thrips by silvery-white streaks and dots on the leaves. Finally, slugs and snails are mainly a problem after rain – they leave large feeding areas with smooth, moist edges, often right at ground level, plus a characteristic slime trail that clearly sets them apart from the ragged feeding holes of caterpillars. Slug bait or copper barriers help here.
With any pest infestation, the rule is: act fast, but think it through. Avoid chemical insecticides during the flowering stage and use organic products such as neem, pyrethrum or Bacillus thuringiensis (Bt) against caterpillars whenever possible. Remove heavily infested leaves immediately and don’t put them in the compost – throw them in the household trash.
- Aphids: colonies on shoot tips, sticky residue, ants as an indicator
- Spider mites: yellow dotted patterns on leaves, fine webbing in hot, dry weather
- Caterpillars: irregular feeding holes, droppings or feeding debris on leaves
- Thrips: silvery streaks, distorted leaf growth, small black specks of droppings
- Slugs and snails: large feeding areas near the ground, slime trails, especially after rain
- Prefer neem oil and organic products, especially during the flowering stage
Identifying and controlling grasshoppers on outdoor cannabis
In late summer, outdoor plants sometimes show coarse, large feeding areas where entire leaf edges or whole leaf blades are missing – a typical sign of grasshoppers. Unlike caterpillars, which tend to leave smaller, irregular holes behind, and unlike slugs and snails, which leave a slime trail, grasshoppers feed during the day, leave no traces and often nibble from the leaf edge inward. They usually move in from nearby meadows, tall grass or dry embankments, especially in warm, dry late summers with lots of grasshoppers in the area.
A single grasshopper rarely does much damage, but if more of them fly in from the surrounding area, the feeding can quickly affect several leaves. The most effective countermeasures are mainly mechanical: fine-mesh insect netting around the plant, closely mowed grass nearby and removing tall vegetation right next to the pots take away the insects’ cover and landing spots. Registered insecticides against grasshoppers aren’t relevant for growing cannabis and hardly work anyway, because the insects only stay on the plant briefly – birds and other natural predators usually bring the population back under control on their own.
Identifying and controlling earwigs on outdoor plants
Small, irregular feeding holes on young leaves and shoot tips that appear overnight and don’t grow during the day often point to earwigs. These brown, elongated insects with the distinctive pincers at the end of their abdomen are active at dusk and at night: they feed on tender leaves, flower clusters and shoots in the dark and hide during the day in leaf axils, under mulch, in pieces of bark or in moist cracks in the soil near the plant.
Unlike with most other pests, it’s worth taking a close look at earwigs before you step in: they also count as beneficial insects and eat aphids, small caterpillars and insect eggs themselves. On young plants or seedlings with just a few delicate leaves, a heavier infestation can slow growth, but on established, vigorous plants the damage usually stays cosmetic, and the natural aphid control outweighs it.
- Detection: check with a flashlight at dusk, when the earwigs are visible on leaves and shoots
- Trap: place rolled-up, damp newspaper or a flowerpot filled with straw next to the plant overnight, collect them in the morning and relocate them instead of killing them
- Prevention: don’t pile mulch and leaves directly against the stem – that takes away their hiding places
- Only intervene in a targeted way with a heavy infestation on seedlings; otherwise leave them in place as beneficial insects
Identifying and controlling voles and other rodents on outdoor cannabis
Unlike the pests mentioned so far, voles, field mice and occasionally rabbits don’t feed on leaves but underground on the roots and the base of the stem. That makes the problem tricky: above ground, the plant first looks healthy, then suddenly wilts within a few days even though water and nutrient supply are fine. Other warning signs are a loose stand in the pot or bed – the plant can easily be lifted because the roots have been severed – fresh mounds of soil or tunnel openings right next to the stem, and gnaw marks on the bark just above the ground. For an overview of other animal culprits, see our pest diagnosis guide.
With rodents, prevention works better than control after the damage is done: plant in a vole basket made of fine wire mesh with a mesh size of no more than about 1/2 in (13–15 mm) that encloses the entire root ball and sits at least 8 in (20 cm) deep in the ground – this works for pots set in a bed as well as for planting directly in the ground. Avoid straw or leaf mulch right next to the plant, because it gives rodents cover and nesting material, and keep vegetation nearby short so natural predators such as birds of prey and cats have a clear view. Poison isn’t a sensible option in your own garden because of the danger to pets and beneficial animals; with an acute infestation, mechanical traps outside the immediate root zone are the safer choice.
Identifying and controlling leafhoppers on outdoor cannabis
Leafhoppers usually sit inconspicuously on the undersides of the leaves and suck plant sap there. The infestation first shows up as fine, pale speckles on the upper side of the leaf – similar to spider mites, but without the fine webbing. If you look closely, the small, wedge-shaped insects jump away or briefly fly up as soon as you touch the plant, which sets them apart from sap-sucking aphids.
A single leafhopper causes hardly any damage, but if more of them fly in from nearby meadows or fields, the sucking damage can visibly increase and weaken the plant. Much more important than the direct feeding damage is the role some leafhopper species play as carriers of plant viruses: in the US, beet leafhoppers are considered the main vector of beet curly top virus, which leads to stunted growth and leaves curled upward. In other regions, such as Central Europe, the virus has been rare so far, but transmission can’t be ruled out.
- Sign: fine, pale speckles on the upper side of the leaf from sucking damage
- How to tell them apart: the insects jump or fly away when touched, no webbing as with spider mites
- Prevention: use insect netting, keep tall vegetation near the plants short
- If you suspect a virus has been transmitted: isolate affected plants and monitor them
Identifying fungal diseases and rot as common outdoor cannabis problems
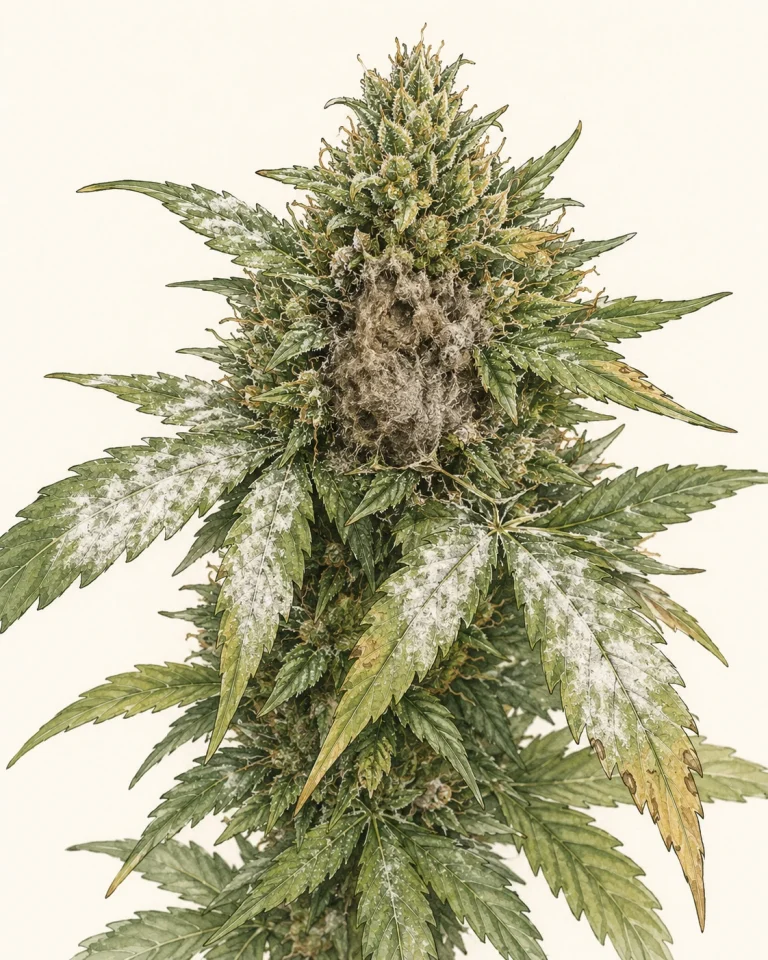
Fungal diseases are one of the most threatening challenges in outdoor growing – because fungi spread quickly, are hard to eliminate completely and can destroy an entire harvest within a few days. Damp, warm weather with poor air circulation is their ideal environment. If you combine plants spaced too closely, high humidity and no protective measures, you’re practically inviting fungi in.
You can recognize powdery mildew by a white, flour-like coating on the upper side of the leaves that typically spreads in circles and can be wiped off with your finger – only to come back a short time later. It usually attacks the upper leaves first and spreads especially fast in dry warmth combined with high humidity at night. Potassium soap, a baking soda solution or sulfur-based products help in the early stages. Heavily infected leaves have to be removed.
Bud rot is the most dreaded fungal disease for outdoor growers, especially shortly before harvest. It starts inconspicuously with brown, watery spots on the buds, usually in areas with poor air circulation or after rain. A grayish-brown, dusty-looking mold quickly develops and can rot entire buds within a few days. Cut out affected areas immediately and completely, disinfect your tools and keep the plant drier. When in doubt, harvest earlier to save at least part of the buds. Downy mildew, on the other hand, shows up on the underside of the leaf as a grayish-purple coating, while the upper side of the leaf shows yellowish spots.
To prevent fungal diseases, a good spot with air circulation, regularly removing unnecessary leaves in the lower part of the plant and avoiding standing moisture on the buds are essential. After heavy rain, you should briefly dry the plants with a fan-like airflow if possible, or at least make sure the moisture can dry off quickly.
- Powdery mildew: white, flour-like coating on the upper sides of the leaves, spreads in warm, humid weather
- Bud rot: brown, watery spots on buds, grayish-brown dusty mold
- Downy mildew: grayish-purple coating on the undersides of the leaves, yellow spots on top
- Root rot: brown, mushy roots in soil that’s too wet, wilting despite water
- Early detection and immediately removing infected plant parts are crucial
- Good air circulation and dry buds as the best prevention
Diagnosing weather damage and environmental stress in outdoor cannabis
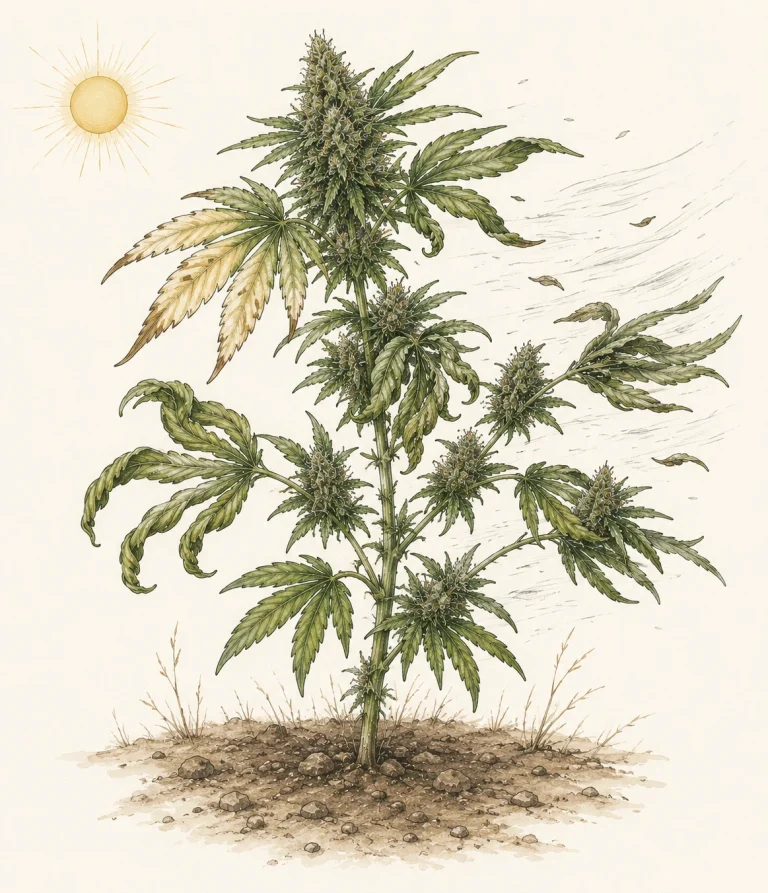
Spotting outdoor cannabis problems also means classifying the effects of the weather correctly. Nature is neither controllable nor predictable – but the damage it leaves behind follows certain patterns that you can learn to read. Heat stress, cold damage, sunburn and wind damage each leave typical traces.
You can recognize heat stress when the leaves curl inward like a banana during the day – the plant is trying to reduce its surface area. In extreme heat above 86 °F (30 °C), the leaf edges can dry out and turn brownish and crispy. The plant looks wilted overall even though the soil is moist. Shade cloth or moving container plants into partial shade helps quickly. Important: heat stress and lack of water look very similar – always check the soil moisture first before watering more.
Sunburn shows up as pale to whitish or brownish, crispy spots on the leaves that faced the sun directly. Unlike pest damage, sunburn spots are on the upper side of the leaf and start on the most exposed areas. Cold stress below about 50 °F (10 °C) causes purple or red discoloration of the leaves – not always a problem, as long as it doesn’t lead to lasting damage. Below freezing, real tissue damage can occur, which shows up as watery, then brown, soft areas. You can recognize wind damage by broken branches, torn or ripped leaves and an overall dry, stressed appearance from increased evaporation.
Flooding or waterlogging after heavy rain is an underestimated problem. The roots get too little oxygen, the plant wilts despite wet soil and the leaves can turn yellowish-green. In severe cases, root rot sets in. The only thing that helps here is consistent drainage – either by repotting into well-draining soil or by adding drainage holes. When watering and judging soil moisture, one rule always applies: watering cannabis the right way is an art of its own that prevents many problems.
- Heat stress: banana-shaped curled leaves, wilting despite moist soil
- Sunburn: pale to brownish spots on the exposed upper side of the leaf
- Cold stress: purple/red leaf color below 50 °F (10 °C), tissue damage below 32 °F (0 °C)
- Wind damage: torn leaves, broken branches, dry leaf edges
- Waterlogging: wilting despite wet soil, roots discolored brown to black
- Move container plants to shelter in extreme weather
Identifying and treating hail damage in outdoor cannabis
Hail often causes more structural damage than wind, because the impact energy hits solid plant parts. Typical signs are shredded or perforated leaves, split stems and snapped shoot tips. Unlike wind damage, the injuries happen at specific points and instantly, not from constant strain.
The real danger usually only shows up afterward: every open wound on the stem or leaves is an entry point for fungi and bacteria. Especially during the flowering stage, this significantly raises the risk of rot, above all when hail is followed by rain.
After a hailstorm, you should:
- Cleanly remove broken or badly damaged leaves and shoot tips instead of leaving them hanging
- Keep an eye on split stems and support them if needed so the wound doesn’t tear further
- Check the plant closely for the first signs of mold over the following days
- If hail is forecast, have a sturdy protective net or solid cover ready, since a regular windbreak alone isn’t enough
Identifying and solving pH problems in outdoor soil
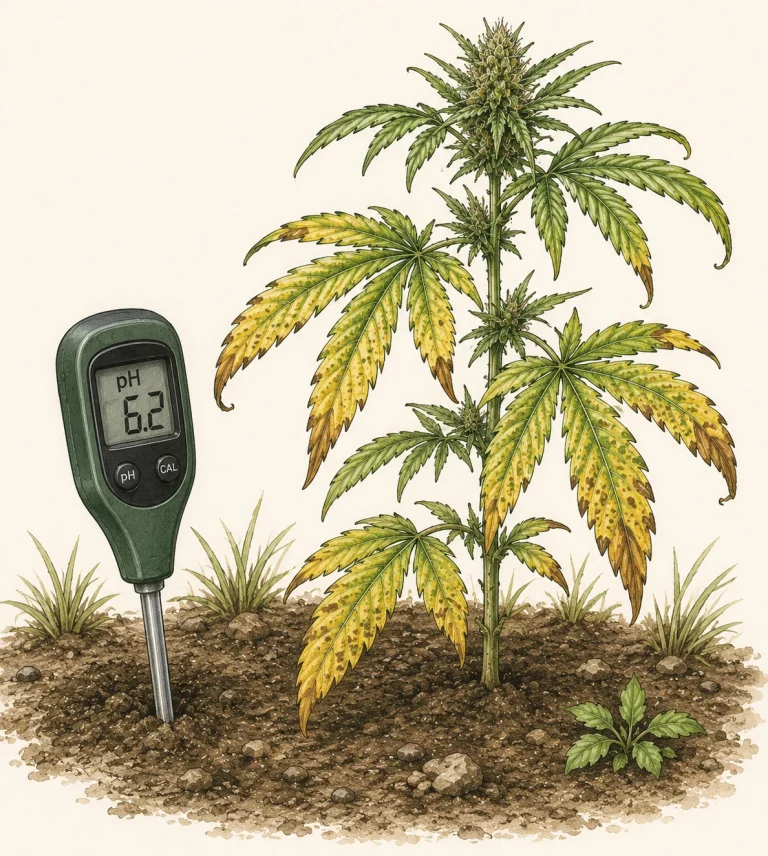
The wrong soil pH is especially tricky in outdoor growing, because it’s invisible and yet mimics almost every other mistake. You can use the most expensive nutrients and still have starving plants – if the pH is off, the nutrients simply can’t be taken up. For outdoor growing in soil, the optimal pH is between 6.0 and 7.0.
A typical sign of a pH problem is several deficiency symptoms appearing at the same time that don’t fit a clear pattern. If you see signs of iron, manganese and zinc deficiency at the same time even though you feed regularly, a pH that’s too high is the most likely culprit. A pH that’s too low, below 5.5, on the other hand, makes phosphorus and calcium hard to take up. Heavy rain can lower the soil pH over time, while hard (lime-rich) irrigation water raises it. Test your soil pH at least once a week and after every heavy rain.
To lower the pH, you can work in sulfur or pH-lowering products. Garden lime or dolomite lime are suitable for raising it. In an emergency, watering with pH-adjusted water also helps correct the soil gradually. You’ll find everything important on the topic in our detailed article on how to adjust the pH for cannabis correctly.
- Optimal pH in outdoor soil: 6.0–7.0 for maximum nutrient uptake
- Several deficiencies at once despite feeding: often a pH problem
- Rain lowers pH over time, hard (lime-rich) water raises it
- Measure pH at least weekly and after heavy rain
- Use sulfur or pH-lowering products to lower it
- Use dolomite lime or garden lime to raise the pH
Besides pH, compacted, clay-rich soil can also block nutrient uptake in your outdoor plant — especially after heavy rain, when heavy clay soil bakes into an impermeable crust. The roots then get too little oxygen despite moist soil, which shows up as limp leaves despite wet soil and visible cracks on the soil surface. If you know your garden soil is heavy, work plenty of compost, perlite or coarse organic matter into the planting spot, and avoid stepping on or compacting the wet soil around the plant.
- Clay-rich, compacted soil after rain: work in compost/perlite
- Don’t step on or compact wet soil around the plant
Identifying herbicide drift damage in outdoor cannabis
A problem many outdoor growers don’t have on their radar at first is herbicide drift from a neighboring field or garden. If growth-regulator weed killers – based on 2,4-D or dicamba, for example – are sprayed nearby, tiny droplets can be carried by the wind several hundred yards (meters) to your plant – even if you haven’t sprayed anything yourself.
Typical signs of herbicide damage are young shoots and leaves that are severely twisted, bent or cupped downward, often accompanied by leaf veins that run parallel instead of fanning out. Unlike nutrient deficiencies or pest infestations, the damage usually affects several plants suddenly and at the same time, and on one side – the side facing the field or garden more than the side facing away.
- New shoots grow twisted, crinkled or as if pulled together
- Leaf stems and stems can twist like a corkscrew
- The damage often appears abruptly after spraying in the surrounding area
- Several plants are affected at the same time, especially on the windward side
- Growth stalls, sometimes for weeks, even after cutting back the affected shoots
It’s easy to mistake this for other causes: zinc deficiency in cannabis also causes twisted leaves, but it develops gradually and can be fixed by feeding. A pathogen like HLVd (hop latent viroid) can also cause deformed leaves, but without the sudden, one-sided outbreak after spraying in the neighborhood.
If your suspicion is well founded, patience is the main thing that helps: lightly affected new shoots often grow back normally after a few weeks, while badly deformed ones should be removed. There’s no direct treatment – what matters is not to harvest affected plant parts and, if you have good reason to suspect contamination, to talk to your neighbors before you plant again.
Systematic diagnosis: how to approach unclear outdoor cannabis problems
When you’re standing in front of your plant and can see that something’s wrong but don’t immediately know what, a systematic diagnostic approach helps. Good growers work like detectives: they gather evidence first, before they act. Hasty feeding or spraying on a hunch can often make the situation worse.
Step 1: Which leaves are affected? Bottom (old) points to mobile nutrients such as nitrogen or magnesium. Top (new) points to immobile nutrients such as iron or calcium, or to pests. Evenly across the whole plant points more to systemic problems such as pH or waterlogging. Step 2: What does the pattern on the individual leaf look like? Even yellowing vs. spots vs. interveinal chlorosis vs. necrosis – each pattern has different causes. Step 3: Are there visible pests or webbing? Always check the undersides of the leaves with a magnifying glass or your smartphone camera.
Step 4: What were the weather conditions like over the past week? Extreme heat, heavy rain or a cold snap can explain many symptoms without any real deficiency or infestation. Step 5: When did you last feed and water, and what’s the current pH? These two factors are responsible for most feeding problems. You’ll find a quick overview of all possible symptoms and causes on our plant diagnosis overview for cannabis. There, you can click through by symptom and quickly get to the right solution.
Document problems regularly with photos and record the date, weather conditions and the steps you took. These records don’t just help you now – they make you a better diagnostician with every grow. If you’re unsure about the diagnosis and are seeing yellow leaves, our comprehensive article on the causes of yellow cannabis leaves may also be helpful.
- Observe and gather evidence first, then act
- Use the location of the affected leaves (old/new/even) as your first clue
- Always check the undersides of the leaves for pests
- Factor the past week’s weather into your diagnosis
- Check pH and watering interval before feeding
- Document problems with photos and notes
Frequently asked questions
What are the most common outdoor cannabis problems for beginners?
The most common problems are nutrient deficiencies caused by the wrong pH, pest infestations from aphids or caterpillars, fungal diseases such as powdery mildew and bud rot, and weather stress from heat or waterlogging after rain. With regular checks and a pH meter, you can catch most problems early.
How often should I check for outdoor cannabis problems?
At least 2–3 times a week, and daily during the flowering stage. After extreme weather such as heavy rain, storms or heat waves, you should always inspect your plants right away. Pay special attention to the undersides of the leaves, the bud sites and the soil.
How can I tell whether my outdoor plant has a fungus or pests?
Fungi usually leave a coating over larger areas (white powdery mildew) or soft, discolored areas (bud rot). You can spot pests by feeding holes, webbing, sticky residue or the critters themselves on the undersides of the leaves. A magnifying glass or your smartphone camera lets you check the leaf undersides closely.
Can I measure the pH of my outdoor soil easily?
Yes, an inexpensive soil pH meter is enough for basic checks. For more accurate readings, a digital pH meter is the better choice: catch the runoff after watering and measure it. The optimal range for cannabis in soil is between 6.0 and 7.0.
What should I do if my outdoor buds start to mold?
Act immediately: cut out all affected spots generously and completely, and disinfect your tools with rubbing alcohol. Put infected material in the household trash, not the compost. Improve air circulation and reduce moisture. If harvest is close and the infection is extensive, it’s better to harvest early and save the healthy buds.
How do I tell heat stress from underwatering in outdoor cannabis?
Both problems can lead to wilting, curled leaves. Always check the soil first: with underwatering, the soil is dry; with heat stress, the soil is moist but the plant still wilts. Heat stress typically occurs on very hot days and improves in the evening when it cools down.
Can heat stress during the flowering stage lead to foxtailing?
Yes, prolonged heat during outdoor flowering is one of the most common causes of stress-related foxtailing: the buds then grow elongated and wispy instead of compact, and terpene production can suffer. If this happens to your plant, it’s worth taking a look at our foxtailing guide with all the causes and prevention tips. Our article on heat stress in cannabis describes the typical curled leaves of heat stress in detail.
Conclusion
Spotting outdoor cannabis problems is a skill you’ll keep developing with every grow – but even with the basics from this guide, you can diagnose most problems early and take targeted action. The most important thing: look closely on a regular basis, take a systematic approach and act fast as soon as you notice something. If you step in early, you’ll usually save your harvest – if you wait and hope things get better on their own, you’ll usually lose more than necessary. Use our plant diagnosis overview as a quick reference when you’re unsure, and always keep pH, watering interval and feeding in balance.
