

Knowing how much to feed cannabis, and building a cannabis feeding schedule that fits each growth stage, is one of the most important skills you need to develop as a grower — because too much is just as harmful as too little. Nitrogen, phosphorus and potassium (NPK) drive growth, bud formation and plant health, but their ratios have to be adjusted to the growth stage. If you get the NPK ratio wrong, you risk deficiencies, nutrient burn or a meager harvest. In this guide, you’ll learn everything you need to know about cannabis nutrients — from the basics to stage-appropriate dosing. If you’re just getting started, it’s a good idea to check out the beginner’s guide to growing cannabis indoors first, so you keep the big picture in view.
NPK basics: what do the numbers on your cannabis nutrients mean?
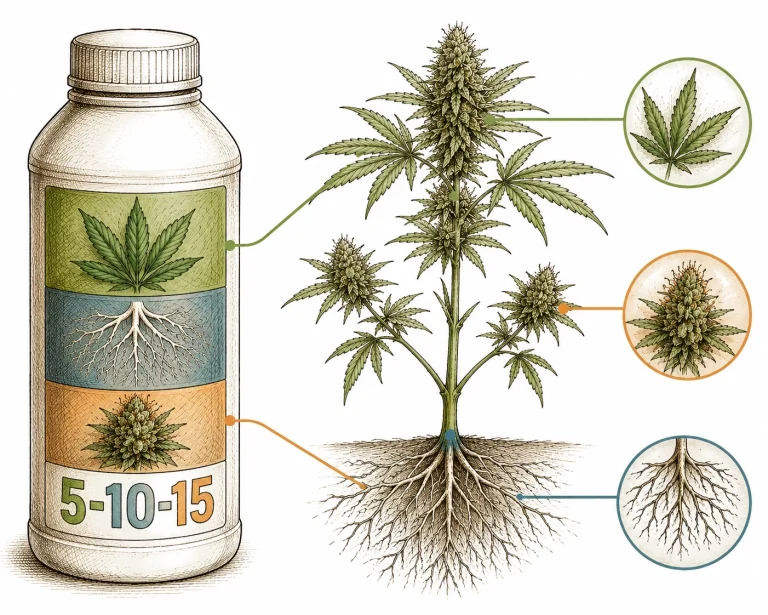
Every cannabis nutrient has three numbers on its packaging — for example 3-1-2 or 1-3-2. These numbers stand for the percentage of the three most important macronutrients: N for nitrogen, P for phosphorus and K for potassium. Nitrogen is the growth engine and promotes the formation of leaves and shoots. Phosphorus supports energy transfer and is essential for strong roots and dense buds. Potassium regulates the plant’s water balance, strengthens the cell walls and improves stress resistance. For a good introduction to the scientific basics, see the Julius Kühn Institute (German).
Besides the three main nutrients, secondary nutrients such as calcium, magnesium and sulfur play an important role. They’re needed in larger amounts than trace elements, but in smaller amounts than NPK. Calcium secures the cell structure and runs out especially fast in fast-growing plants — a typical problem the article on calcium deficiency in cannabis covers in more detail. Trace elements such as iron, manganese, zinc and copper are only needed in microgram amounts, but a deficiency can still cause massive damage.
Important to understand: the absolute numbers on the label matter less than the ratio of the nutrients to each other. A nutrient with 3-1-2 and one with 6-2-4 deliver the same ratio, just at different concentrations. Cannabis has different optimal ratios depending on the growth stage — which is why a single all-purpose nutrient for the whole season is usually not a good idea.
- N (nitrogen): promotes leaf growth and green biomass — high in the vegetative stage
- P (phosphorus): supports root development and bud formation — high in the flowering stage
- K (potassium): regulates water balance, strengthens the immune system and cell structure — important throughout
- Ca/Mg (calcium/magnesium): secondary nutrients for cell integrity and chlorophyll production
- Trace elements: Fe, Mn, Zn, Cu, Mo — essential in small amounts for enzyme functions
How to dose cannabis nutrients correctly in the vegetative stage
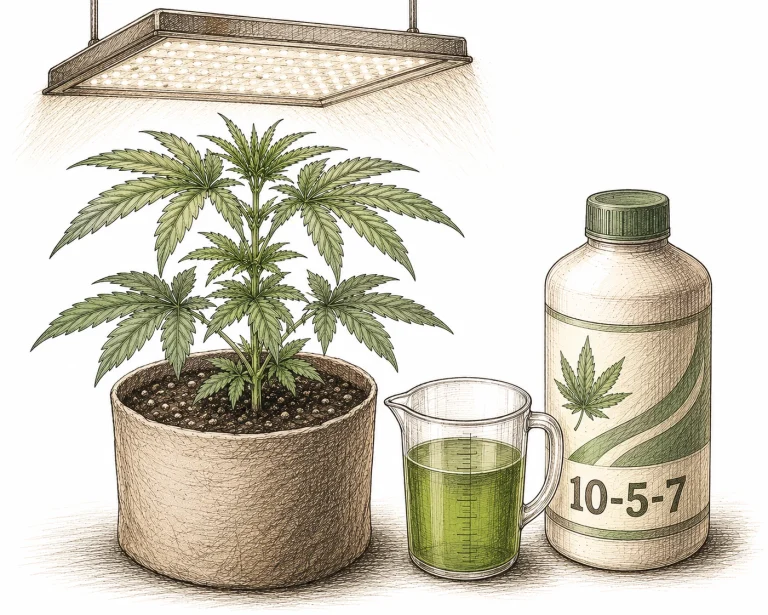
In the vegetative stage, growth is the priority: the plant builds stems, branches and leaves and lays the foundation for a productive flowering stage. In this stage, cannabis mainly needs nitrogen — a typical NPK ratio for veg is around 3-1-2 or 4-2-3. Nitrogen drives chlorophyll production and with it photosynthesis, while moderate amounts of phosphorus and potassium provide stable roots and stress resistance.
The dose depends heavily on your growing medium. If you start with fresh, high-quality seedling soil, you often don’t need any extra nutrients for the first two to three weeks — good soils come pre-fertilized. With coco or hydroponics, on the other hand, you have to feed from the start, because the medium itself contains no nutrients. As a rule of thumb: start with 25–50 percent of the manufacturer’s recommended dose and watch how your plant responds over three to five days.
Typical mistakes in veg are giving too much nitrogen. That leads to dark green, claw-like leaves (“nitrogen claw”). The wrong pH is also a frequent cause — it blocks nutrient uptake, even when there are enough nutrients in the growing medium. That’s why you should always check your cannabis pH before adding more nutrients. For soil, the optimal pH is 6.0–7.0; for hydro and coco, 5.5–6.5.
- Recommended NPK ratio for veg: 3-1-2 to 4-2-3 (nitrogen-heavy)
- Fresh seedling soil: often no extra nutrients for the first 2–3 weeks
- Coco/hydro: feed from the start, full control over the nutrient supply
- Starting dose: 25–50 % of the manufacturer’s recommendation, then increase slowly
- Check the pH: soil 6.0–7.0, hydro/coco 5.5–6.5
- Warning signs of nutrient burn in veg: dark green leaves, leaf tips curling downward
How to dose cannabis nutrients correctly in the flowering stage: adjusting the NPK ratio
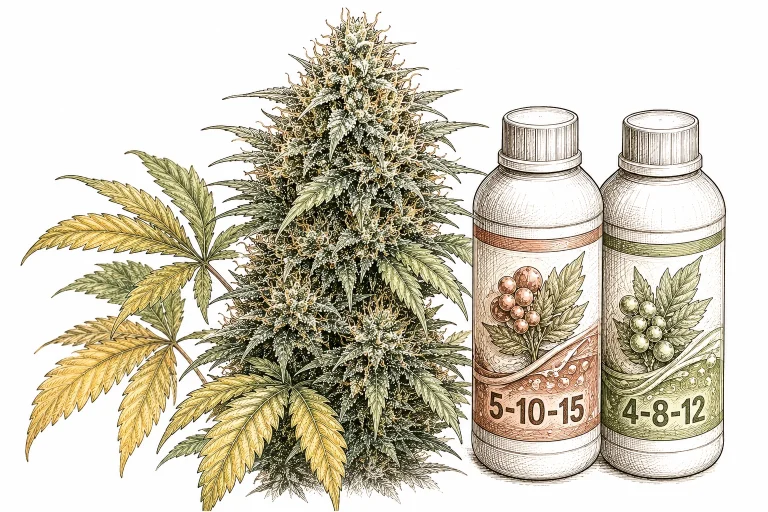
When the plant switches to the flowering stage, its nutrient needs change fundamentally. The plant shifts its growth toward bud production and now needs less nitrogen, but much more phosphorus and potassium. A typical bloom NPK ratio is 1-3-2 or 1-4-5. If you stay on a nitrogen-heavy nutrient too long, you risk delayed bud formation and too much leaf mass at the expense of the buds.
The flowering stage can be roughly divided into three phases, each calling for a different dose. In the first one to two weeks of flower (“early bloom”), a gentle transition makes sense: reduce the nitrogen share, increase phosphorus and potassium. In peak bloom (weeks 3–6), you run the bloom nutrient at the maximum recommended dose — this is when terpenes and cannabinoids form. From week 7 on, the flush begins, or at least feeding is reduced, to minimize nutrient residues in the final product.
Bloom boosters often also contain amino acids, humic acids or sugar molecules that are supposed to boost terpene development. Whether and how well these products work is partly disputed — for beginners, the rule is: master your base feeding regimen first, then test boosters. It’s also important to watch out for cannabis nutrient burn especially in the flowering stage, because buds react more sensitively to nutrient stress than leaves.
- Recommended NPK ratio for flower: 1-3-2 to 1-4-5 (phosphorus- and potassium-heavy)
- Early bloom (weeks 1–2): gentle transition, reduce N, increase P and K
- Peak bloom (weeks 3–6): bloom nutrient at full dose, booster optional
- Late flower (week 7+): reduce feeding or stop it completely (flush)
- Warning signs in flower: small, loose buds with excess N; brown leaf tips with excess K/P
- Keep the pH stable — swings in flower hit the plant harder than in veg
Common feeding mistakes and how to spot cannabis deficiencies
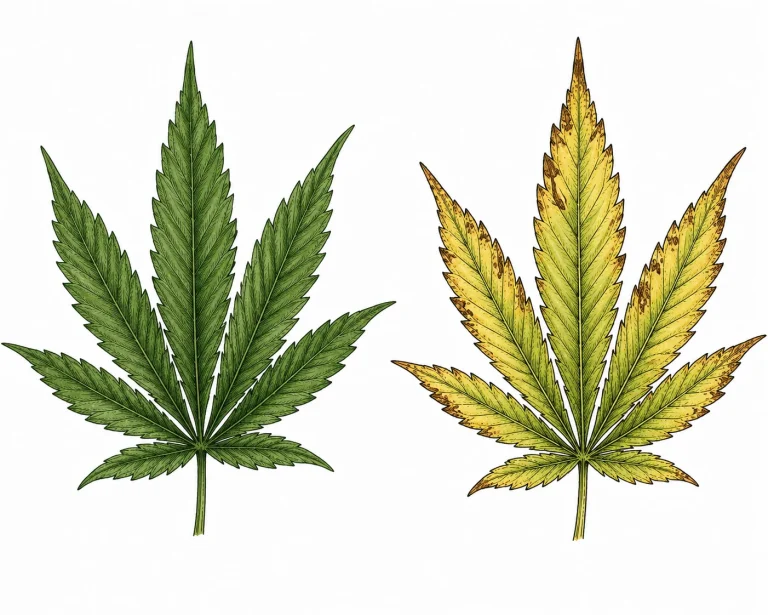
The most common mistake when feeding cannabis is overdosing. Many growers believe more nutrients mean more growth. The opposite is true. Nutrient concentrations that are too high lead to salt buildup in the growing medium, which burns the roots and blocks water uptake. Paradoxically, the plant then shows the same symptoms as with a deficiency — namely yellow leaves and stalled growth — even though there are actually too many nutrients. A simple EC meter helps you measure the nutrient concentration in your nutrient solution and keep it in the safe range (veg: 400–700 ppm (0.8–1.4 mS/cm); flower: 700–1,000 ppm (1.4–2.0 mS/cm)).
Nitrogen deficiency shows up as light green to yellow leaves that progress from the bottom up — so the oldest leaves first. Phosphorus deficiency often appears as violet or purple discoloration of the leaf stems and leaf undersides, combined with slow bud development. Potassium deficiency causes brown, burnt leaf edges (so-called “leaf-edge browning”) that progress from the outside in. Magnesium or calcium deficiency leads to interveinal chlorosis — the leaf veins stay green while the leaf tissue between them fades.
Before you respond to deficiency symptoms with more nutrients, always check the pH of your water first. The wrong pH locks out nutrients that are actually present in the growing medium — this is called nutrient lockout. You should also check your watering habits: watering too often or too sparingly affects nutrient uptake just as much as the nutrient dose itself.
Another typical mistake is ignoring how differently growing media buffer. Soil has a high buffering capacity and is more forgiving of feeding mistakes — coco and hydro react immediately to every change in the nutrient solution. If you grow in coco or hydro and don’t have much experience yet, dose especially conservatively — better to measure twice than to water wrong once.
- Nutrient burn: salt buildup at the roots → stalled growth, yellow leaves despite plenty of nutrients
- N deficiency: yellowing starts at the bottom (oldest leaves) and moves up
- P deficiency: purple leaf stems, dark spots, delayed flowering
- K deficiency: brown leaf edges, progressing from the outside in
- Ca/Mg deficiency: interveinal chlorosis — veins green, tissue between them fades
- Nutrient lockout: wrong pH → nutrients are present but can’t be absorbed
- EC meter: an essential tool for precise nutrient management
How to dose cannabis nutrients correctly: growing media, systems and nutrient types compared
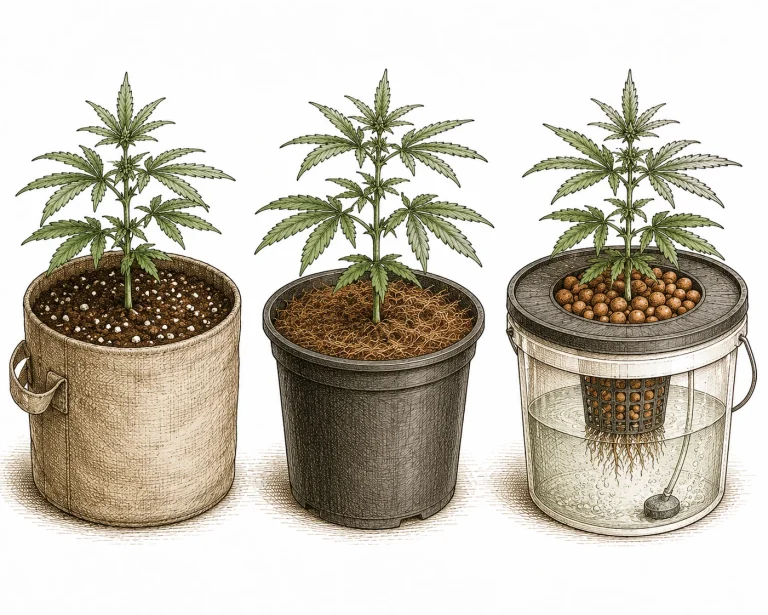
The best feeding strategy depends not only on the growth stage, but also on the medium you choose. In classic cannabis soil, you start slowly: most quality soils are pre-fertilized for three to six weeks. After that, gentle feeding begins at 300–600 ppm (0.6–1.2 mS/cm) in veg. Coco has no nutrient reserve of its own and has to be fully supplied through your water from the start — which also means maximum control. In a hydro system (DWC, NFT or ebb and flow), the nutrient solution circulates directly around the roots. That makes for fast growth — but can also quickly lead to problems if the EC or pH drifts.
With mineral nutrients (such as the dedicated cannabis lines from nutrient manufacturers), you have the most precise control over NPK ratios. They’re immediately available to the plant, but quickly leave salt deposits if you overdose. Organic nutrients (guano, worm castings, horn meal) first have to be broken down by soil life and are harder to overdose — but it takes longer for the nutrients to arrive. Many experienced growers combine both approaches: an organic base, plus mineral supplements for precise corrections.
If you want to skip mineral nutrients completely, our guide to growing cannabis organically covers everything about growing media, nutrient types and typical beginner mistakes.
Ready-made cannabis nutrient sets (often marketed as “Base A+B,” “Bloom,” “Booster” and so on) make getting started easier, because the manufacturers include feeding schedules. Stick to these schedules at first — but start conservatively with 50–75 percent of the recommended doses. Our comparison on how to buy cannabis nutrients (German) shows which sets and single nutrients are good for beginners. If your plant looks well-fed and healthy, that’s the best proof that you’re dosing your nutrients correctly. Then increase or reduce step by step, based on how the plant looks and what your EC meter says. Especially in coco and hydro, a combined pH and EC meter that shows both values in one device is worth it. General fertilizer recommendations for home gardens are also available from the North Rhine-Westphalia Chamber of Agriculture (German).
- Soil: high buffering capacity, pre-fertilized (3–6 weeks), good for beginners
- Coco: no nutrients of its own, reacts immediately to feeding corrections, for advanced growers
- Hydro: maximum growth speed, but sensitive to pH/EC drift
- Mineral: immediately available, precise dosing, risk of salt buildup when overdosed
- Organic: slow-acting, buffering, hardly any risk of nutrient burn, depends on soil life
- Feeding schedule: use the manufacturer’s chart as a guide, but always start conservatively
Dosing cannabis nutrients correctly with flushing: why it matters

Flushing — rinsing the growing medium with large amounts of plain, pH-adjusted water — is something you should use in two situations. First: toward harvest, in the last one to two weeks of the flowering stage. Flushing is meant to remove leftover nutrients from the growing medium so the plant draws on its own reserves. Whether this actually improves the quality of the final product is debated in the grower community — but it doesn’t hurt and is a proven practice with soil.
Second, you use flushing as an emergency measure for acute nutrient burn or salt buildup. If your plant keeps showing signs of nutrient stress despite all your pH corrections, a targeted flush can help dissolve the salt deposits around the roots. To do this, run three to five times the pot volume of water through the growing medium and then give a half dose of fresh nutrients. This method is especially effective in soil and coco.
When flushing, keep in mind: the water must be pH-adjusted (6.0–6.5 for soil), otherwise you’ll cause additional stress. After the flush, check the EC of the runoff with a reliable EC meter (German) — it should be well below that of the input water if you’ve flushed enough. Then let the growing medium dry out slightly before you continue with your normal feeding schedule.
One important difference: with organic feeding, you generally water without runoff from the pot — that keeps the moisture in the growing medium even and protects the soil life that breaks down the nutrients in the first place. With mineral feeding, on the other hand, you always water to runoff: without runoff, salts build up in the growing medium — exactly the salt buildup you actually want to fix with a flush.
- Pre-harvest flush: last 1–2 weeks of flower, makes the plant use its own nutrient reserves
- Emergency flush: for acute nutrient burn or salt buildup, 3–5x the pot volume in water
- Always use pH-adjusted water: 6.0–6.5 for soil, 5.8–6.2 for coco
- Check the runoff EC: it should have dropped clearly after the flush
- After the flush: let the growing medium dry slightly, then restart with a half dose of nutrients
You can see what an overdose looks like in practice with examples such as nitrogen toxicity or zinc toxicity. With micronutrients such as boron or manganese, on the other hand, a deficiency is often the more common problem — learn more in our articles on boron deficiency and manganese deficiency. With soft tap water or reverse osmosis (RO) water in particular, it’s also worth taking a look at Cal-Mag deficiency.
For precise dosing, you need reliable meters — we explain which pH and EC meters are worth it in our separate article on pH and EC meters.
Frequently asked questions
How often should I feed my cannabis plant?
That depends on your growing medium and system. In soil, you feed every second to third watering. In coco or hydro, you usually feed every time you water, because the medium itself contains no nutrients. Watch the EC and how the plant looks — those are the best indicators of the right feeding frequency.
What’s the difference between NPK 3-1-2 and 1-3-2?
The first ratio (3-1-2) is nitrogen-heavy and suits the vegetative stage, when leaf growth is the priority. The second ratio (1-3-2) is phosphorus- and potassium-heavy and is used in the flowering stage to support the formation of dense buds. The ratio is what matters, not the absolute numbers.
Can I use regular plant fertilizer from the garden center for cannabis?
Basically, yes — botanically speaking, cannabis isn’t an exotic plant. Tomato or all-purpose fertilizers contain similar NPK ratios. However, they often lack the trace elements and secondary nutrients tailored to cannabis. Dedicated cannabis nutrients often deliver better results, but they’re not a must. What always matters: dose slowly, check the pH, watch how the plant looks.
Why does my plant show deficiency symptoms even though I feed regularly?
The most common reason is the wrong pH. Even if there are enough nutrients in the growing medium, the plant can’t take them up when the pH is outside the optimal range (soil: 6.0–7.0; coco/hydro: 5.5–6.5). Always check the pH first before adding more nutrients. You’ll find an overview of all nutrient deficiencies and their symptoms in our cannabis nutrient deficiency chart.
How can I tell if I’ve overfed my cannabis plant?
Typical signs of nutrient burn are leaf tips bending downward (“nitrogen claw”), brown leaf edges, unnaturally dark green leaves and stalled growth. In advanced stages, the leaves yellow from the bottom up. An elevated EC in the runoff confirms the suspicion. As an immediate measure, a flush with pH-adjusted water helps.
Do I need an EC meter and a pH meter for feeding?
Neither device is an absolute must, but both are strongly recommended — especially for coco and hydro grows. In soil, you can get by with regularly watching the plant, but a pH meter saves a lot of time when troubleshooting. An EC meter shows you right away whether your nutrient solution is too strong or too weak.
We feature proven nutrients for the vegetative and flowering stages on our Recommended Gear page.
Conclusion
Dosing cannabis nutrients correctly isn’t rocket science — but it takes an understanding of the plant’s stages, the NPK ratio and your growing medium. If you start slowly, check pH and EC regularly and watch your plant closely, you’ll rarely run into serious problems. Remember: your plant always shows you how it’s doing through the way it looks. Learn to read these signals — you’ll get better at it with every grow. If yellow leaves or other symptoms appear despite correct feeding, take a look at our Plant Diagnosis overview on PlantClue.
